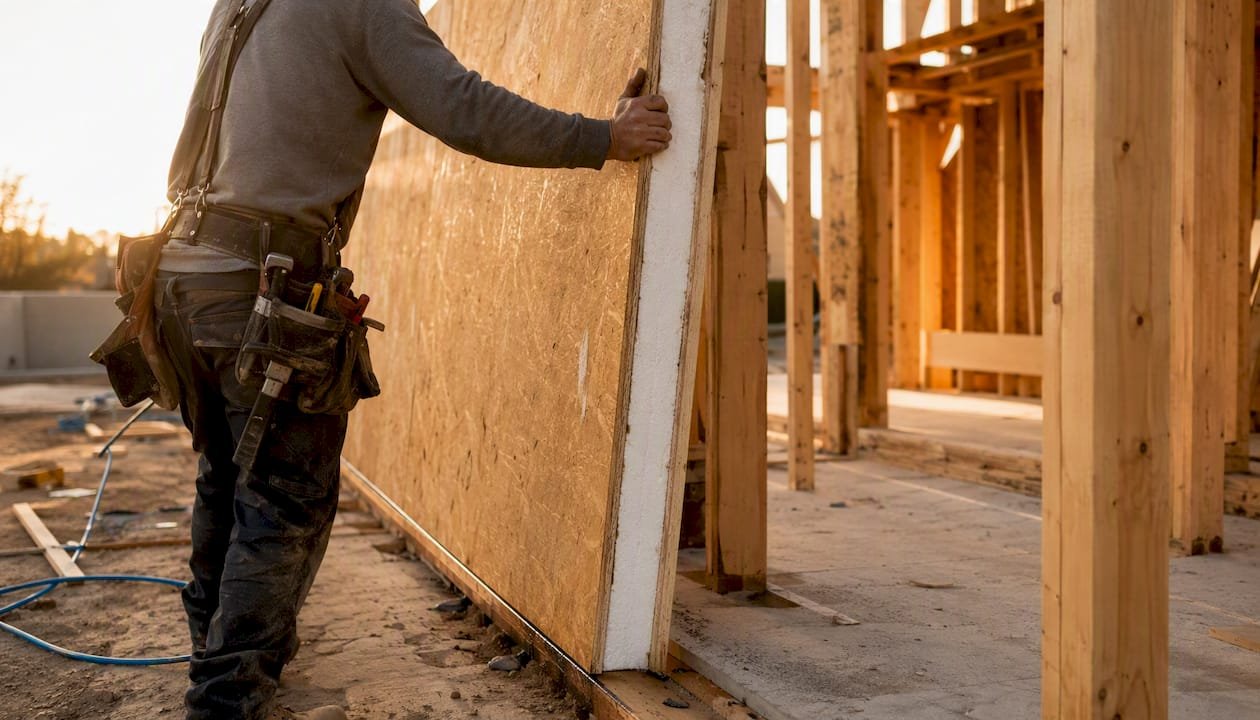
A correctly installed SIP wall envelope starts with engineered shop drawings, gets braced the moment each panel stands, and stays sealed continuously from sill to ridge. Follow that sequence and you get an airtight, energy-efficient shell that outperforms stick framing on both speed and thermal performance. Skip any step and you’re chasing leaks behind drywall.
Quick action checklist before you lift the first panel:
- Verify shop drawings match permitted plans and confirm panel numbers against the delivery manifest per SIPA installation guidelines
- Mark sill plate locations on the foundation to match the panel layout exactly
- Start at a corner and work outward so the shell self-braces
- Pre-install splines and apply caulk before mating each panel
- Brace immediately after setting each panel
- Schedule your blower-door test and size your ERV/HRV before finishing trades close the seams
Pro Tip: Print the shop drawings at full scale and laminate a site copy. Wet paper drawings on a muddy job site cause expensive misreads.
Key Takeaways
Properly installed SIP wall panels require shop-drawing discipline, immediate bracing, continuous sealing, and verified airtightness before any interior finishes close the envelope.
| Point | Details |
|---|---|
| Shop drawings are the authority | Follow project-specific engineered drawings for panel sequence, fasteners, and openings; deviations void warranties. |
| Start at a corner, brace immediately | Corner-first erection self-braces the shell; SIPA warns SIP walls are wind-vulnerable until the roof is tied in. |
| Seal every joint continuously | A 1,200-square-foot house can require over 5,000 linear feet of caulk; plan for power caulking equipment. |
| Test airtightness before drywall | Use smoke pencil and blower-door testing to find and fix leaks while seams are still accessible. |
| Prefabmodularhome kits reduce field risk | Factory-cut openings, numbered panels, and included shop drawings cut field cutting and sequencing errors. |
Table of Contents
- What should you do before the panels arrive?
- How should you receive and store panels on site?
- How do you set and connect SIP wall panels correctly?
- How do you handle windows, doors, and electrical in SIP panels?
- Why does temporary bracing matter so much during erection?
- How do you test and commission a SIP envelope for airtightness?
- What are the most common SIP installation problems and how do you fix them?
- What tools and materials do you need for SIP wall installation?
- Why do shop drawings and manufacturer coordination protect your investment?
- How do Prefabmodularhome DIY SIP kits reduce on-site risk?
- How do you maintain SIP walls to preserve long-term performance?
- How do vapor barriers and weather-resistant barriers work with SIP panels?
- How do SIP panels integrate with roof trusses and floor systems?
- What should a post-installation inspection cover?
- What experienced SIP builders actually learn on the job
- Prefabmodularhome kits make SIP installation faster and less risky
- Sources
What should you do before the panels arrive?
Delays on SIP projects almost always trace back to decisions that weren’t made before delivery day. Lock these down first.
- Permits and drawings: Confirm local building department approval and that your project-specific engineered shop drawings are the installation authority, not generic details. Enercept’s builder guidance specifically flags checking shop drawings for hold-downs and beam pockets before panels arrive.
- Preconstruction meeting: Sit concrete, electrical, plumbing, roofing, and HVAC subs down together. Confirm who unloads, who stacks, and who owns MEP chase locations.
- Foundation tolerances: SIP panels need a flat, level bearing surface. A variance greater than 1/4" across the sill plate creates alignment problems that compound with every panel you set. Check it before delivery, not after.
- Lifting equipment: Panels larger than 4×16 typically need a crane or lull. Confirm availability and that the delivery date aligns with your crew and roof schedule.
- Delivery sequencing: Panels should arrive in erection order. Confirm this with the manufacturer so the first panel off the truck is the first one you set.
Pro Tip: Lock in crane rental at least two weeks out. Last-minute equipment availability is the single most common cause of SIP erection delays.
Plan your MEP chases in the shop drawings, not in the field. Factory-routed chases are cleaner, faster, and don’t compromise the foam core.
How should you receive and store panels on site?
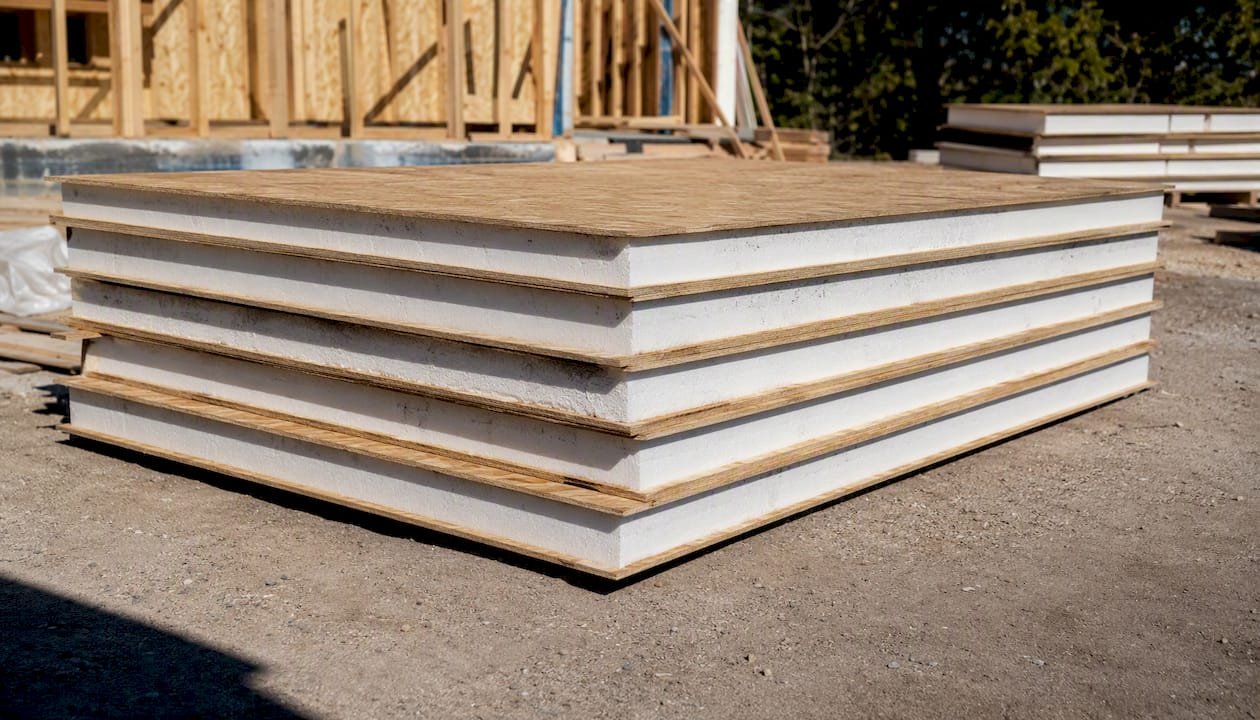
Damage during storage is a warranty issue and a structural one. The Building America Solution Center is direct: stack panels off the ground on 4×4 timbers, keep them flat and covered, organize stacks in erection order, and never store above standing water.
- Inventory every panel against the shop drawings before unloading; verify precut openings and electrical chases
- Inspect OSB facers for damage, delamination, or crushed edges; photograph anything questionable before signing the delivery receipt
- Cover bundles with tarps and place ground cover to block capillary moisture from rising into the bottom panels
- Never lift panels by the OSB facers; keep them flat during movement and follow manufacturer guidance for crane slings or forklift points
For backyard office builds, the staging approach for sandwich panel projects covers practical tips on tight-site unloading and panel protection.
Pro Tip: Stage panels face-to-face with foam cores touching. This protects both facers and keeps the stack stable.
How do you set and connect SIP wall panels correctly?
Start at a corner. Always. Starting mid-wall creates alignment and closure problems on the final panels that are nearly impossible to fix cleanly. The ACME SIPBOOK confirms: pre-install splines and nailers where practical, plumb and level each panel, brace temporarily, then fasten per the schedule.
Spline comparison:
| Spline type | Thermal bridging | Load transfer | Best use |
|---|---|---|---|
| Surface spline | Low | Moderate | Standard wall joints, airtight priority |
| Structural (2x) spline | Higher | High | Load-bearing locations, tall walls |
| Box/block spline | Moderate | High | Corner conditions, header zones |
Surface splines reduce thermal bridging and suit most wall-to-wall joints. Structural lumber splines go where panels can’t carry the load alone. See sandwich panel thermal performance for how spline choice affects whole-wall R-value.
Sealing and fastening sequence:
- Apply manufacturer-specified caulk to the full panel edge before mating
- Use peel-and-stick SIP tape at panel-to-panel seams and at all roof/wall interfaces
- Pull panels together with ratchet straps or belt winches until foam cores contact, per Enercept’s installation guidance
- Nail or screw off both faces per the fastener schedule before releasing straps
A house of typical moderate size can require several thousand linear feet of caulk, so plan for power caulking equipment on anything larger than a single-room build — hand guns will slow you down significantly. Plan for power caulking equipment on anything larger than a single-room build — hand guns will slow you down significantly.
Pro Tip: Use lift plates and a belt winch on long panel runs. Trying to muscle a 10-foot panel into a tight joint by hand usually means a gap in the foam core.
How do you handle windows, doors, and electrical in SIP panels?
Factory-cut rough openings are always preferable to field cuts.
- Electrical chases: Use pre-routed vertical and horizontal chases. Pre-drill sill, top, and cap plates for conductor access. Pull wires before setting outlet boxes, then seal every box penetration with low-expanding foam. This is the core of a proper DIY wall panel system for electrical.
- Outlet boxes: Seal the box-to-panel interface completely. A single unsealed box can account for a measurable fraction of total air leakage in a blower-door test.
- Plumbing: Keep it out of exterior SIP walls entirely. Route plumbing in interior walls or designed chases. Exterior SIP plumbing creates thermal bridges and moisture risk that are expensive to fix after the fact, per SIPA’s installation resources.
- Heavy fixtures: Coordinate fans, mulled windows, and structural headers with the manufacturer before fabrication so blocking and chase locations are built in at the factory.
For door rough openings specifically, common pitfalls in DIY door installation covers framing tolerances that apply equally to SIP openings.
Pro Tip: Label every electrical chase on the shop drawings with conductor size and circuit. Chasing a missing circuit through a finished SIP wall is a half-day job.
Why does temporary bracing matter so much during erection?
SIPA warns explicitly that SIP structures are more susceptible to high winds during erection than conventional framed buildings. Until the roof assembly ties the envelope together, your walls depend entirely on temporary bracing.
- Install diagonal external braces and internal braces at manufacturer-specified spacing immediately as each panel is set
- Stop work when wind exceeds safe thresholds; secure stacked panels and never leave partially completed walls exposed overnight
- Use rated slings and follow crane operator instructions for all lifts; never stand beneath a lifted panel and always use tag lines
- Hard hats, gloves, eye protection, and fall protection near edges are non-negotiable; maintain clear lift paths and active communication during placement
The kit home assembly field guide covers crew coordination and sequencing that reduces the window of time walls are exposed without roof support.
How do you test and commission a SIP envelope for airtightness?
A tight SIP envelope only delivers its energy performance if you verify it before drywall covers the seams.
- Run a smoke pencil along all panel seams, electrical boxes, and wall-to-floor transitions with the building depressurized
- Mark every leak path and seal with caulk, tape, or low-expanding foam before proceeding
- Conduct a blower-door test to a project-specific target; re-test after cladding and roofing are complete
- Confirm ERV or HRV sizing and duct chase locations are in the shop drawings before mechanical rough-in
Because SIP homes are very tight by design, mechanical ventilation is not optional. An undersized ERV in a well-sealed SIP home creates indoor air quality problems that no amount of envelope performance can offset. Plan duct chases in the shop drawings so the mechanical system integrates cleanly rather than being retrofitted through finished panels.
Pro Tip: Do your first blower-door test before any interior finishes go up. Fixing a failed seam behind drywall costs ten times what it costs to fix it in the open.
What are the most common SIP installation problems and how do you fix them?
- Misalignment: Shim and re-plumb, use ratchet straps to pull panels, and re-check plate locations against shop drawings before proceeding
- Missing or incorrect fasteners: Retrofit per the shop drawing schedule; never assume typical spacing when the drawings specify otherwise
- Wet or swollen OSB: Stop interior finishes immediately, dry panels thoroughly, document all damage with photos, and contact the manufacturer for warranty guidance if delamination is present
- Blower-door failure: Smoke-pencil the failing seam, add caulk or tape, and re-test before drywall; call the manufacturer if a spline detail or core contact looks questionable
Pro Tip: Keep a site log with photos dated by panel number. If a warranty claim comes up six months later, that log is the difference between a covered repair and an out-of-pocket one.
What tools and materials do you need for SIP wall installation?
Hand and power tools:
- Impact driver, circular saw with carbide blade, reciprocating saw
- Hot-wire cutter or mechanical router for foam work
- Framing square, 6-foot level, tape measures, and chalk line
Lifting equipment: Per the ACME SIPBOOK, panels larger than 4×16 typically require a crane or lull. For moderate panels, a mini-crane or gin pole with slings, spreader bars, and tag lines works well.
Materials and consumables: Manufacturer-approved caulk, peel-and-stick SIP tape, low-expansion foam, specified fasteners, splines matched to the shop drawing specs, and temporary bracing hardware.
Rent cranes and large lifts. Purchase specialty fasteners, sealants, and splines to match your shop-drawing specifications exactly — substituting sealant brands mid-project is a warranty risk.
Running out mid-seam and waiting for a supply run is a common and avoidable delay.*
Why do shop drawings and manufacturer coordination protect your investment?
Shop drawings are the installation authority. They override typical details, generic guides, and field intuition. Any on-site change needs manufacturer approval in writing before you make it.
- Inventory and photograph all shipping or site damage before assembly to preserve warranty claims
- Call the manufacturer when you encounter a questionable spline detail, core compression or delamination, an engineered header need for openings over 5 feet, or unexpected point loads
- Use only manufacturer-specified sealants, tapes, and fastener schedules; substitutions can void coverage
- Keep a complete project record: photos, delivery receipts, and signed inspections
Deviations from shop drawings made without manufacturer approval are the leading cause of voided SIP warranties. Document every field decision and get written sign-off before proceeding.
Pro Tip: Save the manufacturer’s technical support number in your phone before the crew arrives. Questions come up during installation, not during business hours on a Tuesday.
How do Prefabmodularhome DIY SIP kits reduce on-site risk?
Prefabmodularhome’s structural insulated sandwich panel kits ship with factory-cut openings, matched panel numbers, and project-specific shop drawings that eliminate most field-cutting guesswork. Pre-installed splines and labeled nailers mean your crew spends time setting panels rather than problem-solving connections.
- Factory precision reduces the chance of misaligned openings and incorrect chase locations
- Labeled panel numbers matched to shop drawings make sequencing straightforward even for first-time builders
- Manufacturer support is available for MEP coordination, lift planning, and delivery logistics
The PU panel kits are specifically designed for backyard offices, studios, and small modular builds where speed and thermal performance matter most.
Pro Tip: Request a pre-delivery call with the Prefabmodularhome technical team. Thirty minutes on the phone before panels ship can prevent a full day of on-site confusion.
How do you maintain SIP walls to preserve long-term performance?
SIP walls require less maintenance than stick-framed walls, but a few specific checks protect performance over time. Inspect exterior cladding annually for gaps, cracks, or failed sealant at panel joints and around window and door frames. Water infiltration at these points is the primary threat to OSB facers. Any sign of moisture staining, soft spots, or paint bubbling on interior surfaces warrants immediate investigation before the damage reaches the foam core.
Keep gutters clear and maintain positive drainage away from the foundation. Standing water against the sill plate is the most common entry point for moisture into the panel base. Re-apply exterior caulk at panel seams and transitions every five to seven years, or sooner if visual inspection shows cracking. Interior surfaces need no special treatment beyond standard drywall maintenance.
How do vapor barriers and weather-resistant barriers work with SIP panels?
SIP panels are inherently vapor-retarding due to the foam core, which changes how you approach moisture management compared to a batt-insulated wall. In most U.S. climate zones, a separate interior vapor barrier is not required and can actually trap moisture between the barrier and the OSB facer. Check your local code and climate zone before adding one.
A weather-resistant barrier (WRB) on the exterior is standard practice and goes over the OSB facer before cladding. Tape all WRB seams with compatible flashing tape and integrate it carefully with window and door rough opening flashing. The WRB handles bulk water; the continuous caulk and SIP tape at panel joints handle air and vapor at the seams. These are two separate functions and both need to be complete.
How do SIP panels integrate with roof trusses and floor systems?
The wall-to-roof connection is where most SIP envelope failures originate. SIP walls typically bear on a pressure-treated sill plate anchored to the foundation; the top plate receives the roof truss or SIP roof panel bearing. Confirm bearing widths and anchor bolt locations on the shop drawings before setting walls.
For insulated wall and roof panel systems, the ridge beam and any point-load posts need to be sized by the engineer of record and shown on the shop drawings. Never assume a standard lumber size is adequate for a SIP roof span. At the floor system, SIP walls bear on the rim joist or foundation wall; the connection detail controls both structural load path and air sealing at the critical floor-to-wall transition.
What should a post-installation inspection cover?
Walk the completed shell before any interior finishes go up. Check these items in order:
- All panel joints are fully caulked with no visible gaps; peel-and-stick tape is applied at every seam and roof/wall interface
- Every electrical box is sealed with low-expanding foam; no open chases visible
- Fastener schedule matches shop drawings at sill, top plate, and panel-to-panel connections
- Temporary bracing has been removed only after roof assembly is complete and tied to the walls
- Foundation anchor bolts are fully engaged and sill plate is sealed to the foundation
- Blower-door test result meets the project target; smoke-pencil check confirms no active leak paths
- All field modifications are documented with manufacturer approval on file
A signed inspection record at this stage is your best protection against future warranty disputes and code-compliance questions.
What experienced SIP builders actually learn on the job
The conventional wisdom on SIP installation is that it’s simple because the panels are prefabricated. That’s half right. The panels are precise; the job site usually isn’t. The gap between those two realities is where most problems live.
Corners set first isn’t just a sequencing preference. It’s the structural logic of the whole erection. A crew that starts mid-wall because it looks easier will spend the last two panels fighting a closure that’s 3/8" out of square, and no amount of ratchet straps fixes that cleanly. The shop drawings tell you where to start. Trust them.
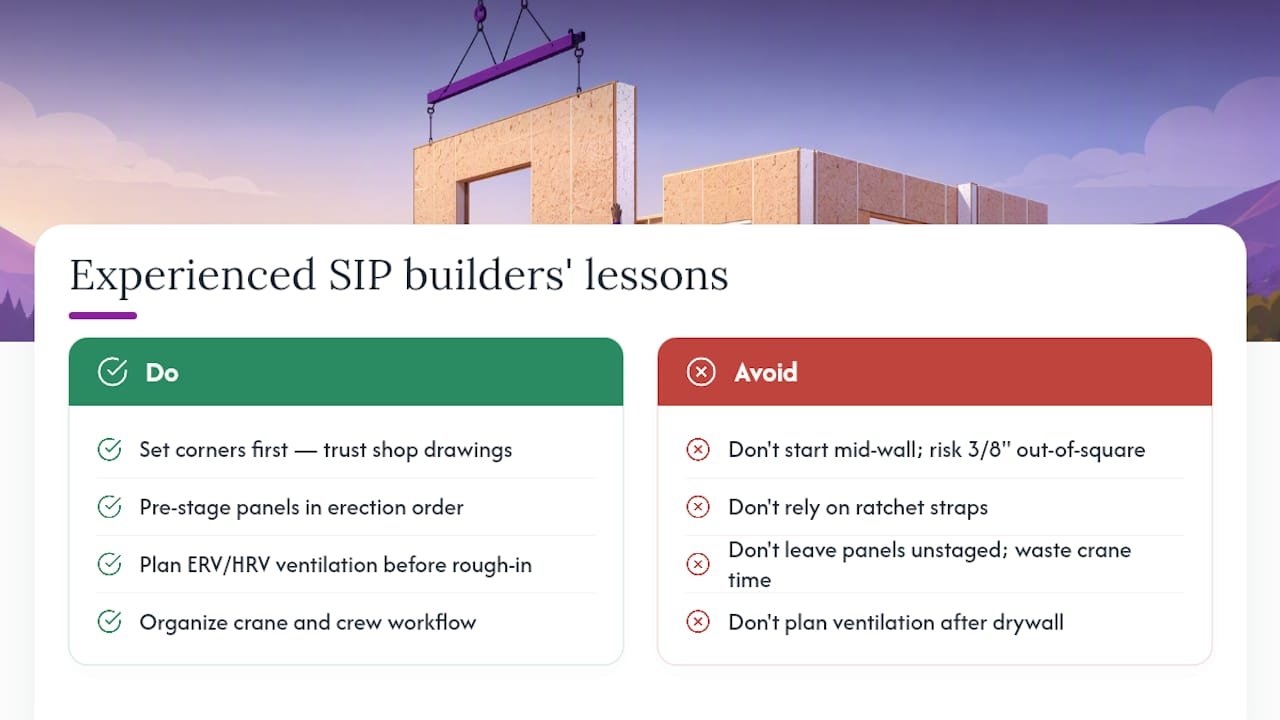
Pre-staged panels in erection order genuinely change the pace of a build. On a well-organized site, a single ridge beam and a half-day of crane time can close a 600-square-foot shell. On a disorganized site, the same crane sits idle while the crew hunts for panel 14B in the wrong stack. The difference isn’t skill; it’s planning.
The ventilation point is the one most first-time SIP builders underestimate. A tight envelope is the goal, and SIP delivers it. But tight means the building doesn’t breathe on its own. Plan the ERV or HRV before the mechanical rough-in, not after the drywall is up and the duct chase is gone.
*— Kian
Prefabmodularhome kits make SIP installation faster and less risky
Skip the field-cutting guesswork entirely. Prefabmodularhome’s DIY SIP and PU panel kits ship with every panel numbered, factory-cut openings matched to your shop drawings, and pre-installed splines where the design calls for them. That means your crew sets panels instead of measuring and cutting them, and your sequencing is built into the delivery manifest.

For backyard offices, garden studios, and small modular builds, the PU panel kits are designed specifically for DIY assembly without heavy equipment or specialized trades. Manufacturer support covers delivery coordination, MEP chase planning, and lift logistics so you’re not solving those problems alone on site. Request a quote or contact the Prefabmodularhome team at Prefabmodularhome to get your project-specific shop drawings and delivery timeline started.
Sources
- Structural Insulated Panels (SIPs) | Building America Solution Center
- SIP Builder best practices and installation guidance (Enercept, 2025)
- SIP Preparation and Installation Guide (ACME SIPBOOK)
Recommended
- Structural Insulated Panels (SIPs): Your Comprehensive Guide – Modular Homes with Structural Insulated Sandwich Panels
- Modern Construction with Structural Insulated Panels – Modular Homes with Structural Insulated Sandwich Panels
- Wall Panel and Roof Panel – Modular Homes with Structural Insulated Sandwich Panels
- Cheep Backyard Office with Sandwich Panels – Modular Homes with Structural Insulated Sandwich Panels