Yes. If a shipping container is going to serve as a permanent dwelling, it needs an engineered, code-compliant foundation, not a stack of concrete blocks or a bed of gravel. Building departments treat a container house like any other single-family structure once someone plans to live in it full time, and that means the foundation has to be sized by a professional and inspected in stages.
The container home foundation you end up with usually falls into one of five categories: concrete piers, a reinforced slab-on-grade, screw or helical piles, a perimeter stem wall with a crawl space, or a full basement. Gravel pads and cribbing blocks show up constantly in container-home photos online, but they’re strictly temporary solutions, fine for a construction trailer, not for a home you plan to finance or insure.
Four things decide which option fits your lot:
- Soil bearing capacity — sandy, loose, or fill soil needs a different approach than dense clay or bedrock.
- Frost depth — how deep the ground freezes in your region, which drives footing depth.
- Seismic and wind loads — corner connections have to resist uplift and lateral shear, not just gravity.
- Flood zone status and your permanence goal — whether you’re building for a conventional mortgage or a temporary/personal-property structure changes the calculus entirely.
Get those four right with your geotechnical engineer and structural designer, and the rest of the build, including how you integrate Prefab Modular Home panels or container modifications, falls into place a lot faster.
Key Takeaways
A container home needs a soil report, an engineer-stamped foundation plan sized for its corner-load pattern, and properly designed anchorage to pass inspection and qualify for standard financing.
| Point | Details |
|---|---|
| Order a geotechnical report early | A few soil borings reveal bearing capacity and frost depth before you commit to a foundation type. |
| Match foundation to site conditions | Piers and slabs suit stable soil; helical piles suit slopes, flood zones, and poor bearing soil. |
| Get a PE stamp on the foundation plan | Permanent dwellings generally require engineered drawings referencing IRC/IBC provisions. |
| Anchorage is the detail inspectors check hardest | Embed plates and bolted or welded connections sized for uplift prevent the most common failures. |
| Permanent foundations unlock conventional financing | Temporary supports like gravel pads classify the structure as personal property, limiting mortgage options. |
Table of Contents
- Foundation Types for a Container Home Compared
- What Soil and Load Data Actually Determine
- What Belongs on Your Foundation Permit Package
- Preparing the Site Before the Foundation Goes In
- How Much a Container Foundation Actually Costs
- Installing a Pier or Slab Foundation, Step by Step
- Temporary vs. Permanent Foundations: Why It Changes Your Financing
- Matching Foundation Type to Your Site: A Decision Checklist
- Where Prefab Kits Fit Into Your Foundation Plan
- The Real Lesson Buried in Every Container Foundation Guide
- Sources
Foundation Types for a Container Home Compared
Each foundation type solves a different combination of soil, budget, and site problem. Here’s how the main options actually perform once you get past the marketing photos.
Concrete piers
Piers are the most common choice for container homes because they’re economical and match how containers were designed to be stacked and moved in the first place: on their four corner castings. A typical layout places piers under each corner casting and adds intermediate piers along the base rail for units over 20 feet. For a 20-foot container, expect a minimum of four to six piers; a 40-foot unit often needs six to eight, spaced to keep the unsupported span under the steel frame within safe limits. Sample pier footings run in the 24 to 36 inch diameter range with footing depths tied to your local frost line, though PermitContainerHomes’ foundation guide is clear that final sizing has to come from your engineer, not a generic chart.
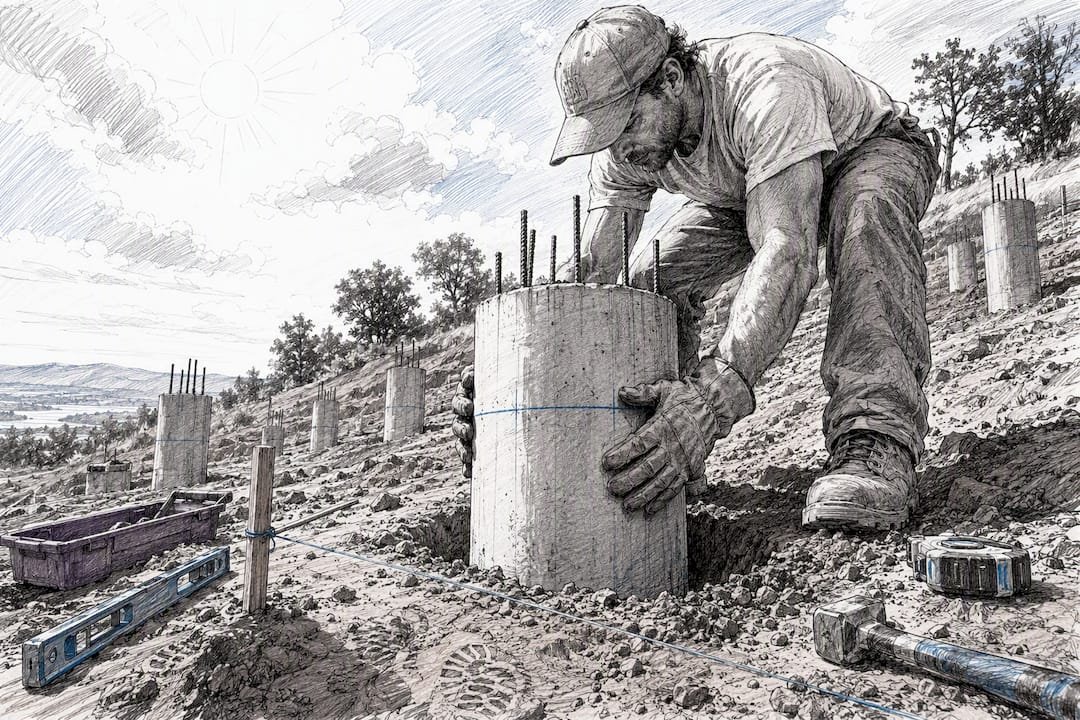
Piers work well on sites with decent bearing soil and a modest budget, and they leave the crawl space open for utility runs. The most common mistake is under-sizing pier count on longer container runs, which lets the frame flex and stresses the corner welds over time.
Slab-on-grade
A slab spreads the container’s weight across a continuous reinforced pad instead of concentrating it at a handful of points. Slabs need embedded anchor plates cast at the exact corner locations before the pour, which means your container layout has to be finalized before concrete goes down. Standard reinforcement includes a grid of rebar and a thickened edge beam around the perimeter, typically 12 to 16 inches deep, to resist the corner loads. In freeze-thaw climates, a straight slab may need to become a frost-protected shallow foundation (FPSF), which uses rigid insulation around the perimeter to keep the bearing soil above freezing instead of digging footings down to the frost line.
Slabs shine on flat, stable lots and give you a finished, insulated floor in one step. They’re a poor fit for expansive clay or unknown fill without extra engineering.
Perimeter stem wall and crawl space
A continuous concrete stem wall around the container’s footprint, sitting on a footing below frost depth, gives you frost protection plus a crawl space for plumbing, electrical, and future access. It costs more than piers but less than a full basement, and it’s the choice many owner-builders land on when they want easy utility access without excavating a full lower level.
Full basement
A basement turns dead foundation space into usable square footage, which matters for resale value, but it’s the most expensive and time-consuming option by a wide margin. Excavation, waterproofing, and structural walls add weeks to a schedule that a pier foundation could finish in days. Choose a basement only when the added living space or storage genuinely justifies the cost, not because it feels like the “complete” answer.
Screw and helical piles
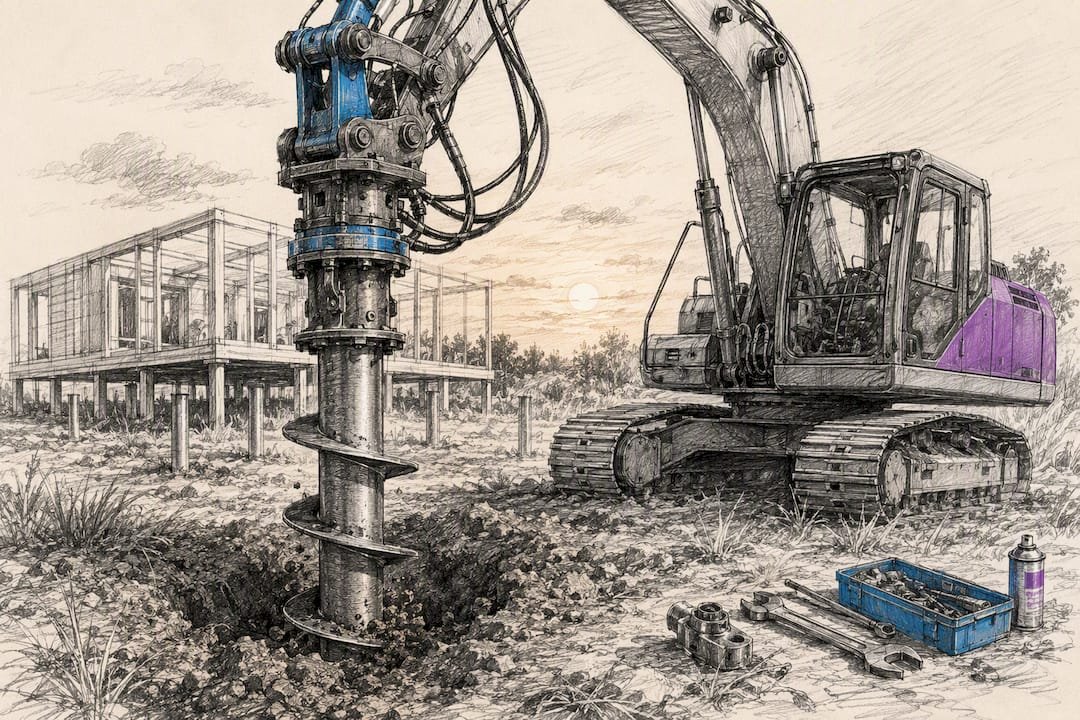
Steel piles with helical flights get twisted into the ground with hydraulic equipment, load-tested on installation, and capped with a bracket that bolts to the container corner. Installation takes a fraction of the time excavation-based footings need, there’s minimal soil disturbance, and piles perform well on sloped lots or sites with a high water table where digging a footing is a headache. They’re a strong option for flood-prone parcels, since the container ends up elevated above the base flood elevation almost as a byproduct of the foundation design.
Gravel pads, blocks, and elevated platforms
Gravel pads and concrete blocks are acceptable for a job-site office or a shed you might relocate, but inspectors reject them for permanent dwellings because they can’t resist uplift or lateral movement and they settle unevenly. If you’re building on a hillside or in a flood zone and want an elevated platform, timber cribbing works for temporary structures, but a permanent elevated home needs an engineered steel or concrete platform tied to piers or piles below.
Pro Tip: Ask your engineer for pier and footing sizes as a range, not a single number, then confirm the final spec against your actual geotechnical report. Soil varies more within a single lot than most people expect, and a foundation sized for the wrong corner of the property is the single most avoidable expense on a container build.
What Soil and Load Data Actually Determine
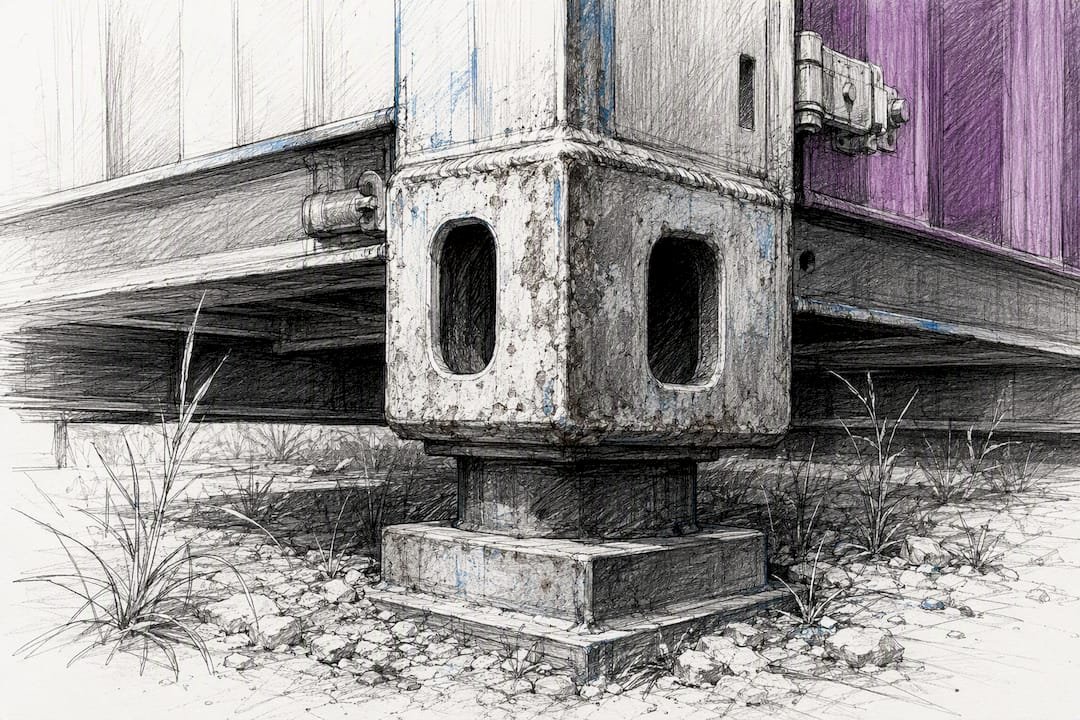
Containers don’t distribute weight the way a stick-built house does. A conventional home spreads load along continuous walls; a container concentrates almost all of it at four corner castings. That point-load behavior is why corner foundation elements have to be engineered specifically, rather than sized off a generic “residential footing” table. Undersize a corner pier and you get localized settlement that racks the entire steel frame, which shows up later as doors that won’t close and roof panels that no longer sit flush.
Soil bearing capacity is the number that makes or breaks a foundation plan. The USDA Web Soil Survey gives you a free, public starting point, showing general soil classifications and presumptive characteristics for a parcel before you spend money on a formal investigation. It’s not a substitute for a geotechnical report, but it tells you whether you’re likely dealing with sandy loam, expansive clay, or something requiring deeper piles before you even call an engineer.
A modest geotechnical investigation, one or two soil borings, typically runs a few hundred to a few thousand dollars, and it’s one of the better-value line items in the entire budget. It reveals the actual bearing stratum depth, water table location, and frost line specific to your lot, and catching a soft layer at that stage is dramatically cheaper than discovering it after a foundation has already cracked.
Frost heave is the other variable that trips up first-time owner-builders. In climates where the ground freezes, footings have to extend below the frost depth or the freeze-thaw cycle will lift and crack them season after season. The frost-protected shallow foundation method sidesteps that by insulating the ground around a shallower footing instead of digging deep, which can shave real money off excavation costs in cold climates. IRC Chapter 4 sets out the prescriptive frost-protection and footing provisions most building departments reference.
Expansive or fill soils change the math again. Clay that swells and shrinks with moisture content can push a standard footing size out of spec entirely, forcing deeper piers or piles that bypass the unstable layer and bear on something more consistent below it. And wind, seismic activity, and lateral loads are why anchorage engineering matters as much as footing size: a foundation that resists gravity fine can still fail if the corner connections aren’t detailed to resist uplift.
What Belongs on Your Foundation Permit Package
Most jurisdictions require a Professional Engineer (PE) stamp on foundation drawings for a permanent container dwelling, and that requirement traces back to how IBC Chapter 18 treats nonstandard structures. A container wasn’t designed as a building component, so the code path for approving it as one runs through structural engineering, not a pre-approved prescriptive table.
Your permit package should include:
- Geotechnical soil report establishing bearing capacity, water table depth, and frost line for the specific site.
- Stamped foundation plan showing pier, slab, or pile layout matched to the container’s actual corner and intermediate load points.
- Anchor and connection details specifying embed plate size, bolt pattern, and welded connections designed for uplift resistance.
- Rebar and footing schedules listing bar size, spacing, and concrete strength (commonly 3,000 to 4,000 psi, though your engineer sets the final number).
- Load calculations covering dead load, live load, wind, and, where applicable, seismic demand.
A geotechnical report and a PE-stamped foundation plan aren’t paperwork for its own sake. They’re the two documents that tell an inspector, and later a lender or an appraiser, that the ground under your container was actually evaluated rather than assumed.
Expect inspectors to check the work at several distinct stages: after excavation (soil conditions match the report), after forms and rebar are set (before any concrete pours), when embed plates and anchor bolts are placed (position and elevation have to be exact), immediately after the pour, again once anchors are welded or bolted to the container, and finally at backfill and final sign-off. Skipping a stage inspection is one of the fastest ways to trigger a stop-work order.
Preparing the Site Before the Foundation Goes In
Grading and drainage decide whether a well-engineered foundation actually performs the way the drawings say it will. Strip organic topsoil and any loose fill down to competent subgrade, then compact it to the density your engineer specifies, usually expressed as a percentage of maximum dry density from a standard compaction test. Skipping this step is how a technically correct foundation design still ends up settling; selecting proper awning windows can also help manage moisture and drainage around your foundation.
Where the native soil is soft, a layer of geotextile fabric topped with a compacted aggregate sub-base, often 6 to 12 inches depending on soil class, gives piers and slabs a stable working surface. Surface drainage matters just as much: grade the site so water sheds away from the foundation, and add swales or perimeter drains on lots where runoff naturally collects near the building footprint. Standing water at the base of a pier or stem wall is a slow, quiet way to undermine a foundation that was otherwise built correctly.
- Strip and compact subgrade before any layout work begins.
- Add geotextile and aggregate sub-base on soft or variable soils.
- Grade for positive drainage away from the foundation on all sides.
- Address a high water table with temporary dewatering before excavation, not after.
- Rough in utility trenches and conduit sleeves before final grade and pour, not after.
Pro Tip: Walk the site after a heavy rain before you finalize your foundation plan. Water pooling in a spot that looked flat and dry on a sunny afternoon is the cheapest information you’ll get about where drainage problems are going to show up later.
How Much a Container Foundation Actually Costs
Cost ranges swing hard based on soil conditions, depth requirements, and site access, so treat any number you see online as a starting point, not a quote. Pier foundations tend to sit at the lower end of the spectrum since they use less concrete and less excavation. Slabs and stem-wall crawl spaces cost more because of the added formwork, rebar, and continuous excavation. Full basements and helical pile systems on difficult soils occupy the top end, driven by excavation volume or specialized equipment mobilization.
The line items that catch first-time owner-builders off guard rarely show up in a rough estimate: geotechnical investigation fees, extra rebar or deeper footings once the soil report comes back worse than expected, dewatering equipment on wet sites, and mobilization charges for concrete trucks or pile-driving rigs reaching a remote lot. Budget a contingency for at least one of these showing up.
On schedule, plan for the foundation to cure fully before the container ever arrives on site. Concrete needs time to reach adequate strength before it can bear load, and most engineers specify a minimum cure period measured in days, not hours, before setting steel on top of it. Build a buffer of several days to a week between foundation completion and your scheduled container delivery so a rain delay or late inspection doesn’t collide with a crane rental you already paid for.
- Piers: lower material and labor cost, faster to install, best on stable soil.
- Slab-on-grade: moderate cost, adds a finished floor, needs stable or engineered subgrade.
- Stem wall/crawl space: higher cost, buys frost protection and utility access.
- Basement: highest cost, adds usable square footage and resale value.
- Helical piles: cost varies with pile depth and count, fastest install on difficult soil.
Foundation type also affects financing down the line. A PERCH guide on container foundations notes that whether a structure qualifies as real property for mortgage purposes often traces directly back to what kind of foundation it sits on.
Installing a Pier or Slab Foundation, Step by Step
Once your engineer has signed off on drawings and the soil report is in hand, the physical installation follows a fairly consistent sequence regardless of whether you’re pouring piers or a slab.
- Confirm the paperwork first. Don’t let excavation start until you have the stamped foundation plan and soil report in hand and the permit issued.
- Lay out and stake every pier location or slab perimeter according to the engineered drawings, double-checking dimensions against the container’s actual corner casting positions.
- Excavate to the specified depth, then set forms for piers or slab edges, and place rebar per the engineer’s schedule.
- Set embed plates and anchor hardware at the exact elevation and position called for, then verify placement before any concrete touches the forms.
- Pour concrete to the specified strength, and protect the pour from rain or freezing temperatures during the initial set.
- Let it cure fully. Most engineers require a minimum cure period before the structure can bear load. Verify strength with your engineer’s method of choice before proceeding.
- Complete anchor connections, welding or bolting per the stamped details, then schedule the crane lift and container set once everything checks out.
Anchorage is the detail inspectors scrutinize hardest, and for good reason: embed plates, anchor bolts, and welded connections sized for uplift are what keep a container from shifting in high wind or seismic activity, and PermitContainerHomes’ code guide flags it as the single most common failure point in amateur installations.
Temporary vs. Permanent Foundations: Why It Changes Your Financing
A container sitting on cribbing blocks or a gravel pad is typically classified as personal property, similar to a mobile trailer, which shuts the door on conventional mortgage financing and standard homeowner’s insurance. A permanent, engineered foundation, one that’s affixed to the land with footings below grade and can’t be relocated without demolition, is generally what qualifies a container dwelling as real property eligible for a standard mortgage.
That distinction ripples into taxes and resale, too. Lenders and appraisers look for a permanent foundation as a baseline requirement, and a buyer’s mortgage underwriter will ask about foundation type before they’ll approve financing on a container home purchase.
- Temporary foundations (blocks, gravel pads) are appropriate only for structures you plan to move, sell, or aren’t living in full time.
- If you go temporary, anchor the container against wind loads anyway and keep it in a non-flood, non-slope location.
- A permanent foundation, with stamped drawings and full inspection, is the path to conventional financing and standard insurance coverage.
- Check with a local lender before you finalize foundation type if financing eligibility matters to your project.
Matching Foundation Type to Your Site: A Decision Checklist
Start with three inputs: your soil class from the geotechnical report, your local frost depth and seismic/wind zone, and your permanence goal (mortgage-eligible home versus a movable or temporary structure). Stable soil with no frost concerns often points toward a slab or pier foundation. Poor bearing soil, steep slope, or a high water table usually points toward helical piles. Flood zones favor an elevated platform on piles. Cold climates with tight budgets often land on an FPSF slab instead of deep conventional footings.
- Ask your geotech for a specific bearing capacity number, not a general soil description, expressed in pounds per square foot.
- Ask your PE for recommended pier or footing sizes based on your actual container dimensions and corner load calculations.
- Confirm frost depth assumptions used in the design match your county’s published frost line.
- Request uplift and lateral load calculations in writing, especially if you’re in a high-wind or seismic zone.
Red flags that should stop you before you sign off on any foundation design: undocumented fill soil with no compaction records, organic material in the excavation, a water table higher than expected, or unmarked utilities crossing the footprint.
Pro Tip: If your geotech report mentions “fill of unknown origin,” don’t treat that as a minor footnote. Unknown fill is one of the most common reasons a foundation that looked fine on paper settles unevenly within the first two years.
Where Prefab Kits Fit Into Your Foundation Plan
A shipping container isn’t the only fast-build path to a permitted structure, and it’s worth knowing the alternative before you commit thousands of dollars to retrofitting steel. Prefabmodularhome’s structural insulated sandwich panel kits still need a properly engineered foundation and anchor plan; that requirement doesn’t disappear just because the building envelope arrives as a kit instead of a shipping container. What changes is everything else: panel-based builds coordinate around foundation elevations, anchor plate locations, utility penetrations, and delivery clearances the same way a container project does, but assembly time on-site shrinks dramatically because the structure and insulation arrive as one integrated component.
For owner-builders who like the speed of a container conversion but not the welding, cutting, and insulation retrofitting it demands, a Prefabmodularhome kit is a legitimate direct alternative, particularly for home offices, rental units, or garden studios where a smaller footprint still needs the same foundation discipline: soil report, engineered plan, proper anchorage.
- Confirm foundation anchor bolt pattern against the kit’s structural specifications before the pour, not after.
- Coordinate utility penetration locations with your kit supplier’s floor plan early in design.
- Verify delivery truck and crane clearances match your site access before scheduling installation.
- Ask whether your kit’s panel connections require different embed spacing than a standard container corner casting.
Readers comparing the two paths in more depth can look at Prefabmodularhome’s comparison of flat-pack panel kits versus container retrofits, or browse the full product catalog of structural insulated sandwich panel kits to see what a foundation-ready kit actually includes.
The Real Lesson Buried in Every Container Foundation Guide
Most container-home content treats the foundation as a checkbox between buying the container and cutting window openings. That’s backward. The foundation is the one part of this build you cannot retrofit cheaply after the fact, and it’s also the part most likely to get shortchanged because it’s invisible once the container sits on top of it.
The conventional advice, “just pour a slab or set some piers,” undersells how much the corner-load behavior of a container changes the engineering compared to a stick-built house. A geotechnical report costing a few hundred dollars is cheap insurance against a foundation failure that costs tens of thousands to fix. That math should make the decision easy, yet it’s the step owner-builders skip most often, usually because it doesn’t feel like “real progress” the way cutting steel or scheduling a crane does.
If there’s one thing to prioritize before anything else: get the soil report first, choose your foundation type based on what that report actually says, and only then start locking in your container modifications or kit specifications around it. Sequence matters more than most guides admit.
— Kian
Sources
Check IRC Chapter 4 on foundations and IBC Chapter 18 on soils and foundations directly, run a preliminary check on the USDA Web Soil Survey, and see Prefabmodularhome’s guide on modular home permits for what a full permit package requires.
- Container Home Foundation: 2025 Pier, Slab & Basement Requirements — PermitContainerHomes
- USDA Web Soil Survey
Recommended
- Flat Pack vs Container Home: Which Fits Your Site? – Modular Homes with Structural Insulated Sandwich Panels
- Ultimate Guide to Container Homes: Fast Building & Design – Modular Homes with Structural Insulated Sandwich Panels
- Container Homes – Modular Homes with Structural Insulated Sandwich Panels
- The Rise of the Container Home – Modular Homes with Structural Insulated Sandwich Panels