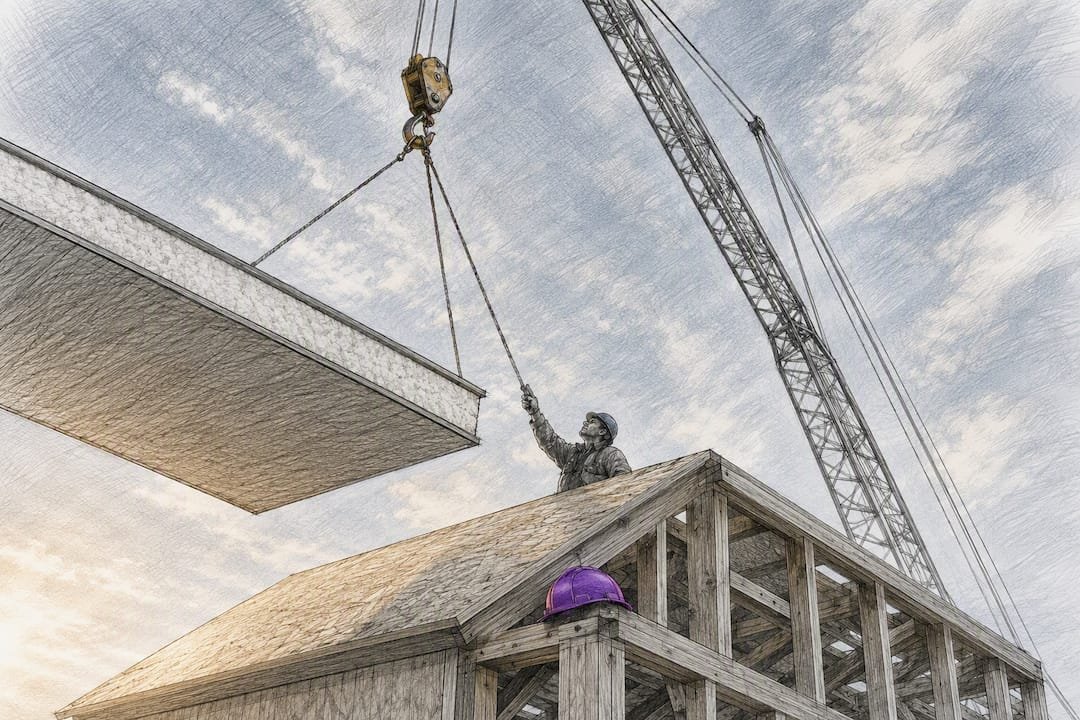
A SIP roof installation replaces stick-framed rafters with prefabricated structural insulated panels that act as both structure and insulation in one piece, cutting framing time dramatically compared to conventional roofing. Getting it right means working from engineered setout drawings, scheduling proper lifting equipment before panels arrive, and sealing every joint and edge the same day panels go up. Skip any of those three, and you risk wet OSB, air leaks, or a crane sitting idle while you figure out the sequence on the fly. For anything beyond a small shed roof, loop in your SIP manufacturer or a structural engineer.
TL;DR:
- Proper sequencing, sealing, and staged storage are critical to prevent moisture, air leaks, and delays during SIP roof installation.
- Using prefabricated panels with pre-cut splines and accurate setout drawings significantly reduces rigging and on-site assembly time.
- Sealing spline joints inside and outside at the right moments prevents air and water leaks, which are common pitfalls causing long-term damage.
- Mechanical lifting equipment and experienced rigging are essential for panels over 7 meters long, especially in tight or complex locations.
- Most installation issues arise from timing errors, improper sealing, or damaging cuts, not material quality, emphasizing thorough planning upfront.
Table of Contents
- Is a SIP roof the right choice for your project?
- What do you need to prepare before delivery day?
- How do you lift and install SIP roof panels safely?
- How do you seal ridges, eaves, and roof penetrations?
- What roofing and ventilation approach works best over SIPs?
- What are the most common SIP roof installation mistakes?
- What do experienced SIP installers wish they’d known sooner?
- How Prefabmodularhome makes SIP roof installation faster
- Where to find the technical manuals installers actually need
- Sources
Is a SIP roof the right choice for your project?
SIP roofs shine on vaulted ceilings and long insulated spans where you want a clean interior finish without a forest of rafters and collar ties. A-frames, timber-frame hybrids, and craftsman-style designs with exposed ridges tend to make SIP roof panels look almost inevitable once you see the framing plan. Standard truss roofs still win on very complex hip-and-valley layouts or where you need cheap, fast coverage without the insulation upgrade.
A few design decisions shape everything downstream:
- Panel thickness and core material (EPS or polyurethane) set your R-value and how far the panel can span unsupported.
- Ridge beams, purlins, or beam pockets each demand different lifting sequences and connection hardware.
- Skylights, vent penetrations, and large openings need to be locked into the SIP wall installation and roof shop drawings before panels are cut, not after.
Changing your mind mid-install on a penetration location means field-cutting a panel that was engineered for a different layout. That’s expensive and it compromises the panel’s structural rating.
What do you need to prepare before delivery day?
Most delays on a SIP roof job happen before the crane ever shows up. Panels arrive in a specific order for a reason, and if the truck gets loaded wrong, you’ll spend the morning shuffling instead of building.
- Confirm the setout drawings match the delivery manifest, and order panels on the truck in the exact sequence you’ll install them.
- Book your lifting equipment (hiab, telehandler, or crane) and an operator who has actually rigged SIP panels before, not just steel or lumber packages.
- Stage panels as close to their final position as the site allows, so the crew isn’t dragging 7.32-meter panels across the yard.
- Store panels rough-side up on flat, protected ground, covered against rain but with enough airflow to prevent trapped moisture, and label each one clearly by its position on the drawing.
- Assign crew roles ahead of time (rigger, spotter, fastener crew) and get fall protection and PPE staged before the first panel leaves the ground.
Roof panels can measure up to 7.32 meters by 2.44 meters and weigh close to 23 kg per square meter, which is exactly why mechanical lifting isn’t optional past a certain size. Two guys with a ladder are not moving that panel safely.
Pro Tip: Walk the delivery route with your crane operator before the truck arrives. A tight driveway or overhead line you didn’t flag in advance turns a two-hour lift into a half-day problem.
How do you lift and install SIP roof panels safely?
Once the crew and equipment are staged, the actual install moves fast, provided you follow the sequence rather than improvising panel by panel.
- Attach rated lifting plates at two points near the top of each panel, following the manufacturer’s rigging guidance exactly. Never stand under a suspended panel.
- Assemble splines and run sealant into the spline grooves on the ground whenever the layout allows. Fitting splines before the panel leaves the ground saves significant time in the air.
- Lift and set the first panel, checking overhangs at the eave and fastening it to the ridge beam and eave plate per the shop drawing.
- Continue the sequence panel by panel, checking alignment against the setout drawing at every step rather than assuming the last panel was square.
- Install temporary bracing and footholds as you go so crew members have safe footing on a sloped, unfinished deck.
A few things separate a clean lift from a stressful one:
- Rigging that matches the manufacturer’s two-point lift spec, not an improvised sling arrangement.
- A screw pattern into ridge beams, purlins, and splines that follows the engineered spacing, not “close enough.”
- A spotter dedicated solely to watching the panel’s swing, especially near power lines or the crew below.
This is also where prefitting splines pays off most. If sealant is already in the groove and the spline is already seated, the crew is fastening and moving to the next panel instead of doing wet work forty feet in the air with a crane holding the load.
How do you seal ridges, eaves, and roof penetrations?
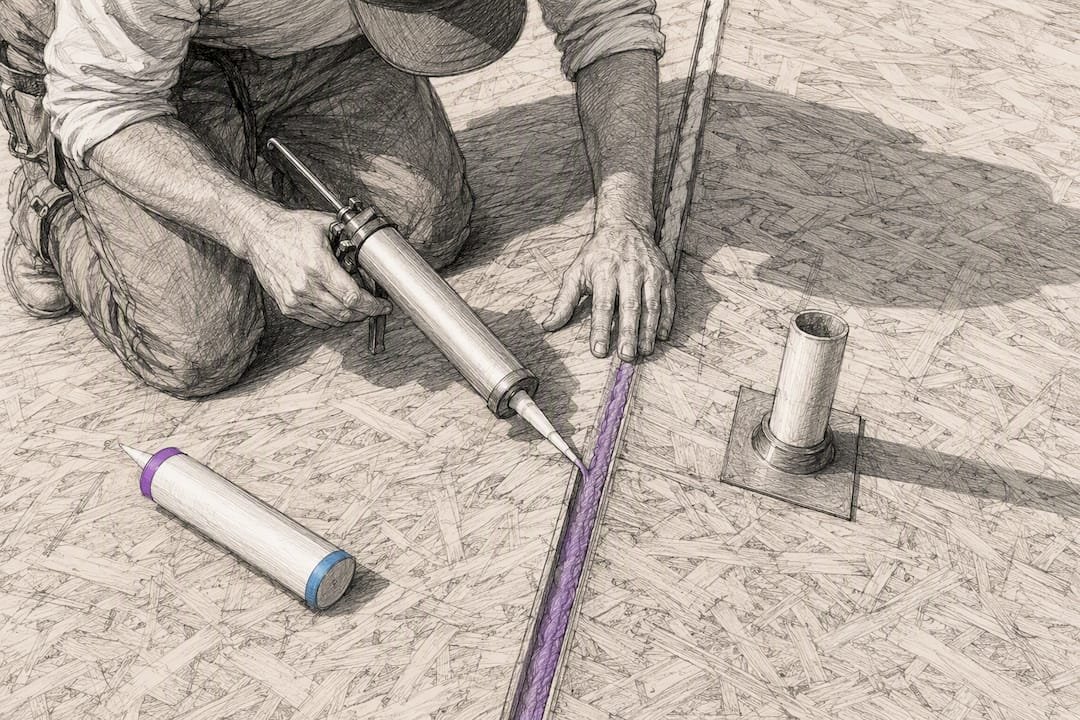
Every joint in a SIP roof is a potential air leak and a potential water path, and the two problems get solved differently. Interior vapor-barrier tape (VBT) goes over spline joints on the inside face, sealing the building’s airtight layer, while exterior edge sealant handles the top-side weather barrier where panels meet at ridges and eaves.
- Tape spline joints on the interior per the manufacturer’s SIP installation instructions before you lose access to that surface.
- Apply exterior sealant at top edges and get roofing underlayment down the same day if the schedule allows it.
- Choose the ridge detail that fits your span (beam-backed ridges carry more load than a mitered cut) and combine tape, foam, and mechanical fasteners rather than relying on one method alone.
- Group small penetrations together where possible, and flash skylights and vents with proper curbs or saddles rather than cutting directly through a spline.
Cutting through a spline to squeeze in a vent destroys the very connection holding two panels together structurally. Route the penetration somewhere else on the panel, even if it means a slightly longer duct run.
Pro Tip: Keep a tube of the manufacturer’s specified sealant on the roof deck at all times during install, not in the truck. Joints that sit open for even a few hours before sealing pick up moisture you’ll be chasing later.
What roofing and ventilation approach works best over SIPs?
The finishing layer determines how much time pressure you’re under. Vapor-permeable underlayment should go on as soon as panels and sealing are complete, because wet OSB on a SIP roof can’t dry toward the attic the way it would in a vented stick-framed roof.
- For metal roofing, follow the metal manufacturer’s fastening pattern into OSB, and add an above-deck ventilation mat like Enkamat or Cedar Breather. Testing on Enkamat 7020 under metal roofing showed an 18% drop in deck surface temperature, which matters for both condensation control and shingle life underneath dark metal.
- For shingles or tile, install strapping per the cladding manufacturer’s spec and pay close attention to edge trim details, since SIP roofs don’t have the same rafter tails to nail into that stick framing provides.
- Never let sealed tape sit exposed under cladding for days. Trapped moisture between the seal tape and the roof covering is one of the more common causes of OSB degradation on SIP jobs.
What are the most common SIP roof installation mistakes?
Most SIP roof problems trace back to timing, not materials. Cladding that goes on a week late, sealant applied in the wrong sequence, or a spline cut open for a vent, these show up on jobsites more than any panel defect.
- Delayed cladding leaves OSB exposed to weather longer than the panel was designed to tolerate.
- Insufficient sealing at splines or edges creates air leaks that undercut the whole point of installing SIPs.
- Cutting through splines for penetrations weakens the panel-to-panel connection.
- Poor rigging technique, single-point lifts or slings not rated for the panel, risks dropping a panel or damaging its edges.
If you catch swelling or minor water staining early, let the panel dry, sand or replace the affected edge, and reapply tape and sealant. If you’re looking at rot, permanent OSB delamination, or any sign the panel took on load it wasn’t engineered for, stop and call the SIP manufacturer or a structural engineer before you cover it up.
What do experienced SIP installers wish they’d known sooner?
The single habit that saves the most time on a SIP roof is prefitting splines and running sealant while panels are still stacked on the ground, not once they’re airborne. Mark each panel pack in installation order before the truck even arrives, and on steep slopes, wedge temporary timber blocks against the eave to give the crew somewhere stable to stand. None of this is complicated. It’s just discipline applied before the crane starts moving. For panel-specific cutting questions or connection details that don’t match your drawing, check the SIP connection guidance before you improvise on the roof.
— Kian
How Prefabmodularhome makes SIP roof installation faster
Most of the risk in a SIP roof job isn’t the panels, it’s the guesswork around lifting sequence, connection details, and how much sealing time you’ve budgeted before cladding goes on. Prefabmodularhome’s SIP kits arrive with pre-cut panels, setout drawings, and a delivery sequence matched to your install order, so the crane spends less time idle and your crew spends less time second-guessing the shop drawing.

If you’re planning a garden studio, home office addition, or a full roof replacement using structural insulated panels, the modular home extension kits are built around exactly the lifting and sealing sequence covered above. For readers still comparing this against a traditional stick-framed rebuild, the modular versus traditional construction breakdown lays out the time and cost tradeoffs directly. Homeowners weighing a full DIY approach can also look at how new interior doors and airtight detailing pay off in older homes through this energy efficiency retrofit guide from a trusted partner. Request the technical documents and a quote for your project’s SIP panel package to see exactly what ships and in what order.
Where to find the technical manuals installers actually need
Every SIP roof job runs smoother with the manufacturer’s own paperwork open next to you, not a general contractor’s memory of the last job.
- SIPA’s SIP installation resources cover ridge, eave, and spline connection options in detail.
- The Insulspan installation manual walks through pre-lift checklists and rigging specs.
- Premier SIPS’ ventilation bulletin documents metal roof ventilation testing.
Always confirm project-specific connection details against your own shop drawings before cutting or fastening anything.
Sources
- Structural insulated panel — Wikipedia
- SIP Installation — Structural Insulated Panel Association (SIPA)
- Insulspan SIP Installation Manual — InspectApedia (pdf)
- TechR-7: Ventilation of metal roofing with Enkamat — Premier SIPS technical bulletin