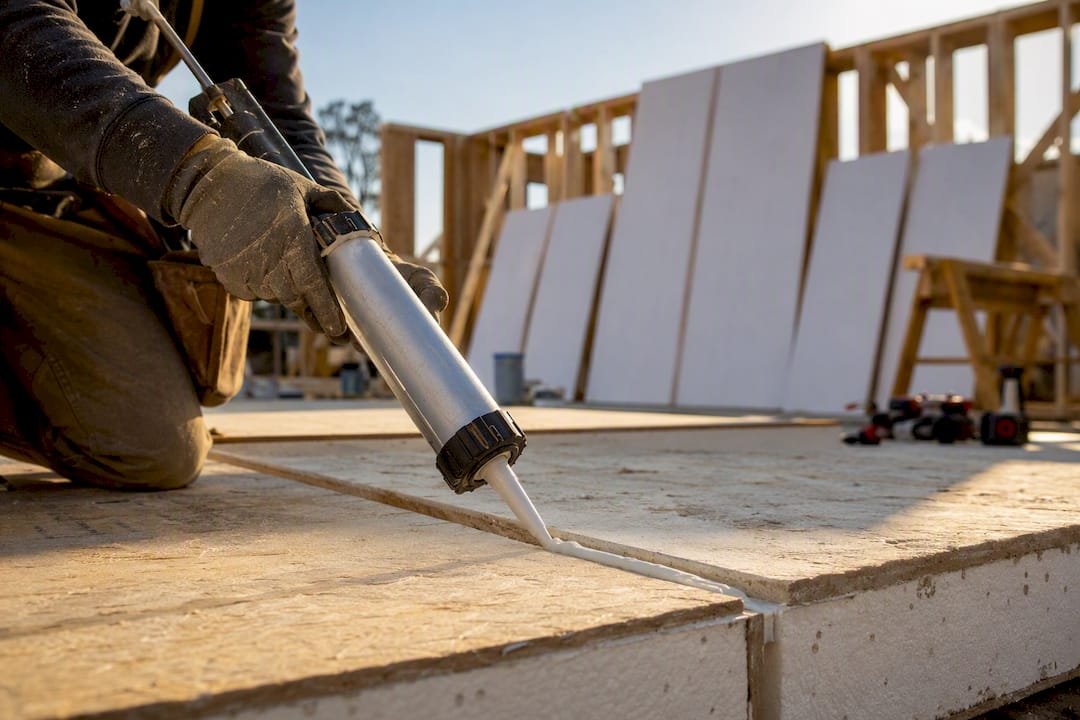
SIP connections are the joints, splines, fasteners, top plates, and sealant beads that tie structural insulated panels into one airtight, structural assembly. Get them wrong and you’re chasing drafts and soft spots for years. Get them right and the building performs the way the foam core promises.
The single most important move: follow your kit’s shop drawings or engineered details for spline and fastener placement, and lay down a continuous multi-bead SIP mastic system at every joint. Skipping either one is how a good panel becomes a weak wall.
- Confirm your kit includes engineered joint details before you touch a fastener.
- Use a three-bead mastic pattern, not a single dab of caulk, at every spline joint.
- Check plate overlap and offset requirements against your shop drawings, not guesswork.
Key Takeaways
A SIP connection performs only as well as its spline selection, fastener schedule, and sealing pattern, all three matched to the engineered detail for that joint.
| Point | Details |
|---|---|
| Follow the shop drawing | Spline type, fastener spacing, and plate offsets come from your kit’s engineered figures, not estimates. |
| Seal with three beads | Run mastic on both sides of the spline plus a center bead down the core for a continuous air seal. |
| Manage moisture direction | Place tape on the side that lets the joint dry, and never seal both sides with an impermeable barrier. |
| Watch for thermal voids | Fill gaps around splines and lumber with low-expansion foam to stop condensation before it starts. |
| Use an engineered kit | Prefabmodularhome’s SIP kits include connection packets with fastener schedules built in, cutting guesswork on-site. |
Table of Contents
- Materials, Fasteners, and Tools for SIP Connection Work
- What Spline Types Handle Panel-to-Panel Joints?
- Which Fastener Types Do SIP Connections Require?
- How Do You Seal SIP Joints Against Air and Moisture?
- How Do Plates, Corners, and Openings Affect SIP Connections?
- Step-by-Step Sequence for On-Site SIP Panel Connection
- When Do SIP Connections Need an Engineer?
- What Are the Most Common SIP Connection Mistakes?
- Where to Get a SIP Kit With the Connection Details Already Worked Out
- Sources
Materials, Fasteners, and Tools for SIP Connection Work
Half of the mistakes on a SIP job site trace back to missing the right sealant or the wrong fastener on hand when the crew is mid panel. Stock the job before you start.
Sealants and tapes. SIP mastic handles the primary joint seal. Low-expansion foam fills small voids around splines and lumber where mastic won’t reach. Peel-and-stick SIP tape covers seams and penetrations where a mechanical bond outperforms liquid sealant.
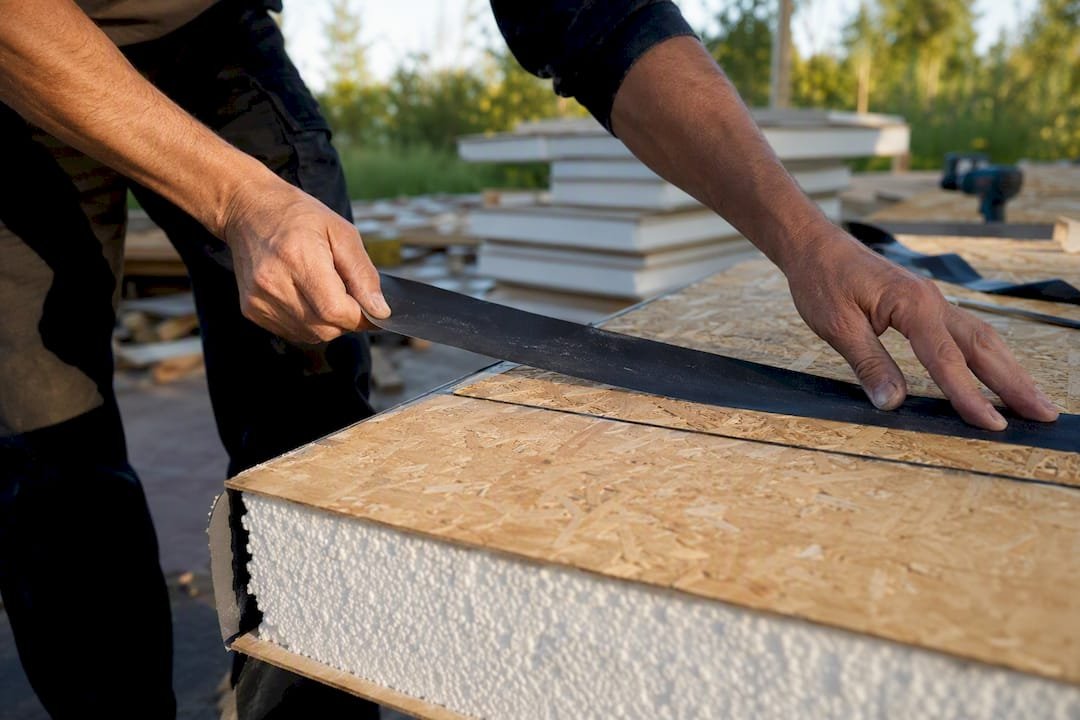
Splines and fasteners. Confirm with your kit or engineer which spline type each joint calls for: wood surface spline, block spline, or reinforcing spline. Match fasteners to the schedule, whether that’s nails, screws, or through-bolts, rather than whatever’s in the truck.
Tools. You’ll want a power caulker, ratchet straps or a come-along for snugging panels, a drill for electrical chases, a pneumatic nailer, a level, temporary bracing, and standard safety gear.
Pro Tip: A typical 1,200 sq. ft. SIP home can eat up 5,000 lineal feet of caulk. Do that by hand with a standard gun and you’ll get inconsistent bead width and gaps you won’t find until the blower door test fails. A power caulker keeps the bead unbroken and saves your forearms.
What Spline Types Handle Panel-to-Panel Joints?
Splines are the pieces that join two SIP panels edge to edge, and the type you use determines how much load that joint can carry. Common connection methods include surface splines, insulated or block splines, and reinforcing splines classified as Type R or RT, and each shows up in a different part of the wall or roof.
- Surface spline: a strip of OSB or plywood set into grooves on both panel faces. Fine for light-load walls and non-structural partitions.
- Block (box) spline: a dimensional lumber block, often used where you need extra bearing at corners or under point loads.
- Insulated spline: foam-filled to reduce the thermal bridge that solid lumber splines create.
- Type S / reinforcing spline: engineered for shear walls and load-bearing lines where the connection itself has to resist lateral force, not just hold panels together.
Surface splines are generally acceptable on non-load-bearing sections. Shear walls, roof ridges carrying snow load, and any line called out on the engineered plan need a reinforcing or engineered block spline instead. Don’t eyeball groove depth or spline thickness. Reference your kit’s own figures, or the geometry shown in the SIP engineering design guide, and confirm spline thickness matches the panel core.
Pro Tip: Bevel the spline’s leading edge slightly before you slide it into the groove. It engages the panel core cleanly instead of shaving foam or hanging up halfway.
Which Fastener Types Do SIP Connections Require?
Not every SIP joint gets the same fastener treatment, and the connection classification tells you why. Design guides sort SIP connections into three types: Type A relies on adhesive or sealant, Type C uses conventional mechanical fasteners, and Type S is a SIP-specific mechanical connection. Type A joints depend on the strength of the bond itself. Type C and Type S connections need calculated capacity or tested values, which is exactly why an engineer signs off on them for load-bearing lines.
On the ground, that means fastening through the facer into the spline at a specific spacing, or following a face-nail pattern the shop drawing lays out. Never assume standard spacing works everywhere. Model-code figures call for double top plates recessed into the SIP core with offset end joints, and where the drawing specifies a tighter nail schedule on a shear line, that schedule isn’t optional.
- Confirm fastener type, length, and spacing against the shop drawing before driving the first nail.
- Never thin out a fastener schedule on a structural line to save time.
- Double top plates get recessed, not surface mounted, unless the plan says otherwise.
Pro Tip: Keep a printed copy of the fastener schedule at each work station. Crews drift toward “close enough” spacing by the third panel unless the number is in front of them.
How Do You Seal SIP Joints Against Air and Moisture?
The answer up front: run a continuous multi-bead mastic system at every joint, and put your air barrier tape on the side of the assembly that matches your climate. Industry best practice calls for one bead of SIP mastic on each side of the spline plus a third bead down the center of the foam core, so the seal stays unbroken across the whole joint rather than relying on a single line of caulk.
- Run the two outer beads along the spline edges so they stay in contact with both the spline and the wood plate.
- Run the center bead down the panel core itself, not just across the facer.
- Apply SIP tape over seams and staple it in place before setting the next panel, overlapping tape ends by at least three inches.
- Fill any thermal void around splines or embedded lumber with low-expansion foam per the manufacturer’s directions.
Tape placement depends on where you build. Cold and mixed climates generally take the tape on the warm, interior side; hot-humid climates flip that to the exterior, so the joint has one clear direction to dry. Trapped moisture at a joint, not the panel itself, is the leading long-term durability risk in SIP construction. Never seal both sides of the same joint with a vapor-impermeable material. That traps whatever moisture gets in, and it will find the coldest surface to condense on and rot from the inside out.
Pro Tip: Walk every spline and lumber interface with a flashlight before you close it up. Thermal voids at those spots create the exact cold surface where condensation forms.

How Do Plates, Corners, and Openings Affect SIP Connections?
Top plates and corner framing are where SIP connections either stay continuous or quietly fail. A double top plate recessed into the panel core, with end joints offset rather than stacked directly over each other, keeps the wall line continuous across panel breaks. Sole plates need the same attention. Gaskets and sealant under the plate stop ground moisture and air infiltration before the first panel even goes up.
- Corners take cap plates or blocking that overlap both the spline and the panel facers, not just one or the other.
- Electrical chases get drilled or recessed before panels are set, and every penetration gets sealed after wiring is run.
- Bracing at openings and roof lines has to come from the source your kit or engineer specifies, since a window or door opening interrupts the panel’s own structural continuity.
Overlap and offset dimensions belong to your shop drawings, not to a rule of thumb picked up on a forum. If your figures show a 12 inch offset, use 12 inches.
Step-by-Step Sequence for On-Site SIP Panel Connection
A SIP wall goes up fast once the sequence is dialed in. Work out of order and you’ll be pulling panels apart to fix a missed bead.
- Measure and lay out the panel positions, then install the sill or sole plate with gaskets underneath.
- Set the first panel, install the spline into the adjoining groove, and apply your three sealant beads before pulling the next panel tight.
- Use ratchet straps or a come-along to snug the panels together, checking that the foam core makes full contact at the joint.
- Tack fasteners on both sides of the spline, then complete the full fastener schedule once alignment is confirmed.
- Apply SIP tape over the seam, overlapping ends and stapling as needed before the next panel goes on.
- On roofs, seal the ridge per the manufacturer’s sequence first. Stack effect pulls air upward through any gap at the ridge faster than anywhere else on the building.
Brace every panel during the lift, keep a spotter communicating clearly with whoever’s on the crane or come-along, and wear proper fall protection and PPE throughout.
Pro Tip: Drill spline plates to match your electrical chase locations before you set the panel, not after. Trying to drill through an installed spline usually means chipping foam and re-sealing a joint you just finished.
When Do SIP Connections Need an Engineer?
Get an engineer involved the moment a panel joint carries gravity or lateral load that isn’t already covered by your kit’s prescriptive shop drawings, or whenever local code requires stamped engineered drawings for the structure. Shear walls, long roof spans, and unusual openings are the usual triggers.
Before you call for a final inspection, walk the building and confirm:
- Every joint has a continuous, visible seal with no gaps in the mastic beads.
- Spline type and thickness match the shop drawing at each location.
- The fastener schedule was followed, not shortened.
- Plate overlaps and offsets match the engineered figures.
- Thermal voids around splines and lumber are filled.
- Every penetration is taped and sealed.
Blower door testing is a common way to verify seam performance once the shell is closed up. Keep your shop drawings and a record of your sealing pattern on hand. Inspectors and warranty claims both go faster when you can show exactly what was done at each joint.
What Are the Most Common SIP Connection Mistakes?
Most SIP problems trace back to a handful of repeat offenders, and nearly all of them show up months later as a draft, a soft spot, or a moisture stain.
Skipped or single-bead sealant. A single caulk line instead of the three-bead mastic pattern leaves gaps that air and moisture find eventually. If you’re troubleshooting a drafty wall after the fact, check the joint first. A missing center bead is the usual culprit.
Wrong spline for the load. Using a surface spline on a shear wall line because it was faster to install is a common shortcut that shows up as wall racking or fastener pull-through down the road. If a wall feels like it flexes more than it should, check whether the spline matches what the engineered plan actually called for.
Vapor barriers on both sides of a joint. Taping the interior in a cold climate, then sealing the exterior with an impermeable membrane, traps moisture with nowhere to go. Musty smells or visible staining near a joint after a season usually points here.
Fastener spacing drift. Crews tend to space out as they move down a wall, especially by panel three or four. Compare actual spacing against the schedule at random points, not just at the start.
Unfilled thermal voids. Gaps around embedded lumber or spline edges create cold spots where condensation forms inside the wall, invisible until damage shows up. A thermal bridging deep dive covers how these voids form and why they’re easy to miss during assembly.
Why the Details on the Drawing Matter More Than the Panel Itself
The foam core does the insulating. The joint does the structural and airtight work, and it only performs to spec if the spline, fasteners, and sealant pattern match what the engineer or manufacturer drew. Prefabmodularhome builds its kits around this: follow the connection packet, and rapid assembly happens without the callback six months later.
Where to Get a SIP Kit With the Connection Details Already Worked Out
Reading through fastener schedules and spline classifications is one path to a solid SIP wall. Buying a kit where those details are already engineered and packaged is the faster one. Prefabmodularhome’s DIY panel kits ship with shop drawings and a connection packet covering spline types, fastener schedules, and sealing patterns for your specific build, so you’re not reverse-engineering code figures on a Saturday morning.

That connection packet is the difference between guessing at overlap dimensions and just following the page in front of you. Homeowners building a backyard studio or office start with the modular backyard office kits, while contractors comparing panel specs for a larger build can review the full structural insulated sandwich panel lineup to match panel thickness and core type to the job. If your project includes a roof-mounted addition like solar, it’s worth checking how roof load bearing affects panel connections before you finalize your fastener schedule. Browse the current product catalog and request a quote to get your kit’s connection details in hand before you order materials.
Sources
- SIPA-BEST-7-SIP-Layout-and-Panel-Installation.pdf
- BASC – Air sealing structural insulated panel (SIP) seams
Recommended
- Structural Insulated Panels (SIPs): Your Comprehensive Guide – Modular Homes with Structural Insulated Sandwich Panels
- Modern Construction with Structural Insulated Panels – Modular Homes with Structural Insulated Sandwich Panels
- How to Assemble a Kit Home: A Field Guide – Modular Homes with Structural Insulated Sandwich Panels
- Cheep Backyard Office with Sandwich Panels – Modular Homes with Structural Insulated Sandwich Panels