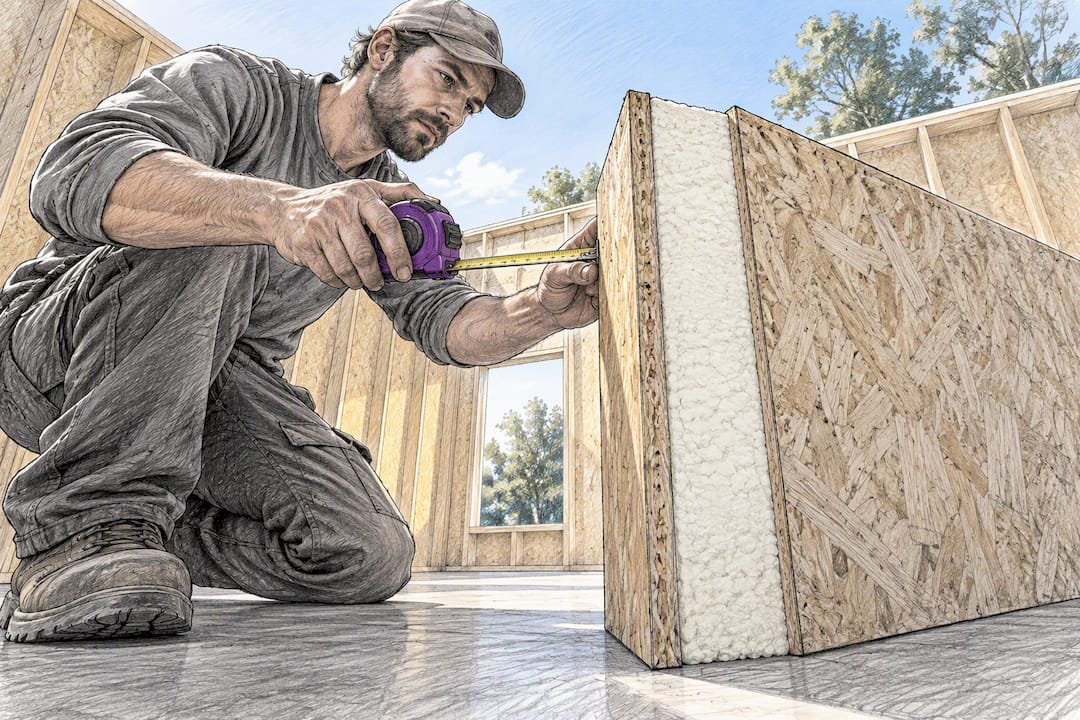
For DIY builders, “breathable wall panels” means structural insulated sandwich panels, or SIPs: factory-made panels that combine a rigid foam core with structural facings so insulation and framing arrive as one piece. They cut assembly time dramatically compared with stick framing and can trim energy use, but only if you get the joints and moisture details right, which is where most owner-builder problems start.
TL;DR:
- Prefabricated and ready-to-assemble SIP panels significantly reduce on-site installation time and errors compared to blank panels, making them ideal for DIY builders.
- Energy savings from SIP walls typically reach 12% to 14%, mainly due to continuous insulation that minimizes thermal bridges and improves envelope tightness.
- Proper sealing at joint and ridge lines is critical, as improper sealing is the primary cause of long-term moisture damage like ridge rot in SIP walls.
- Panel thickness should match climate zone requirements and desired R-value, with thicker cores offering higher insulation performance especially in colder regions.
- SIP panels contribute about 44% of a house’s embodied carbon, emphasizing the importance of careful core and panel material selection for environmental impact reduction.
Table of Contents
- What are structural insulated sandwich panels made of?
- What energy savings can you expect from SIP construction?
- How do you stop moisture and joint failure in SIP walls?
- How do you plan a smooth SIP panel installation?
- What should you check before buying SIP panels or a DIY kit?
- Which core materials affect how a panel performs?
- How do SIP walls manage moisture compared with framed walls?
- Where do SIP panels work best, and where do they struggle?
- How long do SIP panels last, and what maintenance do they need?
- Do SIP panels work with standard cladding and finishes?
- How does SIP cost compare with framed walls, and what’s the tradeoff?
- Why fast, factory-built panels are the right call for most DIYers
- Ready to build with panels designed for DIY assembly?
- Sources
- FAQ
What are structural insulated sandwich panels made of?
A structural insulated sandwich panel is a foam core, typically expanded polystyrene (EPS), extruded polystyrene (XPS) or polyisocyanurate/polyurethane (PU), laminated between two facings, usually oriented strand board (OSB) or plywood. The foam does double duty as insulation and as the web that ties the two skins together into a single structural unit, which is why SIPs can carry roof and wall loads without separate stud framing.
Department of Energy, typical SIP cores run 4 to 8 inches thick between OSB or plywood facings, and thicker cores generally mean higher R-value and better whole-wall performance. Fewer seams also matter more than most first-time buyers expect, since every joint is a potential air leak and a thermal bridge.
Panels are sold at different fabrication levels, and the choice affects both your skill requirements and your timeline:
- Blank SIPs arrive as plain panels with no cuts, so a contractor or you have to route chases and openings on site.
- Prefabricated panels come with window, door and utility openings already cut from shop drawings.
- Ready-to-assemble (RTA) kits add numbered panels, pre-installed splines and included fasteners so pieces go together in sequence.
SIPA’s technical guidance notes that prefabricated and RTA packages speed onsite work and reduce installation errors, which is the main reason most DIY kit buyers skip blank panels entirely. A closer look at structural insulated sandwich panels shows how these fabrication levels translate into actual product options.
What energy savings can you expect from SIP construction?
SIPs deliver notable energy savings compared with conventional stick-frame construction, according to the Department of Energy. That gap comes mostly from continuous insulation: a stick-framed wall loses R-value at every stud, top plate and header, while a SIP wall keeps the foam core unbroken except where fasteners and splines pass through.
That continuity has a second effect beyond the R-value number. Tighter, more consistent envelopes reduce the guesswork in HVAC sizing, since a leaky wall forces a furnace or heat pump to fight infiltration as well as conduction. Building envelope research points to continuous insulation as the main driver of that improvement, since it eliminates most of the thermal bridges a framed wall can’t avoid.
A few things shape how much of that 12% to 14% figure you’ll actually see:
- Whole-wall R-value accounts for framing, corners and fasteners, and it always runs lower than the “clear-wall” number printed on a spec sheet.
- Climate zone changes how much continuous insulation matters: cold and mixed climates see the biggest heating-load benefit, while hot-humid regions get more value from the airtightness itself.
- Panel thickness interacts with local code minimums, so a 6-inch core that clears one jurisdiction’s requirements might fall short in a colder one.
None of this means a SIP shell is a shortcut around good design. Window area, orientation and mechanical equipment still drive a large share of total energy use, but the wall assembly itself starts from a stronger baseline than a typical framed wall.
How do you stop moisture and joint failure in SIP walls?
Joints, not the foam core itself, are where SIP walls fail. Building science guidance from Joseph Lstiburek identifies improper joint and ridge sealing as the primary cause of long-term SIP moisture damage, often showing up as what installers call ridge rot: decay at the roof peak where two panels meet and water finds a path inward.
The fix follows a few consistent rules:
- Seal every panel joint with SIP tape, mastic or a gasket system, applied to manufacturer specifications rather than improvised with general construction adhesive.
- Follow the warm-side tape rule, sealing the side of the panel that faces the building’s conditioned interior to control vapor drive in the direction it actually moves.
- Prioritize the ridge joint above all others, since it carries both structural load and the highest exposure to wind-driven rain and stack-effect air movement.
- Design for drainage, deflection and drying, not just a single sealed layer, especially in wet climates where back-ventilated details give trapped moisture somewhere to go.
- Avoid stacking two vapor barriers on the same wall, which can trap moisture between them instead of letting it escape.
Larger factory-cut panels help by reducing the sheer number of joints a building has, and in high-snow regions a vented over-roof assembly gives meltwater a controlled path away from the SIP roof deck instead of pooling at a seam.
Pro Tip: Order extra SIP tape and mastic beyond the calculated linear footage. Running short mid-install is the single most common reason installers substitute an unapproved sealant at the worst possible joint.
How do you plan a smooth SIP panel installation?
Most installation problems trace back to what happened before the panels ever arrived on site. Shop drawings need to show every electrical and HVAC chase and every panel’s position number, because retrofitting a missing chase into an assembled foam core means cutting into finished insulation and undoing sealed joints. The DOE’s SIP overview is direct on this point: verify routing before fabrication, since missing chases are costly to fix later and can leave thermal voids behind.
Two broad approaches to lifting panels shape your crew and equipment needs:
- Manual handling works for smaller panels, typically 4 by 8 feet, and a crew of two to four people without rented equipment.
- Crane-assisted lifts suit larger factory panels and cut seam count, but they require rigging and a tighter installation schedule to control rental costs.
On-site sequencing matters as much as the lift method. Stage panels in the order they’ll be set, protect edges and facings from weather before assembly, and seal each joint as you go rather than leaving sealing for a final pass, since panels shift slightly once loaded and gaps are easier to catch immediately. A step-by-step installation guide walks through transport, staging and weatherproofing in more detail.
Pro Tip: Do a dry-fit walk of the first three or four panels before applying any sealant. It’s far cheaper to catch a numbering or chase mismatch on panel four than after the whole wall is up and taped.
What should you check before buying SIP panels or a DIY kit?
Comparing SIP suppliers gets easier with a short list of specifics to ask for rather than a general sense of “good quality.” Confirm these before you commit to an order:
- Core material (EPS, XPS or PU) and its rated R-value per inch.
- Fabrication level: blank, prefabricated or ready-to-assemble, and what that means for your on-site labor.
- Included sealing materials, since some kits bundle SIP tape and mastic while others expect you to source your own.
- Panel sizes and fastener schedule, which affect seam count and installation speed.
- Transport protection, especially for pre-applied finishes that can be damaged in shipping.
- Warranty terms covering both the panel material and workmanship.
- Lead time and on-site support availability if you run into an installation question.
- Recommended cladding and structural load limits for your climate and building type.
Match panel thickness to your climate zone and target whole-wall R-value rather than defaulting to whatever thickness is cheapest, since undersizing insulation in a cold climate erases much of the energy advantage SIPs are supposed to deliver. The insulated wall and roof panel specs are a useful reference point when sizing a build against these questions.
Which core materials affect how a panel performs?
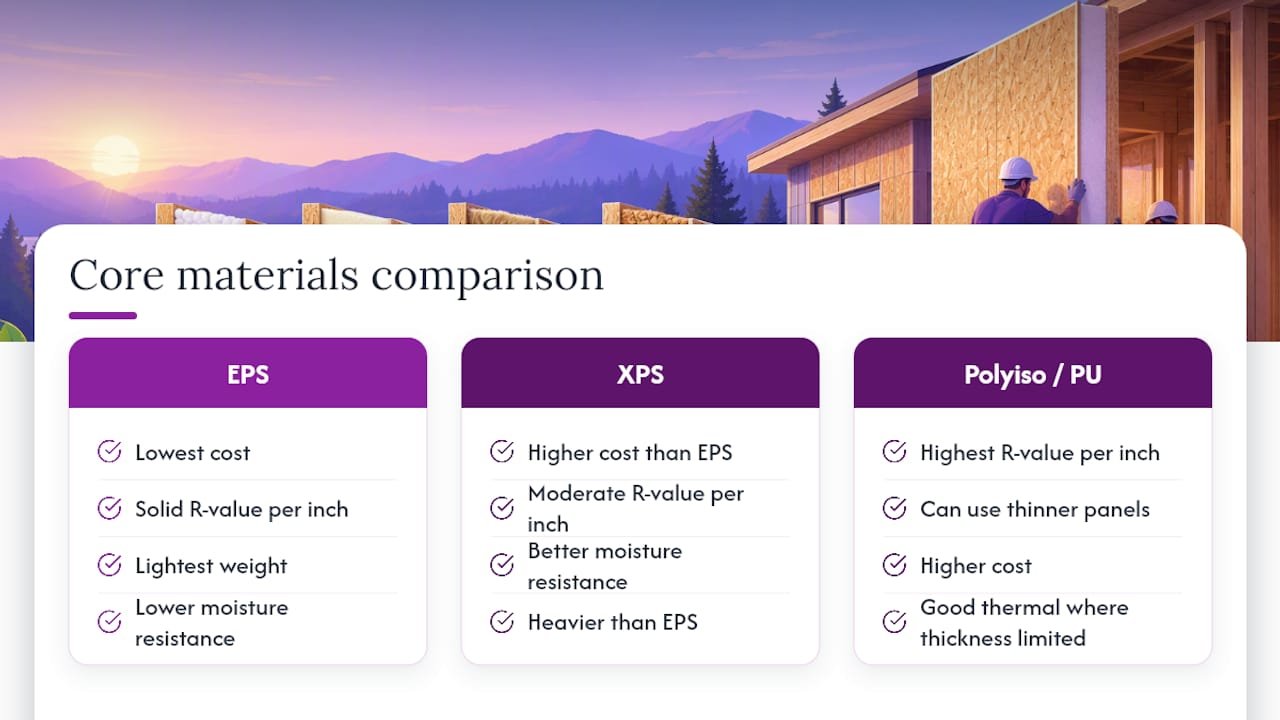
Core material is the single biggest variable in how a sandwich panel behaves, both structurally and thermally. EPS is the lightest and most common core, offering solid R-value per inch at the lowest cost. XPS costs more but resists moisture absorption better, which matters in below-grade or high-humidity applications. Polyisocyanurate and polyurethane (PU) cores deliver the highest R-value per inch of the three, letting a thinner panel hit the same thermal target as a thicker EPS one, which can matter when wall thickness is constrained.
Facing material matters too. OSB is the standard structural skin and handles most residential loads well, while plywood facings cost more but offer somewhat better moisture tolerance in demanding applications. Some manufacturers offer pre-applied interior finishes bonded directly to the facing, which saves a construction step but introduces transport risk, since a dented or scratched finish can’t easily be repaired once the panel is set.
None of these cores are “breathable” in the sense of allowing bulk vapor diffusion through the panel body. What varies between core types is R-value per inch, moisture resistance and weight, not permeability, since the sealed foam core and facings are deliberately built to resist air and moisture movement through the wall, pushing that job onto the joints and detailing instead. Choosing a core is really about balancing cost, weight and R-value per inch for your specific climate and structural span, not about picking a more or less permeable material.
How do SIP walls manage moisture compared with framed walls?
A SIP wall and a conventionally framed wall manage moisture in fundamentally different ways. A stick-framed wall typically relies on a combination of house wrap, cavity insulation and interior vapor retarders working together, with multiple layers each doing part of the job. A SIP wall consolidates most of that function into the panel skins and the sealed joints between them, which means the joint sealing quality carries more of the moisture-control burden than in framed construction.
This is why building science guidance stresses drainage, deflection and drying paths specifically for SIP assemblies rather than treating them like a framed wall with a foam core swapped in. The panel body itself is essentially airtight and moisture-resistant, so any water that gets past the exterior cladding needs an intentional path to drain and dry rather than a cavity to diffuse through, as it might in a more open framed assembly.
Getting this wrong doesn’t show up immediately. A poorly sealed joint can trap moisture for months before it becomes visible as staining, softening OSB or, in the worst ridge cases, structural decay. That lag is part of why joint sealing deserves more attention upfront than most first-time SIP buyers give it, since a mistake made during installation may not surface as a problem until well into the building’s first winter or wet season.
Where do SIP panels work best, and where do they struggle?
SIP construction tends to perform best in projects with simple, rectangular geometry, since fewer wall intersections mean fewer joints to seal and less opportunity for error. Backyard studios, home offices, small additions and modular rooms fit this profile well, which is part of why DIY kits built around SIPs concentrate on those use cases rather than complex, multi-wing custom homes.
Climate shapes the tradeoffs too. In cold and mixed climates, the continuous insulation advantage shows up directly in heating costs and comfort, since there’s no stud bay to leak heat through. In hot-humid climates, the airtightness matters more than the R-value itself, since it keeps conditioned, dehumidified air from escaping and outside moisture from finding a path in. In wet climates generally, the joint-sealing and drainage details discussed earlier become non-negotiable rather than optional refinements.
The tradeoff on the other side is design flexibility. SIP walls resist modification after the fact, since cutting a new opening into an assembled panel means cutting through both facings and the structural core, unlike a framed wall where you can reroute a stud. That makes SIPs a strong fit for projects where the layout is settled before ordering, and a weaker fit for builds expected to change significantly over time.
How long do SIP panels last, and what maintenance do they need?
A properly sealed and clad SIP wall needs relatively little routine maintenance, since the foam core and facings are protected from weather by the cladding system and don’t require the periodic treatment that some other wall materials do. The maintenance burden that does exist concentrates almost entirely on the building envelope’s outer layers and the joints, not the panel core itself.
Inspecting cladding fasteners, caulking around windows and doors and checking for any staining or soft spots near panel joints on a regular schedule catches most problems while they’re still minor. The ridge and joint areas deserve particular attention since that’s where sealing failures concentrate, and a small gap caught early is a caulk job, while the same gap ignored for a season or two can mean replacing damaged OSB.
Lifespan expectations depend heavily on installation quality rather than the panel material’s inherent durability. A well-sealed SIP wall with properly detailed drainage can last as long as the building’s other structural elements, while a poorly sealed one can develop moisture damage within a few years regardless of how good the foam core itself is. This is a big part of why buyers should weigh installation support and included sealing materials as heavily as core R-value when comparing kits.
Do SIP panels work with standard cladding and finishes?
SIP panels are generally compatible with most conventional cladding systems, including siding, stucco, brick veneer and panelized exterior finishes, since the OSB or plywood facing gives fasteners the same kind of nailing surface a framed wall’s sheathing would. The compatibility question that matters more is how the cladding interacts with moisture management rather than whether it can physically attach.
SIPA’s guidance on finish materials recommends a back-ventilated cladding or furring strips in climates with more than 20 inches of annual rainfall, or wherever the chosen cladding is a reservoir material that can hold moisture against the wall. That air gap gives any water that gets behind the cladding a path to dry out instead of sitting against the panel facing.
Interior finishes carry their own consideration. Some manufacturers offer pre-applied interior finishes bonded to the panel facing at the factory, which saves a construction step but risks transport damage, since a dinged finish on an assembled panel is hard to repair invisibly. Many manufacturers instead recommend installing interior finishes after the panels are set, or using furring strips to separate the finish layer from the structural splines, which also simplifies running wiring or making later cosmetic changes.
How does SIP cost compare with framed walls, and what’s the tradeoff?
SIP walls typically carry a higher material cost per square foot than conventional stick framing, largely because you’re buying integrated insulation and structure as a single factory product rather than assembling cheaper individual components on site. What SIPs typically claw back is labor time and callback risk: fewer trades, faster envelope closure and a tighter building from day one.
Fabrication level changes that math directly. Blank SIPs cost less than prefabricated or RTA packages, but they shift labor and skill requirements onto the buyer or their contractor for cutting openings and chases, which can erase the savings if it requires hiring specialized help anyway. SIPA’s guidance frames this explicitly as a tradeoff between upfront cost and the speed and error reduction that a more finished panel delivers.
There’s a carbon cost worth weighing alongside the dollar cost. A peer-reviewed life-cycle assessment of a modular SIP house found the SIP wall and roof panels together accounted for 44% of the house’s total embodied carbon, with wall panels contributing about 19% and roof panels about 25%, against a whole-of-life embodied carbon figure of 347.15 kilograms of CO2 equivalent per square meter for the studied house. That doesn’t make SIPs a poor environmental choice overall, since the same study confirms the modular construction advantages, but it does mean the panels themselves are the biggest lever if you’re trying to reduce a build’s material footprint, more than fixtures or finishes.
Why fast, factory-built panels are the right call for most DIYers
Sandwich panels solve the problem that stops most first-time builders: stick framing demands skills, tools and time most people don’t have. A factory panel arrives with the insulation and structure already integrated, which is the whole reason a DIY kit can turn a home office or backyard studio project into days of work instead of months. For most owner-builders, a prefabricated or ready-to-assemble package is the right starting point rather than blank panels, since it trades a small cost premium for meaningfully fewer chances to make an expensive mistake.
— Kian
Ready to build with panels designed for DIY assembly?
Kits built around structural insulated sandwich panels let someone with no framing experience get a sealed, insulated shell up fast. The product line includes DIY KIT Homes and related kits alongside standalone insulated wall and roof panels for anyone adding onto an existing structure.
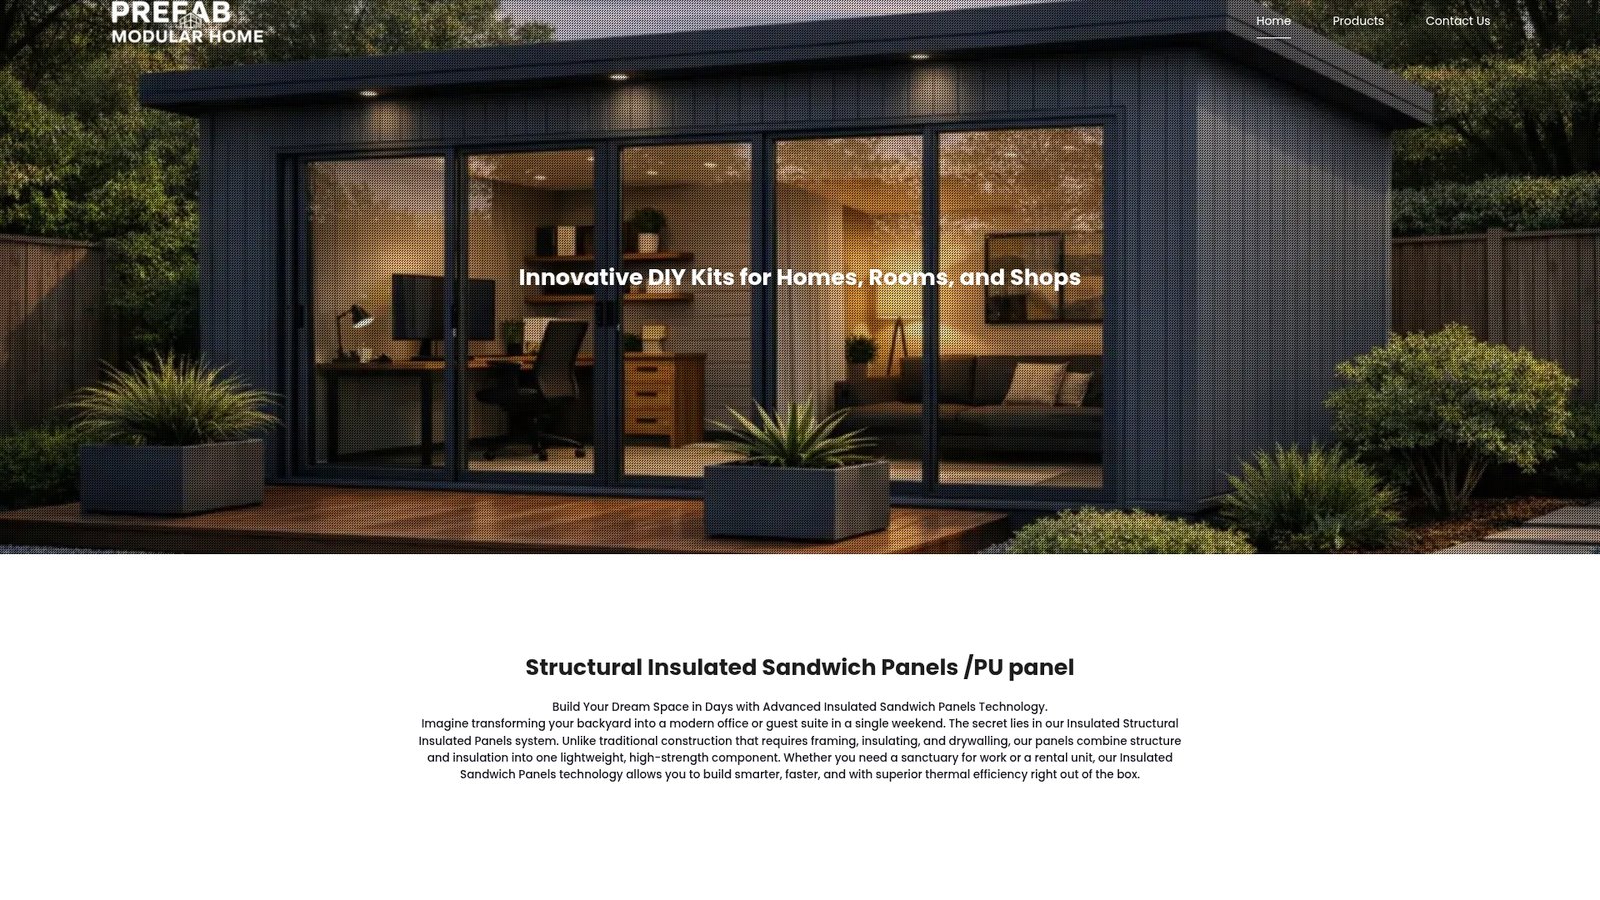
If you’re planning a build, request shop drawings before you order, ask about a sample panel to check facing and core quality firsthand, and review the installation guide so you know what tools and crew size to line up. Start by browsing the full product catalog to find the kit that fits your project.
Sources
- U.S. Department of Energy — Structural Insulated Panels (SIPs)
- BuildingScience — BSI‑148: Structural Insulated Panel Systems (SIPs)
- MDPI — LCA of SIP modular houses (2025)
FAQ
What are breathable wall panels made of?
In DIY prefab construction, breathable wall panels are structural insulated sandwich panels made from a foam core, EPS, XPS or PU, laminated between OSB or plywood facings. The Department of Energy notes cores typically run 4 to 8 inches thick, which sets both the R-value and the panel’s structural capacity.
How much energy do SIP panels actually save?
SIP construction delivers roughly 12% to 14% energy savings compared with conventional stick-frame building, according to the Department of Energy. That comes mainly from continuous insulation, which avoids the thermal bridging that studs and headers create in a framed wall.
What causes moisture problems in SIP walls?
Improper sealing at panel joints and ridge lines is the leading cause of long-term SIP moisture damage, according to building science research. Proper drainage, deflection and drying details, along with correctly applied SIP tape and mastic, prevent the issue commonly known as ridge rot.
Should I buy blank, prefabricated or ready-to-assemble panels?
Ready-to-assemble and prefabricated panels speed onsite work and reduce installation errors compared with blank SIPs, per SIPA’s technical guidance. Most first-time DIY builders get better results from a prefabricated or RTA kit, even at a higher upfront cost, since it removes most of the cutting and fitting risk.
Are SIP wall and roof panels a big source of embodied carbon?
Yes: a peer-reviewed life-cycle study of a modular SIP house found wall and roof panels together made up 44% of the home’s total embodied carbon. That makes core and panel selection one of the more meaningful choices for reducing a build’s overall material footprint.