For most homeowners, a modular room addition is a fast and less disruptive way to add real square footage without gutting your budget or living on a construction site for a prolonged period. The core case is straightforward: industry data from the Modular Building Institute shows that modular builds typically run significantly less expensive than comparable stick-built work, and off-site fabrication can cut total project timelines considerably in many regional examples. That’s not a marginal difference.
Three situations where a modular addition usually makes the most sense:
- Limited yard but a clear access path. A crane can set a module in a tight side yard where a full framing crew couldn’t work for months.
- You need to stay in the home. Most of the build happens at a factory, so your daily life stays intact until delivery day.
- ADU or rental income goal. A self-contained modular unit can be permitted as an accessory dwelling unit in many jurisdictions, generating income faster than stick-built timelines allow.
Your immediate next step: take site photos (driveway width, overhead lines, the wall where the module attaches), pull your property survey, and ask every supplier these three questions before you go further: What does your foundation scope include? Who coordinates the permits? What’s your crane and delivery plan?
Key Takeaways
A modular room addition is a fast and low-disruption path to new square footage for many U.S. homeowners, with total costs often within a typical industry range per square foot and timelines significantly shorter than stick-built alternatives.
| Point | Details |
|---|---|
| Cost range | Modular additions generally have a price range commonly cited in the industry; budget an appropriate contingency for site surprises. |
| Timeline advantage | Parallel factory and site-prep tracks cut total schedules significantly versus sequential stick-built construction. |
| Permit first | Start the permit process before finalizing finishes; ADU permits in some jurisdictions take 3–4 months. |
| Supplier screening | Ask every supplier for stamped engineering drawings, a written crane plan, and three local references. |
| Prefabmodularhome kits | DIY sandwich panel kits from Prefabmodularhome offer a fast, no-special-skills path to a finished room or backyard office. |
Table of Contents
- What exactly is a modular room addition?
- Common types of modular room additions
- Can a modular addition attach to your existing house?
- How a modular room addition project actually progresses
- What timeline should you realistically expect?
- What does a modular room addition actually cost?
- How to make the addition look and feel like part of your home
- Permits, zoning, and inspections: what to check first
- Benefits and tradeoffs: the honest comparison
- How to choose a supplier and what to ask them
- What to look for in project photos and galleries
- Prefabmodularhome: the DIY kit option worth considering
- What I’ve learned helping homeowners choose modular additions
- Prefabmodularhome gets you to a finished room faster
- Sources
What exactly is a modular room addition?
A modular room addition is a fully enclosed, factory-built module that gets transported to your property and permanently attached to your existing house. By the time it arrives, walls, roof, windows, insulation, and often interior finishes are already complete. On-site work is mostly foundation prep, structural tie-in, and utility connections.
That’s different from two alternatives homeowners often confuse it with:
- Prefab panel kits (like structural insulated sandwich panel systems) ship flat components that you or a contractor assemble on-site. More on-site labor, more flexibility in shape and size, lower shipping cost per square foot.
- Stick-built additions are framed entirely on your property from raw lumber. Maximum design freedom, but every trade shows up sequentially, weather is a constant risk, and your home is open to the elements during framing.
Industry coverage puts the distinction clearly: the difference between prefab and modular comes down to degree of factory completion. A modular unit arrives nearly finished; a semi-prefab panel system requires substantially more on-site work.
When to prefer each:
- Modular unit: tight timeline, limited on-site labor availability, or a self-contained ADU.
- Prefab kit: irregular footprint, budget-sensitive project, or a homeowner who wants more hands-on control.
- Stick-built: complex roofline integration, highly custom design, or a site with no crane access.
Common types of modular room additions
The format you choose shapes everything downstream: foundation type, utility routing, permit category, and cost. Here are the most common configurations:
Single-room bump-out. A one-room module added to the side or rear of the house. Typical uses: extra bedroom, home office, playroom. Usually the simplest foundation and roofline tie-in scenario.
Side addition. A larger module running along one exterior wall, sometimes replacing an existing window or door opening. Works well for a primary suite expansion or a larger living area.
Second-story module. A module set on top of an existing single-story structure. Requires a structural engineer to confirm the existing walls and foundation can carry the load. More complex, but avoids consuming yard space entirely.
ADU or backyard unit. A detached or semi-attached module functioning as a separate dwelling. Modular cottages marketed for aging-in-place often fall here, frequently including barrier-free bathrooms and wider circulation paths. Rental income potential makes this the fastest-growing category.
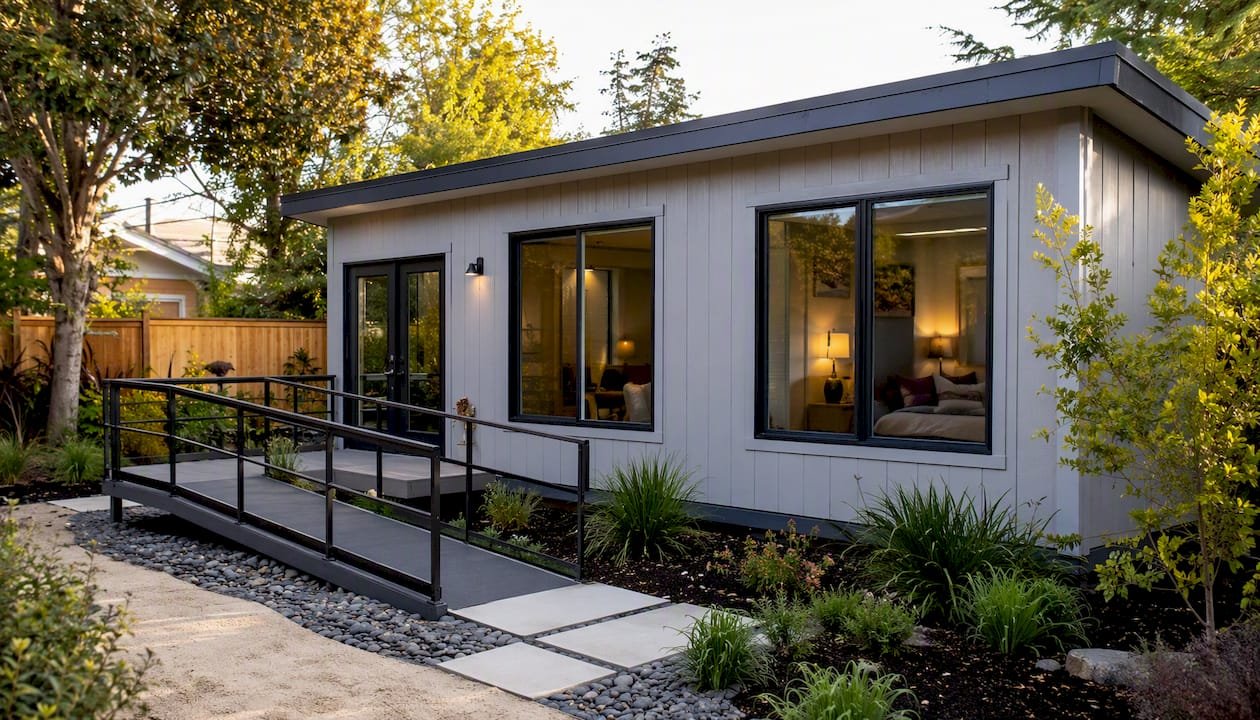
Sunroom or garden studio. A lighter-use module, sometimes with more glazing and less insulation than a full living space. A modular backyard office is a close cousin: fully insulated, wired for power, and usable year-round.
Some manufacturers now ship configurable pods ranging from a room-only shell to a fully self-contained unit with bathroom and kitchen, giving homeowners a clear spectrum from simple to ADU-ready.
When reviewing vendor galleries, look for before-and-after photos that show the roofline tie-in and foundation interface, not just interior shots. Those two details reveal more about build quality than any finished living-room photo.
Can a modular addition attach to your existing house?
Early screening saves weeks. Run through this checklist before you call a single supplier.
Site access:
- Driveway width of at least 14 feet for delivery trucks; wider for crane staging.
- Overhead clearance: check for power lines, tree canopy, and roof overhangs along the delivery path.
- Neighbor setbacks: most jurisdictions require 5–10 feet minimum; ADUs often have their own rules.
- Crane pad: a firm, level surface roughly 20 x 20 feet near the set location.
Structural:
- Existing wall framing must be able to accept a new opening or attachment point; older balloon-frame homes sometimes need reinforcement.
- Floor height must match or be bridgeable with a small step; mismatched heights add cost.
- Roofline tie-in: shed roofs and simple gable ends are easiest; complex hip roofs require more custom work.
Utilities:
- Plumbing stack location relative to the addition footprint (adding a bathroom far from the existing stack adds cost).
- Electrical service capacity: a 200-amp panel handles most additions; a 100-amp panel may need an upgrade.
- HVAC: can the existing system extend, or does the addition need its own mini-split?
Quick pass/fail:
- Pass: clear crane access, simple roofline, 200-amp panel, addition within 20 feet of existing plumbing.
- Likely needs engineering review: second-story add, complex roofline, older electrical service, tight urban lot.
Pro Tip: Before your first supplier call, photograph the driveway from the street, the exterior wall where the module attaches (with a tape measure visible), the electrical panel label, and the nearest plumbing cleanout. Those four photos cut the back-and-forth on preliminary quotes by half.
How a modular room addition project actually progresses
The sequence below applies to a typical attached modular addition. Responsibilities shift depending on whether you hire a general contractor or manage trades yourself.
-
Design and configuration. You work with the manufacturer on floor plan, window placement, ceiling height, and finish selections. Homeowner decides; manufacturer produces drawings.
-
Permit application. Manufacturer provides engineered drawings and factory QA documentation. Homeowner or GC submits to the local building department. This stage often takes 4–12 weeks depending on jurisdiction.
-
Site prep and foundation. Local contractor pours the slab, stem wall, or sets piers while the module is being built at the factory. These two tracks run simultaneously, which is where the time savings come from.
-
Factory build. The module is framed, insulated, sheathed, roofed, and finished inside a controlled environment. No weather delays, no waiting on sequential trades.
-
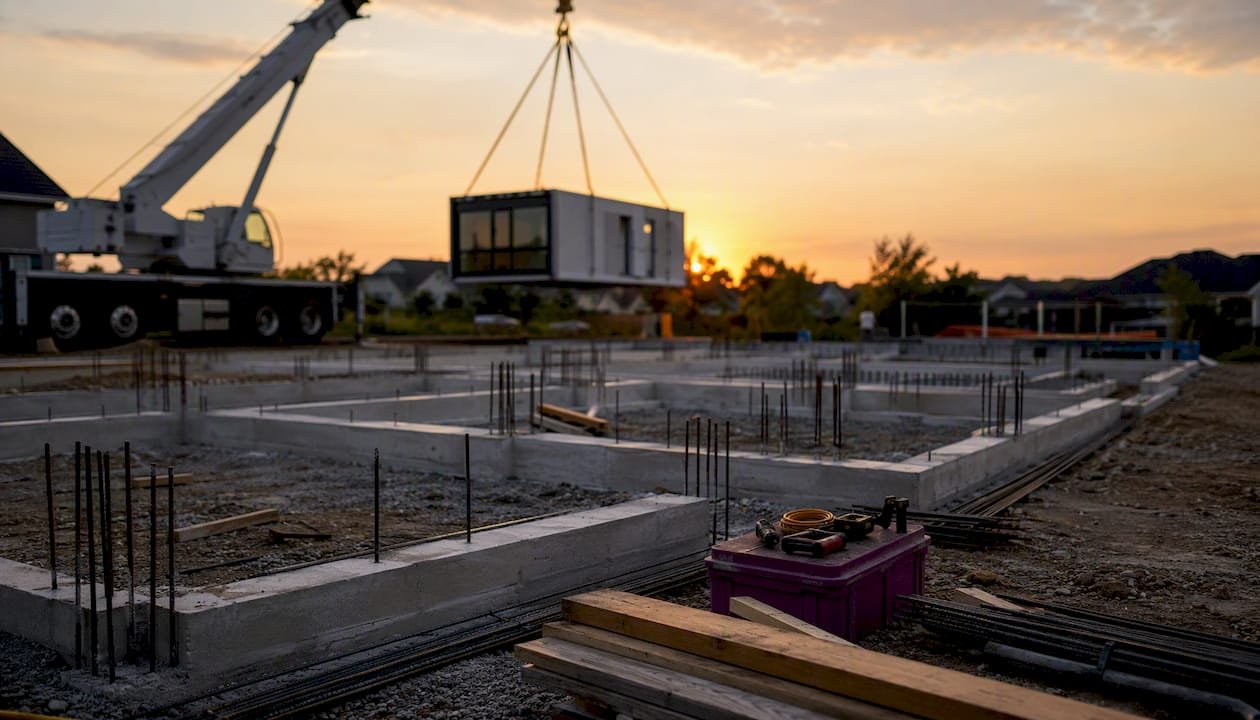
Delivery and set. A flatbed delivers the module; a crane lifts it onto the foundation. This is typically a one-day operation. The structural connection to the existing house happens the same day or the next.
-
Finish and inspection. On-site work: utility tie-ins (electrical, plumbing, HVAC), interior trim at the joint, exterior cladding match, and final inspections. This phase runs 2–6 weeks depending on scope.
Decisions to lock in before factory build starts: exterior cladding material, window style, interior finish level, HVAC strategy (mini-split vs. extension), and whether the bathroom rough-in is included.
A useful coordination tool: platforms like Buildertrend let homeowners track delivery schedules, subcontractor milestones, and inspection dates in one place, which matters when you’re managing a local contractor alongside a factory timeline.
Milestone meetings to schedule: design review sign-off, pre-delivery site check (one week before delivery), and a post-set walkthrough before finish trades begin.
What timeline should you realistically expect?
The short answer: 3–5 months total for a straightforward attached addition, versus 6–12 months for comparable stick-built work. Here’s how the schedule breaks down.
| Phase | Typical Duration | Notes |
|---|---|---|
| Design and contract | 2–4 weeks | Longer if custom engineering is needed |
| Permit review | 4–12 weeks | Biggest variable; ADUs often take longer |
| Foundation / site prep | 2–4 weeks | Runs parallel to factory build |
| Factory fabrication | 6–12 weeks | Depends on manufacturer backlog |
| Delivery and set | 1–2 days | Weather-dependent |
| Finish work and inspections | 2–6 weeks | Scope-dependent |
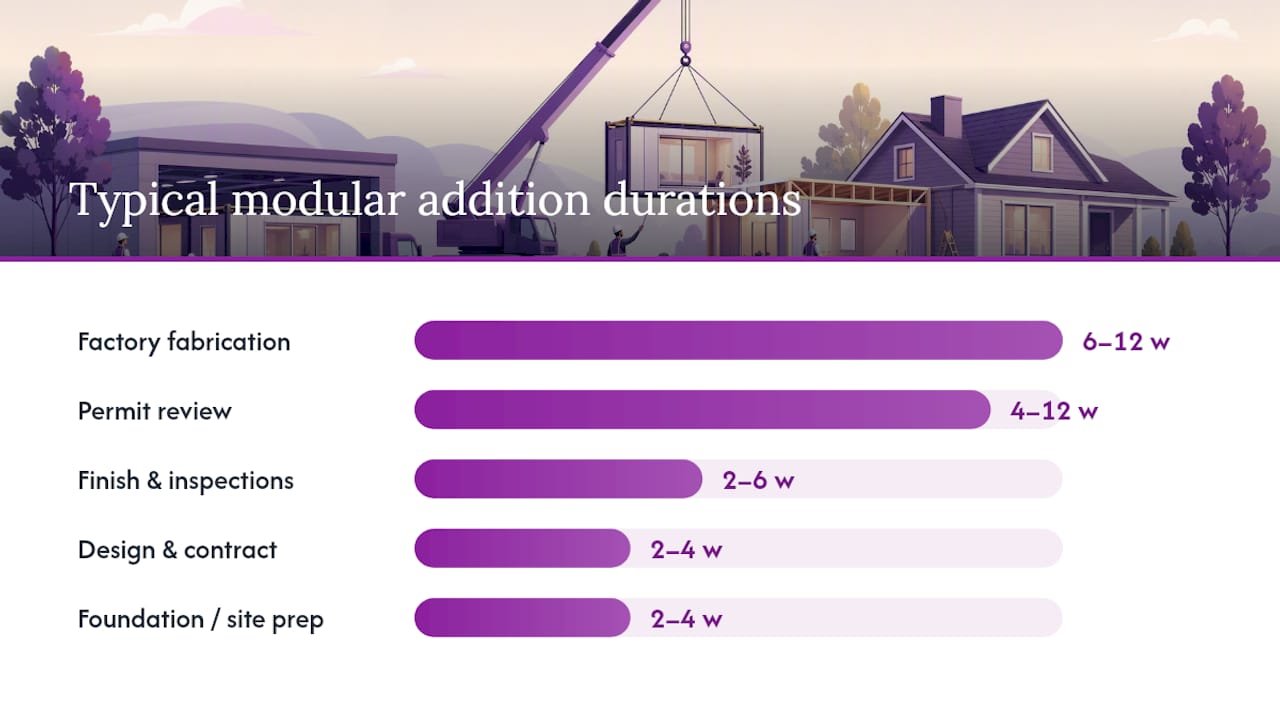
The parallel-track nature of modular construction (foundation and factory build happening simultaneously) is where the 50%–70% timeline reduction cited by the Modular Building Institute comes from. Stick-built projects run sequentially: permits, then foundation, then framing, then each trade in turn.
Common schedule risks to plan for:
- Permitting delays. ADU permits in some California counties routinely take 3–4 months. Check your jurisdiction’s current backlog before committing to a move-in date.
- Delivery logistics. Wide-load permits for oversized modules can add 1–2 weeks in some states.
- Weather on set day. Crane operations are wind-sensitive; have a one-week buffer around your target delivery date.
Some prefab kit systems advertise installation in as few as five days once the foundation is ready. That’s realistic for a panel-kit backyard studio; a fully attached modular addition with utility tie-ins takes longer regardless of how fast the module itself goes up.
What does a modular room addition actually cost?
Design and industry sources commonly cite $100–$200 per square foot for prefab and modular room additions, with finishes and site complexity pushing the number in either direction. A 300-square-foot bedroom addition might run $30,000–$60,000 all-in; a fully finished ADU with bathroom and kitchen can reach $80,000–$150,000 or more depending on location.
Main cost drivers to watch:
- Foundation type. A full stem wall costs significantly more than a simple slab or pier system.
- Finish level. Builder-grade interiors versus custom cabinetry and tile can double the module cost.
- MEP complexity. Adding a bathroom far from the existing plumbing stack, or upgrading an undersized electrical panel, adds cost fast.
- Crane and delivery. Rural sites or locations requiring special routing add to logistics costs.
- Site remediation. Grading, tree removal, or retaining walls are easy to miss in early estimates.
Financing options include home equity lines of credit (HELOCs), cash-out refinancing, and construction-to-permanent loans; most lenders treat a modular addition the same as any permitted home improvement for underwriting purposes.
Budget checklist for supplier quotes: ask each supplier to itemize foundation scope, delivery and crane, finish level, MEP rough-in (yes/no), permit support, and warranty terms. Without those line items, you can’t compare bids.
How to make the addition look and feel like part of your home
The biggest visual giveaway of a poorly executed modular addition is the roofline. A module that arrives with a flat or shed roof when the existing house has a 6:12 gable pitch will always look bolted on. Specify the roof pitch and overhang depth to match your existing eaves at the design stage, not after delivery.
Foundation options:
- Slab on grade: lowest cost, works for single-story additions on flat lots.
- Stem wall (crawl space): matches existing floor height more easily; better for flood-prone areas.
- Helical piers: fast to install, minimal excavation, good for tight access or unstable soil.
Exterior integration:
- Match siding material and profile exactly. If your house has 4-inch lap cedar, spec the same on the module. Manufacturers can pre-install cladding at the factory.
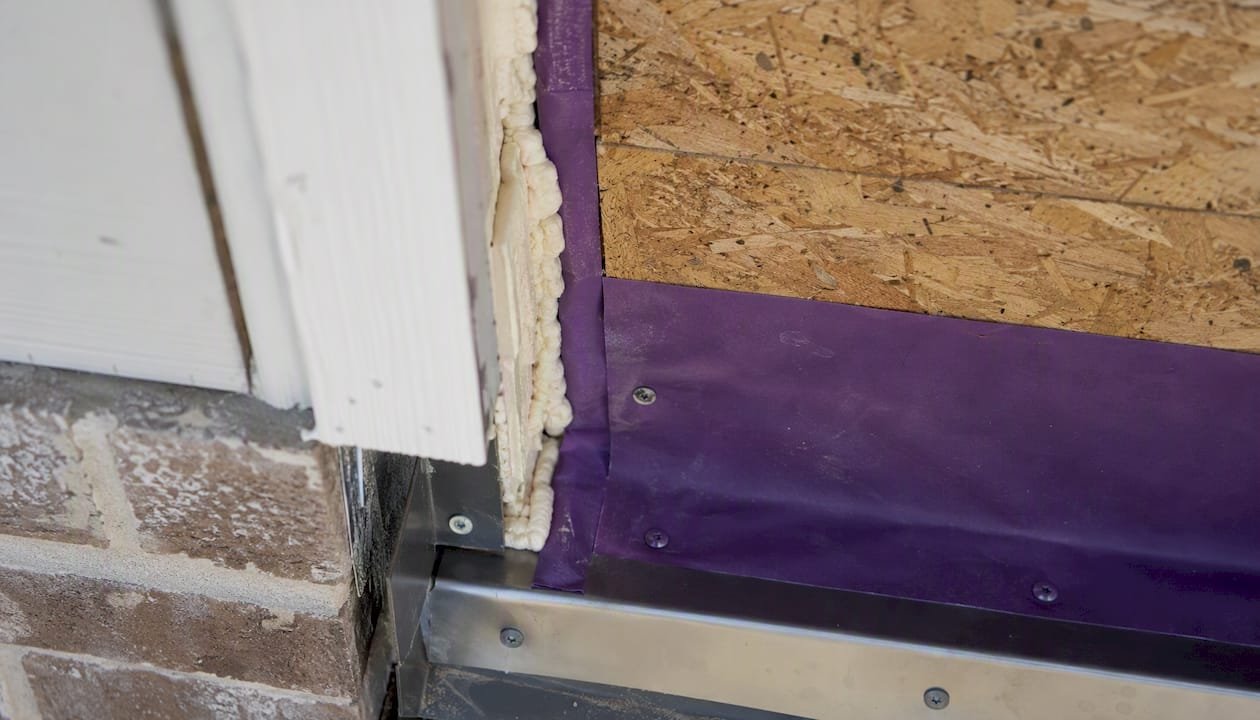
- Gutters and downspouts should drain away from the connection joint. A shared valley between the existing roof and the module roof is a common leak point if not detailed correctly.
- Window style and trim profile matter more than most homeowners expect. Bi-fold windows work well in sunroom and studio additions where you want a strong indoor-outdoor connection.
Utility connections:
- Electrical: the module arrives with a sub-panel; your electrician connects it to the main panel and runs any exterior circuits.
- Plumbing: a licensed plumber ties the module’s supply and drain lines into the existing system. Locate the tie-in point before finalizing the module position.
- HVAC: a ductless mini-split is the most common solution for modular additions because it requires no duct penetrations through the existing structure.
Structural insulated sandwich panels (SIPs) combine the structural layer and insulation in a single panel, which simplifies finish work and delivers strong thermal performance. They’re particularly effective in modular extensions because the factory can pre-cut and pre-fit panels precisely, reducing on-site gaps.
Pro Tip: When joining a new module to an older home, the air-sealing detail at the connection joint matters more than the insulation R-value. A well-insulated module with a leaky joint will underperform a lower-R module that’s properly sealed. Specify a continuous air barrier at the connection in your contract.
Permits, zoning, and inspections: what to check first
Permitting is where modular projects most often stall. Get ahead of it.
Permits typically required:
- Building permit (structural drawings, energy compliance).
- Electrical permit (sub-panel connection, new circuits).
- Plumbing permit (if adding a bathroom or wet bar).
- Mechanical permit (HVAC equipment and ductwork).
- Conditional-use permit or ADU permit if the addition functions as a separate dwelling.
Zoning checks to make before you design:
- Setback requirements from property lines (front, side, rear).
- Maximum lot coverage percentage (structure footprint as a share of lot area).
- Height limits, especially for second-story modules.
- ADU rules: many jurisdictions now allow ADUs by right under state law, but local rules on size, owner-occupancy, and parking still vary.
Inspection milestones to expect:
- Foundation inspection before the module is set.
- Framing and structural connection inspection after set.
- Rough MEP inspections before walls are closed.
- Final inspection and certificate of occupancy.
Good modular suppliers provide a full engineering package (stamped drawings, energy calculations, factory QA documentation) that local building departments can review without requesting additional engineering. That package is one of the clearest signals of a professional supplier.
Who to call first: contact the building department’s permit counter and ask for the residential additions checklist. Ask specifically whether modular or factory-built additions require any additional state-level certification in your jurisdiction (some states have a separate modular home approval process through the state building authority).
Benefits and tradeoffs: the honest comparison
Why modular additions work well:
- Speed. Parallel factory and site-prep tracks cut total schedules significantly versus sequential stick-built timelines.
- Reduced on-site disruption. Most of the construction noise, dust, and trade traffic happens at a factory, not your driveway.
- Factory quality control. Climate-controlled assembly means consistent framing, no rain-soaked lumber, and documented inspections at each stage.
- Predictable scheduling. Once the factory slot is confirmed, the delivery date is reliable in a way that sequential on-site trades rarely are.
Common tradeoffs:
- Design limits. Standard module widths (typically 12–16 feet) constrain floor plans. Very irregular shapes or complex roofline integrations are harder to execute as a single factory module.
- Delivery logistics. Rural properties, narrow streets, or lots with overhead obstructions can make crane access expensive or impossible.
- Attachment complexity. Matching an existing hip roof or a multi-gable facade takes more custom engineering than a simple gable or shed roof tie-in.
- Upfront commitment. You finalize finishes before the module is built; changes after factory start are costly.
When stick-built is the better call: highly complex rooflines, sites with no crane access, or projects where the design changes frequently during construction. Stick-built also makes sense when a homeowner wants to phase work over several years and can’t commit to a full module scope upfront.
How to choose a supplier and what to ask them
A modular addition is a significant purchase. The supplier interview is where you separate professional operations from undercapitalized ones.
Decision criteria:
- Build method and factory location (domestic vs. overseas fabrication affects lead times and warranty enforcement).
- Warranty terms: what’s covered, for how long, and who handles warranty claims locally.
- Factory QA documentation: do they provide stamped engineering and inspection records?
- Transport experience: have they delivered to your county or state before?
- Local contractor network: do they have established relationships with foundation and MEP contractors in your area, or do you source those yourself?
Exact questions to ask on the first call:
- What does your quote include for foundation work?
- Who pulls the permits, and do you provide stamped engineering drawings?
- What’s your current factory lead time?
- What’s your crane and delivery plan for my site?
- What warranty do you offer, and who handles service calls?
- Can you provide three local references from completed projects in my state?
Red flags:
- No local references or references they can’t connect you with directly.
- Vague delivery plan (“we’ll figure it out when the time comes”).
- No engineering package or expectation that you’ll hire your own engineer separately.
- Quotes that don’t itemize foundation, delivery, and MEP separately.
Trust signals in a bid: itemized line items, a named project manager, a written delivery and crane plan, and a warranty document you can read before signing.
What to look for in project photos and galleries
A supplier’s gallery is a screening tool, not a marketing brochure. Here’s how to read it.
Photo angles that reveal quality:
- Roofline tie-in from outside: does the ridge align? Is the flashing detailed correctly?
- Foundation interface: is there a clean, finished transition between the module and the ground, or visible gaps?
- Interior join line: where the module meets the existing house wall, is the transition finished cleanly or covered with a wide trim board hiding a gap?
Red flags in photos:
- Mismatched siding color or profile between the addition and the original house.
- Temporary bracing or props visible in “finished” photos.
- Only interior photos with no exterior shots showing the connection.
- No photos of the foundation or the structural tie-in.
What captions should tell you: project scope (sq ft, type), whether the homeowner stayed in place during construction, and approximate timeline. Suppliers who include that detail are confident in their process. Those who don’t often have something to hide about schedule or disruption.
Ask suppliers directly for unedited on-site photos from delivery day and the week after set. Those photos show real conditions. Also ask for two or three homeowner references you can call, not email. A five-minute phone call with a past client tells you more than a gallery ever will. You can see prefab addition results from completed projects to understand what realistic outcomes look like.
Prefabmodularhome: the DIY kit option worth considering
Prefabmodularhome’s DIY modular room and backyard office kits use structural insulated sandwich panels that combine structure and insulation in a single component. No special tools or construction skills are required to assemble them, which makes them a realistic option for homeowners who want to manage more of the project themselves and keep labor costs down.
Best-fit use cases for the kits:
- Backyard office or studio where a detached structure is permitted.
- Spare-room addition where the footprint is straightforward and crane access is available.
- ADU or granny flat on a lot where a detached unit is allowed by zoning.
- A second-story module where the structural assessment confirms the existing home can carry the load.
What the kit includes and what you still hire locally:
- Kit includes: pre-cut sandwich panels, structural components, and assembly documentation.
- You hire locally: foundation contractor, crane operator for delivery and set, licensed electrician and plumber for final MEP tie-ins.
A prefab spare room addition through Prefabmodularhome can be delivered and finished in a fraction of the time a stick-built project would take, with most of the structural work completed before the panels arrive on your lot.
To get a fast, accurate quote, send: site photos (driveway, attachment wall, overhead clearances), your property survey or lot dimensions, desired square footage and use (bedroom, office, ADU), and your preferred finish level. The more specific your inputs, the faster the quote turnaround.
What I’ve learned helping homeowners choose modular additions
The homeowners who get the best outcomes from modular additions share one habit: they do the site screening before they fall in love with a floor plan. The projects that run into trouble almost always start with a homeowner who picked a module size and finish level, then discovered the crane couldn’t reach the set location or the electrical panel needed a full upgrade. Those surprises aren’t catastrophic, but they add $5,000–$15,000 and several weeks to a project that was supposed to be fast.
The second consistent finding: permit timeline is the real schedule driver, not factory lead time. A manufacturer can build your module in eight weeks. If your jurisdiction takes 14 weeks to review ADU permits, the module sits in a warehouse. Start the permit process as early as possible, even before you’ve finalized every finish detail.
On scope creep: modular additions are particularly vulnerable because the factory-build process creates a natural “while we’re at it” moment. A bathroom rough-in sounds cheap at the design stage. By the time you add tile, fixtures, and a plumber for the tie-in, it’s $12,000–$20,000 more. Decide your scope before the factory slot is confirmed, put it in writing, and hold the line.
Pro Tip: Book your crane operator and foundation contractor before the factory confirms your build slot. In most markets, good foundation crews and crane operators are booked 4–6 weeks out. If you wait until the factory gives you a delivery date, you may push your finish date by a month just waiting on trades.
Prefabmodularhome gets you to a finished room faster
Skip the six-month framing timeline. Prefabmodularhome’s sandwich panel kits ship pre-cut and ready to assemble, so you’re not waiting on sequential trades or weather windows. The panels handle structure and insulation in one step, which cuts both labor time and long-term energy costs.
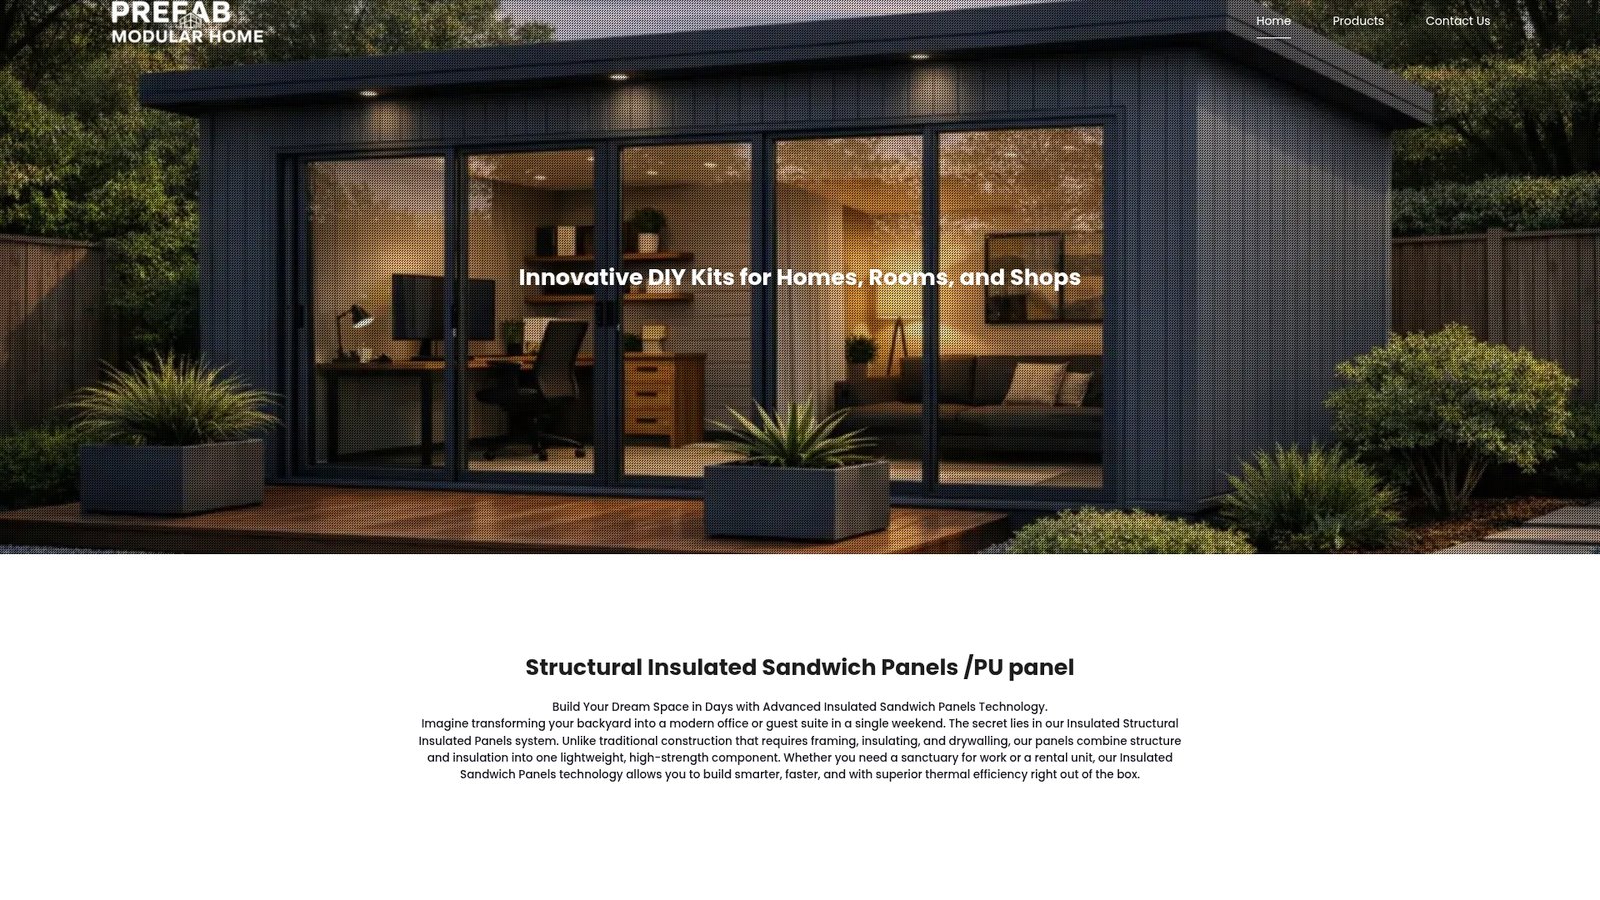
Whether you’re adding a backyard office, a spare bedroom, or a rental ADU, the process starts with a quote. Send Prefabmodularhome your site photos, lot dimensions, and desired square footage, and you’ll get a specific kit recommendation rather than a generic price range. For homeowners who want a purpose-built, ready-to-order option, the modular backyard office kit is a strong starting point. Browse the full product catalog at Prefabmodularhome’s products page and submit an inquiry to get your quote started today.
Sources
A short list of authoritative U.S.-focused resources for homeowners who want to verify timelines, costs, and technical details before committing to a project.
Recommended
- custom-modular-room-guide – Modular Homes with Structural Insulated Sandwich Panels
- How a Prefab Spare Room Addition Can Work – Modular Homes with Structural Insulated Sandwich Panels
- Modular Home Extensions That Fit Real Life – Modular Homes with Structural Insulated Sandwich Panels
- Modular Home Permits: What Your Project Needs – Modular Homes with Structural Insulated Sandwich Panels