Most SIP roofs are built between 3:12 and 12:12. That is the range the Structural Insulated Panel Association (SIPA) uses for its prescriptive guidance, and anything outside it needs project-specific engineering and sign-off from the panel manufacturer. Below 3:12 you can still build a good SIP roof, but the roofing, the joint sealing and the panel span all get less forgiving. This guide covers the pitch range, overhangs, low-slope and flat designs, and the checks that decide whether the roof lasts.
TL;DR
- Plan on 3:12 to 12:12 for a standard SIP roof. SIPA’s prescriptive method treats that as the normal residential range, and pitches outside it need engineering verification and manufacturer approval.
- Low-slope SIP roofs (1:12 to 3:12) work, but the roofing product must be rated for that slope and the flashing details matter far more.
- Overhangs depend on panel thickness, orientation, splines and load. Use the manufacturer’s cantilever table, not a rule of thumb.
- A “flat” SIP roof is really a low-slope roof. It loses span capacity, so expect more beams or thicker panels.
- On any pitch, rot is a joint-sealing problem, not a pitch problem. Airtight interior joints and no double vapor barrier matter most.
Table of Contents
- What pitch means on a SIP roof
- The standard range: 3:12 to 12:12
- Steeper roofs and snow
- Low-slope SIP roofs: 1:12 to 3:12
- Flat roofs and SIPs
- SIP roof overhangs
- Ridge details by pitch
- Moisture matters more than pitch
- Our perspective
- Roof panels and kits from Prefab Modular Home
- Choosing your pitch: a short process
- FAQ
- Sources
What pitch means on a SIP roof
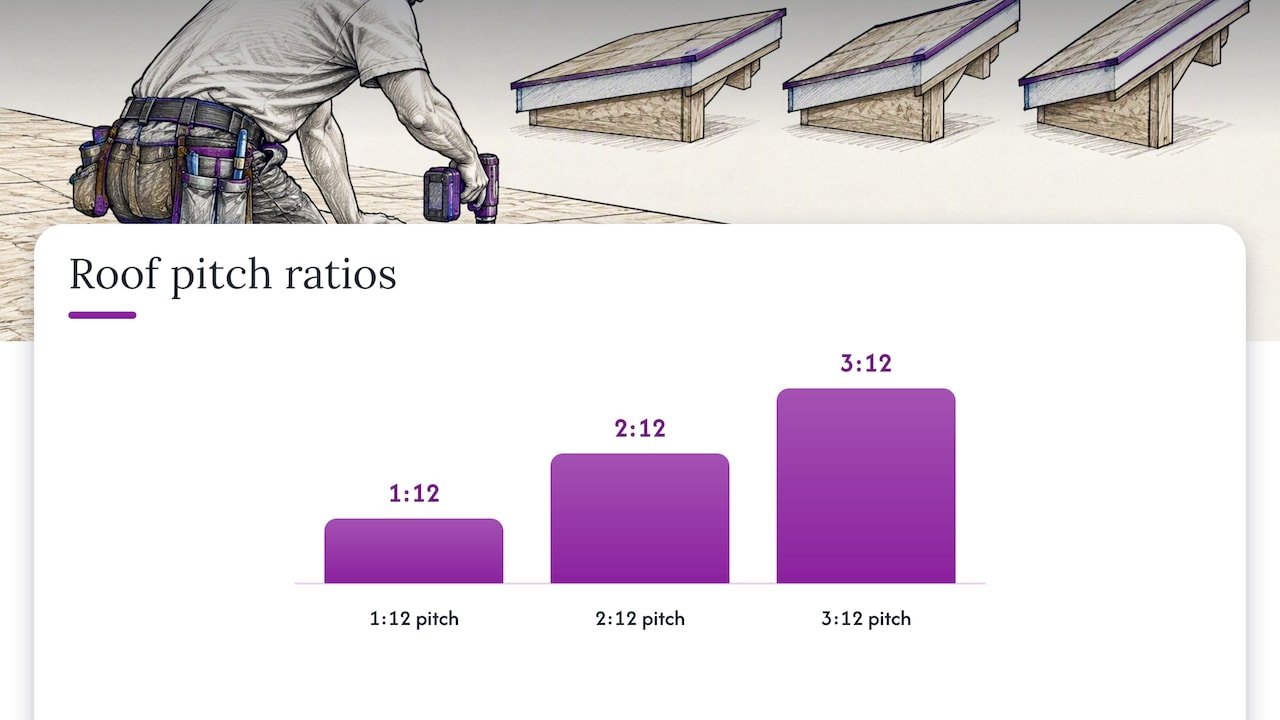
Pitch is the rise over 12 inches of run. A 4:12 roof rises 4 inches for every 12 inches it runs horizontally. Some quick conversions help when a product sheet quotes degrees:
| Pitch | Approx. angle | Typical use |
|---|---|---|
| 1:12 | 4.8° | Modern low-slope, standing seam metal only |
| 2.5:12 | 11.8° | Modern single-slope with rated metal roofing |
| 3:12 | 14° | Practical minimum for shingles and tile |
| 6:12 | 26.6° | Common residential gable |
| 12:12 | 45° | Steep, simple ridge detail |
A SIP roof behaves like a conventional roof in one way and differently in several others. The slope sheds water the same way. But the panel is a solid, continuous foam core between two OSB skins. There is no rafter cavity, no attic to ventilate, and the panel carries structure and insulation in one piece. That is why pitch interacts with span, roofing and moisture in ways a framed roof does not.
The standard range: 3:12 to 12:12
SIPA’s prescriptive guidance for SIP roofs applies to pitches from 3:12 to 12:12 in residential construction. Prescriptive methods also carry strict limits of their own, such as maximum building width, so a roof inside the pitch range can still fall outside the method.
Two practical reasons the range lands where it does:
- Roofing compatibility. Steep-slope roofing such as asphalt shingles and tile is generally specified from 3:12 up. SIPA’s SIP design guidance on roof and wall assemblies notes that SIPs are compatible with conventional roof and wall claddings, so the cladding’s own minimum slope usually sets your floor.
- Detailing. Ridge connections are simplest at the extremes. With a 12:12 roof a simple overlap works at the ridge, while most other pitches call for panels mitered at the ridge. Mitered ridges are standard, but they are exactly where air leaks start if the joint is rushed.
If you are choosing a pitch for looks, there is no industry standard for the most pleasing one. A 4:12 to 6:12 gable reads as traditional, a 1:12 to 3:12 single slope reads as modern. Choose by style, then confirm the roofing and the structure can support it.
Steeper roofs and snow
Steep pitches shed snow, but they bring other loads: uplift on the windward side, and sliding forces at the eave connection. Connection detailing is usually the weak point rather than the panel itself. In snow country, check your design snow load against the panel’s published load tables for the thickness and span you plan to use. We cover the numbers kit buyers should check in our guide to SIP snow loads, and the fastener and spline side in how to get SIP connections right the first time.
Do not copy fastener spacing from a forum post. Prescriptive methods have applicability limits, and your local building department will want engineering or the manufacturer’s evaluation for anything outside them.
Low-slope SIP roofs: 1:12 to 3:12
Low slopes are popular with SIPs because the panels give a clean, thin roof edge and a flat vaulted ceiling. They are also where most of the problems show up.
Roofing choices
At these slopes shingles are out. Standing seam metal is the common answer, and Green Building Advisor contributors point out that many metal products carry a specific rating for installation at 1:12 or lower, with flashing becoming much more critical. Read the roofing manufacturer’s installation sheet for your exact slope before ordering. If the product is not rated at your pitch, the warranty is gone no matter how good the SIP is.
A real-world example from the same site: a builder in Central Oregon described a 2.5:12 single-pitch roof of 12-inch SIPs under standing seam metal. The open question was the underlayment, which brings us to the biggest mistake on SIP roofs.
Do not blanket the roof with peel-and-stick
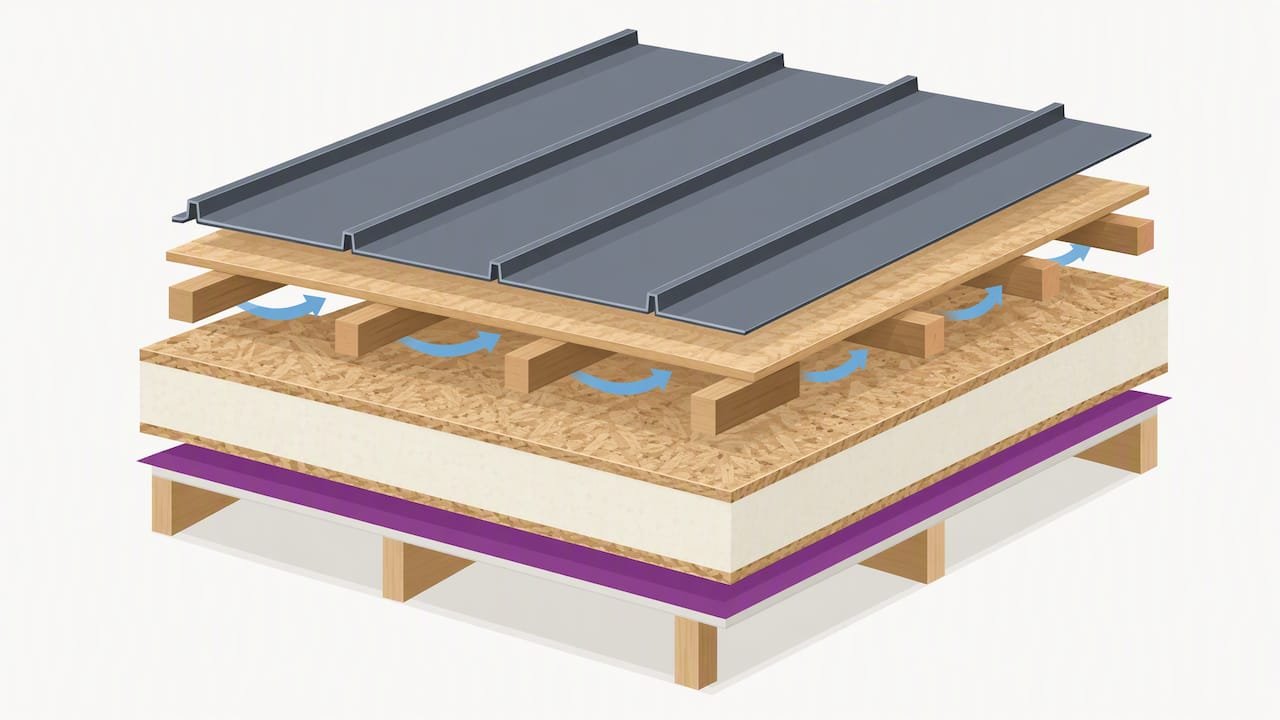
SIPs are airtight. If moisture gets into the OSB, it dries very slowly. SIPA’s Need to Know guide advises against fully adhered products such as peel-and-stick ice and water shield across the whole roof, because a vapor-impermeable layer on the outside, combined with one on the inside, traps moisture in the panel. Use self-adhered membranes only at critical spots like eaves and valleys, and consider a separation layer or vent channel to protect the OSB for the next re-roof.
A practitioner thread on venting a vaulted SIP shed roof topped with three-layer peel-and-stick makes the same point from the field: once a leak or construction moisture is sealed between two membranes, it stays there.
Ventilation on low slopes
On a low slope, convective attic-style ventilation does very little. The thing that protects the roof is a well-sealed interior air barrier: every panel joint taped or sealed on the warm side. If you choose to vent, the usual approach is a cold-roof build: a gap formed by strapping or purlins above the SIPs, then a second layer of sheathing under the metal. That gap is also where batten and purlin rot gets decided, so see our DIY checklist for metal roofs over SIPs. For wetter climates, our builder note on when to vent SIP roofs covers the rainfall threshold we use.
Flat roofs and SIPs
True flat roofs do not exist in good building practice: even a “flat” roof needs a slope to drain, typically a quarter inch per foot or more. With SIPs, a flat or near-flat roof raises three issues.
- Span drops. SIP roof panels lose much of their spanning ability at low pitch, because the load is carried in bending rather than shared along a slope. Expect closer beams, thicker panels, or both. A panel that spans comfortably at 6:12 under a given snow load may need extra support at 1:12.
- Water sits. Ponding adds weight and finds every weak seam. Membrane roofing (the low-slope types used on commercial buildings) must be installed to the membrane maker’s instructions over a compatible deck and separation layer.
- No margin for sealing errors. Any leak has nowhere to drain quickly, and the OSB skin dries slowly.
If a flat-looking roof is what you want, build in a real slope, even a subtle one, and have the span and drainage checked by an engineer. For a small garden studio or backyard gym, a single shed slope in the 2:12 to 4:12 range with rated metal roofing is usually the easier route than a membrane roof.
If you want a quick comparison of how other sheds handle wet climates, a supplier in Ireland has a useful overview of shed roofing options for wet, windy sites. It is Irish and aimed at framed sheds, so treat it as background on roofing materials, not as SIP guidance.
SIP roof overhangs
SIP roofs can cantilever past the walls, which is one of the attractive things about them: a deep eave for shade or porch cover without framing a separate outrigger. How far depends on several things at once:
- panel thickness (thicker panels cantilever farther)
- panel orientation relative to the wall (the panel’s span direction)
- the type of spline joining panels
- the roof load, especially snow and wind uplift
- the weight of the roofing on top
Because those variables multiply, there is no single safe number. Ask the manufacturer for the cantilever table for your panel thickness and load, and do not extend an overhang beyond it with a decorative fascia or heavy tile. For anything unusual, such as a wide overhang on a low-slope roof in snow country, get a stamped engineering check.
Two detailing points apply to every overhang:
- Protect the panel edge. An exposed OSB edge at the eave or rake is a direct path for water. Cap or seal it as the manufacturer specifies.
- Keep the interior air seal continuous. Where a roof panel passes over a wall, the joint at the top plate is a main air-leak location. Seal it from inside before the roof is closed in.
Pitch affects overhangs too: on a steeper roof the overhang’s projected length is shorter for the same panel length, and uplift at the eave rises with wind exposure. Check the design wind speed for your site as well as the snow load.
Ridge details by pitch
Ridges are where pitch turns into craft.
- 12:12: a simple overlap can work, as the panel edges meet cleanly.
- Most other pitches: panels are mitered at the ridge so the two faces meet tightly.
- Single-slope roofs: no ridge, but a high-side wall connection that needs equal sealing care.
On all of them, the ridge joint should be sealed with SIP tape or approved sealant on the interior, along with foam where the manufacturer calls for it. As the U.S. Department of Energy’s high-R wall research stresses, once a building is closed in, envelope errors such as an unsealed ridge or window opening are very hard and expensive to fix. The same guidance notes that the materials and tools are nearly the same as framing, but the air-sealing precision needs to be higher.
Moisture matters more than pitch
It is tempting to think a steeper roof is a safer roof. For durability, a steeper roof helps with water shedding, but the failures we see discussed are almost always air-leakage failures. SIPA’s building science chapter says properly sealed joints are the primary durability concern in a SIP enclosure, and that air movement carries far more moisture into a panel than vapor diffusion does.
So the checklist, at any pitch:
- Seal all panel joints on the warm side with code-approved SIP tape or sealant.
- Do not install vapor barriers on both faces of the roof.
- Skip fully adhered underlayment across the whole roof. Use membranes only at eaves, valleys and similar spots.
- Keep the panels dry during construction. Covered storage and quick close-in avoid trapped moisture.
- Confirm roofing products are rated for your slope.
The Department of Energy’s moisture management research found that in highly airtight, high-R assemblies, small wetting events such as rain leaks or convective loops can occur, and drying is slow. More layers do not make the roof more durable. Airtightness does. Our guide to avoiding SIP panel rot turns this into five checks you can inspect yourself.
Our perspective
We sell insulated sandwich panel kits, so we see the same questions from buyers again and again. The first is “can I make it flat?” Our answer: give it a slope. Even a small studio or office is easier to keep dry and easier to span with a 2:12 to 4:12 shed slope than with a nearly flat deck.
The second is “which pitch is best?” Choose the pitch your roofing is rated for, then check span and snow load, then pick the look. A roof that suits the product sheet, the load table and the local code is a better roof than a stylish one that depends on exceptions.
The third is the one we most want you to hear: build the air seal as if it were the main job, because on a SIP roof it is. A factory-cut panel gives you a straight, consistent edge. What you do with tape and sealant on the day decides whether the roof is dry in year ten. For how that factory side works, see how SIPs are made and why joints matter.
— Kian
Roof panels and kits from Prefab Modular Home
If you are planning a garden studio, home office, gym or backyard suite, we supply insulated roof and wall panels and complete DIY kits designed for assembly without special skills or heavy tools. You can browse the full range, including kits for rooms, offices and homes and container units, on our products page. Tell us your pitch, your snow and wind loads and your roofing choice, and we can help you match panels to the design. For planning a first build, what to plan first with flat-pack kits is a good place to start.
Choosing your pitch: a short process
- Find your loads. Get ground snow load and design wind speed from your local building department.
- Pick the roofing. Read its minimum slope and underlayment rules.
- Set a pitch at or above that minimum, and at least 3:12 if you want to stay inside the standard prescriptive range.
- Check panel span and overhang in the manufacturer’s load tables for your thickness.
- Plan the air seal. Decide where tape goes and who inspects it before close-in.
- Get engineering for exceptions: pitches below 3:12, long overhangs, heavy snow, or any width beyond a prescriptive method.
If your roof also has to be installed fast and without a crane, precut panels can help, as covered in our SIP roof installation note.
FAQ
What is the minimum pitch for a SIP roof?
For standard residential use, 3:12 is the practical minimum, since SIPA’s prescriptive range starts there. Lower slopes are possible but require engineering, a manufacturer’s approval and roofing rated for that slope.
Can you build a flat roof with SIPs?
You can build a low-slope SIP roof, but it should still have a slope for drainage. Span capacity falls at low pitch, so expect thicker panels or more beams, and make sure the membrane or metal roofing is installed per the maker’s instructions.
How far can a SIP roof overhang?
It depends on panel thickness, orientation, spline type and load, so there is no universal number. Use the manufacturer’s cantilever table and get an engineering check for long overhangs or heavy snow.
Do SIP roofs need a vapor barrier?
No secondary vapor barrier is needed, because the panel itself is an air barrier. Putting vapor barriers on both the interior and exterior can trap moisture, so seal the joints with SIP tape and avoid full-coverage peel-and-stick, per SIPA’s building science guidance.
Sources
- SIPA: Prescriptive Method for Connecting SIP Roofs to Concrete Wall Systems
- SIPA: Designing with SIPs, Design Considerations
- SIPA: Building with SIPs, Need to Know
- SIPA: SIP Building Science
- Green Building Advisor: Metal roof on SIPs and purlin rot
- Green Building Advisor: Low slope SIP and standing seam assembly
- Green Building Advisor: Venting a vaulted SIP shed roof with peel-and-stick
- U.S. DOE Building America: Moisture Management for High R-Value Walls
- U.S. DOE Building America: Practical Residential Wall Systems, R-30 and Beyond