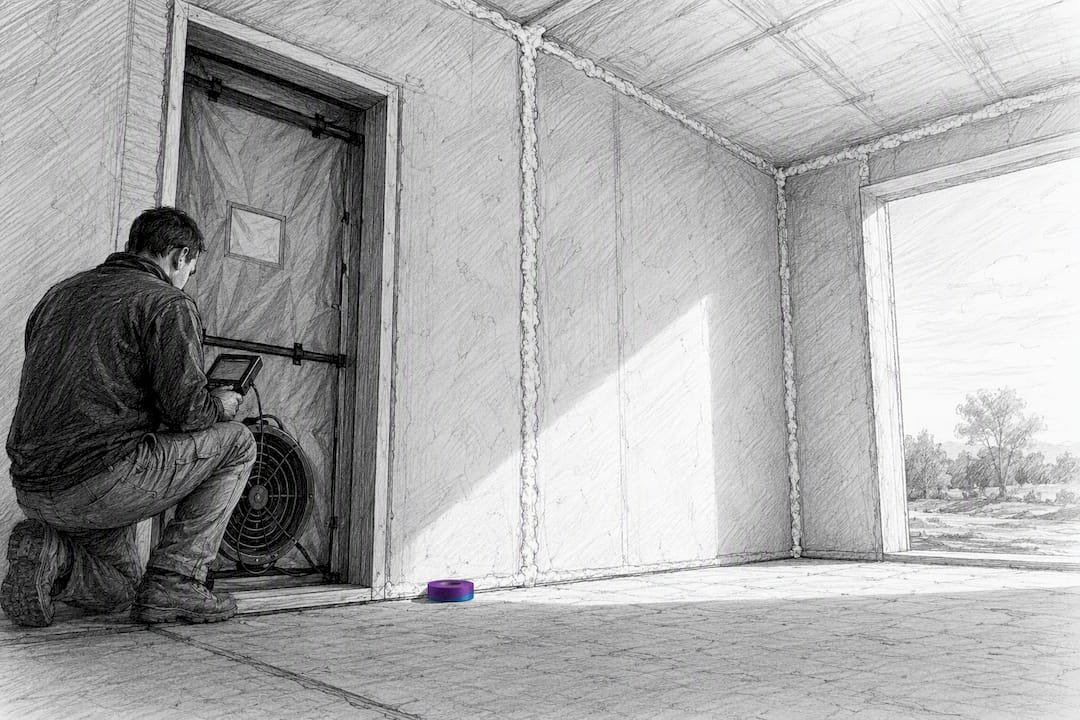
SIPs are made by bonding a rigid foam core between two structural facings, usually OSB, under controlled pressure and heat until the adhesive cures into a single load-bearing unit. The factory then CNC-cuts window, door, and chase openings before shipping. That precision is why panels show up on site ready to stand, seal, and frame in days instead of weeks.
TL;DR:
- Proper pressing and curing are critical; uneven pressure can lead to delamination that appears years later, making quality control essential.
- The choice of core material impacts cost, insulation value, and moisture resistance, with PIR/PUR offering the highest R-values per inch.
- Factory labeling, pre-cut chases, and precise sequencing minimize on-site errors and streamline electrical installation and sealing.
- Sealing seams thoroughly with caulk and proper tape is crucial for airtightness, often requiring extensive linear footage on mid-sized homes.
- Field modifications should follow factory shop drawings closely, using appropriate safety precautions to prevent mistakes that compromise panel performance.
Table of Contents
- How Sips Are Made: The Manufacturing Steps
- What Sips Are Made Of: Core And Facing Materials
- Factory Finishing: Cutting, Labeling, And Packaging
- Site Assembly: Splines, Sealing, And Lifting
- Quality Control And Why Factory Precision Pays Off
- How Prefabmodularhome Kits Apply Factory Sip Principles
- Sustainability In SIP Materials And Manufacturing
- A Factory-To-Site Guide That Actually Matches How SIPs Get Built
- Sources
How Sips Are Made: The Manufacturing Steps
Every SIP plant runs a version of the same sequence, and the order matters. Skip a step or rush the cure, and you get a panel that looks fine in the warehouse but delaminates on a job site five years later.
- Shop drawings and CAM files. Engineers convert architectural plans into CNC-ready files, marking exact panel dimensions, seams, and where every window, door, and electrical chase will land. This is also where panel numbers get assigned for later labeling.
- Cutting foam and facers. Foam billets and facing sheets get cut to size, often on the same CNC equipment that will later profile the openings.
- Adhesive application. Most plants use a polyurethane-based structural adhesive spread evenly across the foam or facer surface. Coverage has to be consistent. A thin spot becomes a weak point the moment the panel takes a structural load.
- Pressing and curing. The layered panel goes into a hydraulic or vacuum press that applies even clamping pressure while the adhesive sets. Cure time and pressure consistency are the biggest factors in how well the panel performs later, since uneven press conditions are the leading cause of delamination risk.
- Trimming and squaring. Cured panels get trimmed to final dimensions before moving to the finishing line.
The whole sequence, from raw foam to a squared, cured panel, typically runs a few hours per batch, not counting cure time. That is the trade off for precision: slower than framing lumber off a truck, faster than framing walls stick by stick on a windy job site.
What Sips Are Made Of: Core And Facing Materials
Core foam choice drives cost and R-value at the same time, and there is no perfect answer. It depends on climate, budget, and how thick you can afford to build.
- EPS (expanded polystyrene): the most common core, cheapest per square foot, solid but not class-leading insulation.
- XPS (extruded polystyrene): denser, better moisture resistance, costs more than EPS.
- PIR/PUR (polyisocyanurate/polyurethane): highest R-value per inch of the three, useful when wall thickness is limited.
Facings usually mean OSB, which dominates the market on cost and availability. Plywood shows up where extra moisture resistance matters. Magnesium oxide board, fiber cement, and sheet metal facings cover fire-rated, high-moisture, or specialty structural jobs where OSB falls short.
Panel thickness typically runs from about 3.5 inches to over 11 inches, and core type and thickness together push R-values from roughly R-16 to R-49. A thin EPS wall panel and a thick PIR roof panel can sit on the same job, doing different jobs.
Factory Finishing: Cutting, Labeling, And Packaging
The finishing line is where a generic panel becomes a specific panel for a specific wall. Some manufacturers go further and install bucks, structural blocking, or splines at this stage, which means less field carpentry later.
Before panels leave the plant, a few things need to happen:
- Each panel gets labeled with a panel number that matches the shop drawing set.
- Panels are stacked in the sequence they will be installed, not randomly.
- Wrapping and edge protection guard against jobsite weather and forklift dings during transport.
- Chases and outlet cutouts are verified against the electrical plan before shipping.
That labeling system sounds minor until you are standing on a foundation with forty panels and no idea which wall is which. Precut chases and labeled panels let electricians pull wire using the manufacturer’s plans instead of guessing where the factory routed things.
Site Assembly: Splines, Sealing, And Lifting
Getting panels off the truck and into a weathertight building comes down to three things: how you join them, how you seal them, and how carefully you lift them.
- Choose the right spline. Structural splines carry load between panels and go where the engineering calls for it. Surface splines cover the seam without carrying structural weight, often used on non-load-bearing walls or as a secondary seal over a structural spline.
- Seal every seam properly. Continuous caulk beads at each panel joint, peel-and-stick tape at ridges and wall-to-roof transitions, and a blower-door test before drywall goes up all confirm the envelope is actually airtight. A mid-sized house can require extensive linear feet of caulk to seal properly, which surprises most first-time builders.
- Sequence the lift. Walls go up before roof panels. Larger panels reduce seam count but need a crane and a rigging plan; smaller panels can go up by hand but multiply the sealing work.
- Route electrical carefully. Chases handle most wiring, but boxes cut into the foam need low-expansion foam around them so you do not over-compress the insulation.
Pro Tip: Rent or borrow a power caulker before sealing day. Hand-caulking a full house of SIP seams by tube and gun turns a one-day job into three, and the bead quality suffers when your hand gets tired halfway through.
Quality Control And Why Factory Precision Pays Off
Panel quality gets locked in long before installation. Reputable plants keep records tied to each shop drawing, tracking adhesive lot numbers and press cycle times so a bad batch can be traced and pulled before it ships. On site, the real test is a blower-door reading and a visual seam check. Gaps, foam voids at seams, or uneven caulk lines all show up as air leaks before drywall ever goes on.
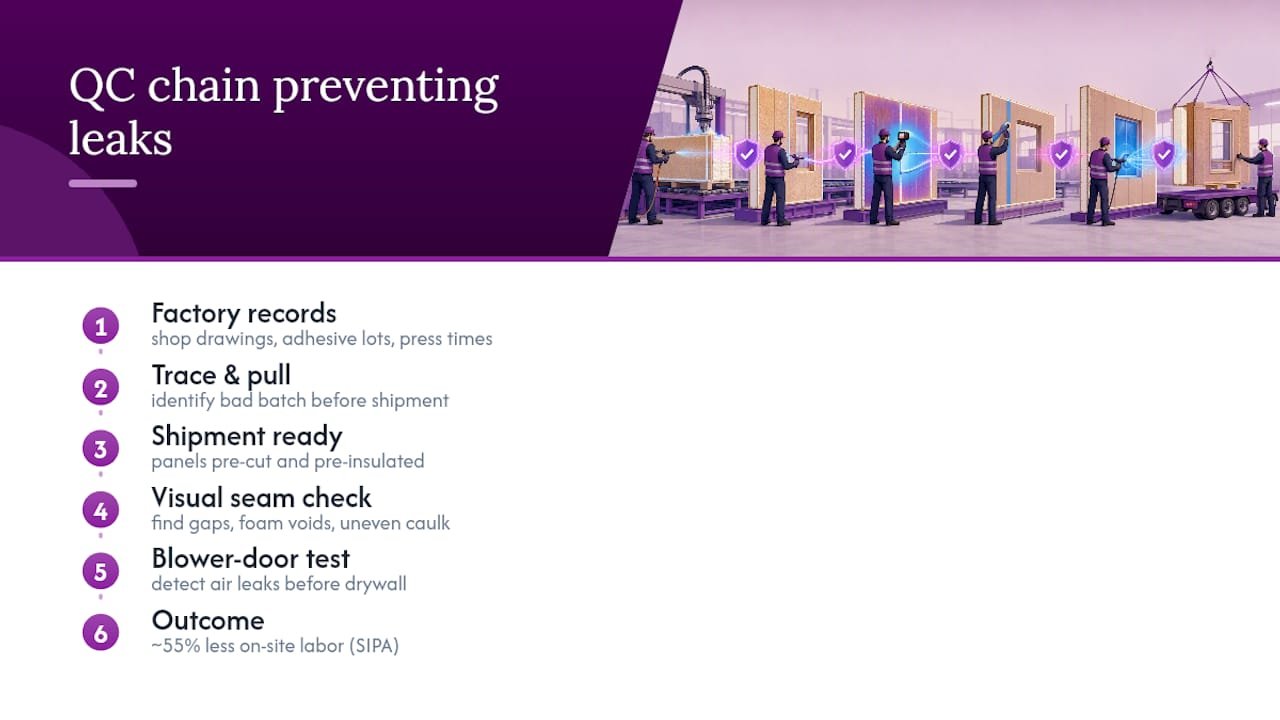
Structural performance backs up the effort. The facers act like the flanges of an I-beam, with the foam core as the web, giving panels real load-carrying capacity rather than just insulation value. Time-motion research cited by the Structural Insulated Panel Association points to roughly 55% less on-site labor compared with stick framing. That gap comes from panels arriving pre-insulated, pre-cut, and ready to stand, not from any shortcut in materials.
How Prefabmodularhome Kits Apply Factory Sip Principles
DIY kits are built around the same factory logic covered above: panels arrive precut, labeled, and matched to a plan set, so assembly follows a sequence instead of a guessing game. Chases and structural blocking, where the design calls for them, come preplanned rather than improvised on site.
Not every step belongs in a homeowner’s hands, though. Standing large panels, cutting structural splines, and setting roof panels all call for extra people, rigging, or professional judgment. Cutting foam cores yourself is manageable with the right prep:
- Wear a dust mask or respirator and eye protection when cutting foam or facers.
- Use a fine-tooth blade sized for the panel thickness, not a general demolition blade.
- Use low-expansion foam around any field-cut electrical box, never standard expanding foam.
- Check the cutting safety guide before making a field modification that was not on the shop drawing.
Field-cutting a SIP panel without a shop drawing to reference is where most DIY mistakes start. A panel that looks solid from the outside can have a chase or blocking exactly where you are about to drill.
Sustainability In SIP Materials And Manufacturing
Factory production itself cuts waste in ways stick framing rarely matches. Foam and facer sheets get cut to exact dimensions on CNC equipment, so offcuts are smaller and more consistent than the pile of scrap lumber typical of a framing crew working from rough measurements. Panels that arrive pre-insulated also mean less packaging waste from separate insulation batts, vapor barriers, and housewrap that would otherwise ship and install separately.
The bigger environmental payoff shows up after the building is finished. A continuous, well-sealed foam core cuts thermal bridging in a way that stud-framed walls, full of thermal breaks at every stud, cannot match. Less thermal bridging means less energy spent heating and cooling the space for the life of the building, which is where SIP construction earns most of its sustainability credit.
Material choice affects the sustainability picture too. EPS and XPS cores are petroleum-based, which raises fair questions about embodied carbon. OSB facings, by contrast, use fast-growing wood species and utilize wood that would otherwise go to waste in lumber production. MgO facings, where used, avoid formaldehyde-based resins found in some OSB products, though they come at a cost premium. None of these materials is without tradeoffs. The honest read is that SIP construction shifts environmental cost from decades of operational energy use toward the manufacturing and material stage, and for most climates, that trade pays off over the building’s lifespan.
A Factory-To-Site Guide That Actually Matches How SIPs Get Built
Most explainers stop at “foam sandwiched between two boards” and call it done. That description is not wrong, but it skips the part that actually determines whether a SIP build goes smoothly: the handoff between factory precision and site execution. A panel can be cut perfectly and pressed correctly, and still leak air like a sieve if nobody runs a proper caulk bead or checks the blower-door numbers before drywall.
The conventional advice on this topic treats sealing as an afterthought, a five-minute detail buried at the end of a materials list. It should be near the top. Thousands of linear feet of caulk on a mid-sized house is not a rounding error. It is the difference between a panel system that performs the way the R-value chart promises and one that quietly underperforms for the life of the building.
If you take one thing from all this: prioritize the shop drawings and the seam plan before you worry about which foam core sounds most impressive. Panel labeling, spline choice, and sealing sequence decide whether the build goes fast and tight, or slow and drafty.
— Kian
If you are weighing a DIY SIP project against traditional framing, start by looking at what a DIY flat-pack kit actually requires you to plan first. Some kits carry the same factory-cut, labeled-panel approach covered throughout this guide, built for homeowners and builders who want the precision without needing a construction crew on payroll.
Sources
- What Are SIPs? Structural Insulated Panels Explained | PGS Consulting
- Structural Insulated Panels Product Guide
- Structural insulated panels (SIPs) | Building America Solution Center (BASC)
- How It’s Made: Structural Insulated Panels | Architect Magazine