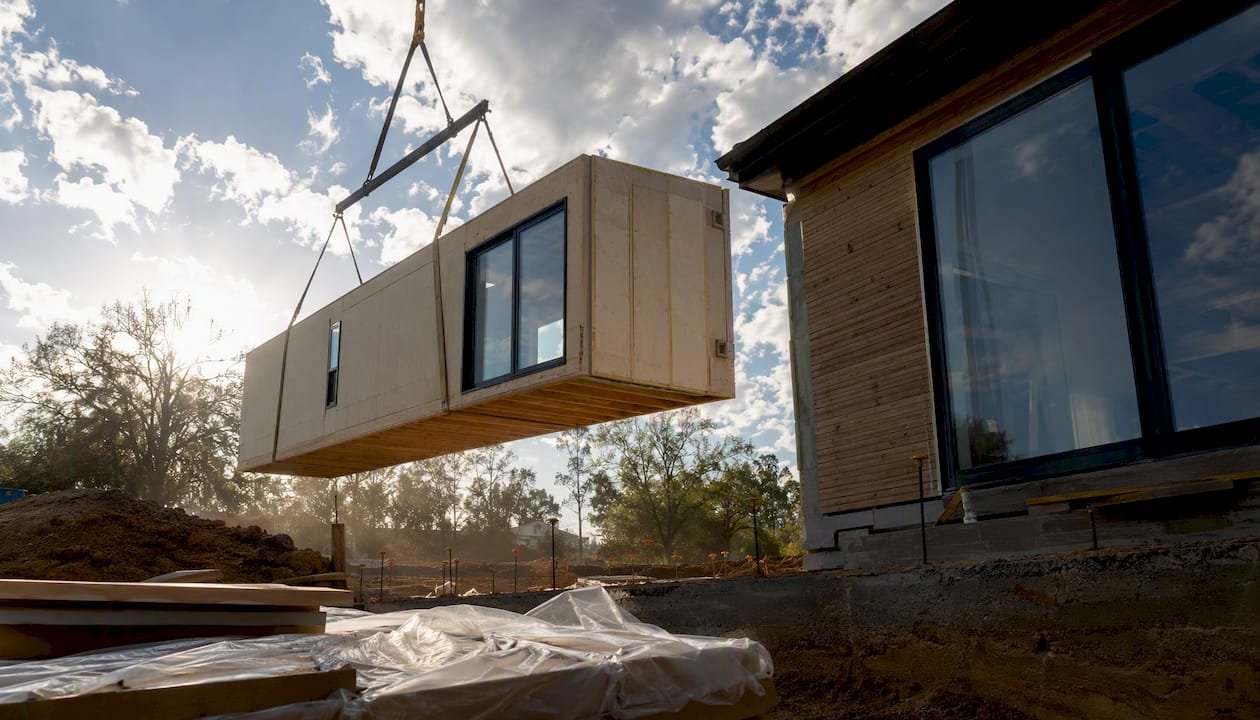
A modular home extension is a realistic, cost-effective way to add living space to most existing houses, and for the right project, it beats traditional construction on speed, budget predictability, and on-site disruption. Typical costs run $100–$200 per square foot, and the full project, from design through final inspection, usually wraps in 4–6 months. Because modular units are built to the International Residential Code (IRC), they qualify for conventional mortgage financing once set on a permanent foundation, which matters for both your lender and your future buyer.
-
Cost: $100–$200 per sq ft for most modular additions; smaller room additions start around $15,000, while a full second story can exceed $100,000
-
Timeline: On-site assembly typically takes 4–6 weeks; the full project including design and permits runs 4–6 months
-
Resale signal: IRC-compliant modular additions on permanent foundations appreciate similarly to site-built additions, and they are eligible for standard appraisals
The one scenario where modular additions struggle: lots with severe access restrictions (no crane clearance, tight setbacks) or homes on non-conforming foundations that cannot support additional load. If either applies, you will need a structural engineer’s assessment before committing to anything.
Table of Contents
-
Why do homeowners choose modular extensions over traditional additions?
-
How much does a modular home extension cost, and how long does it take?
-
What happens during a modular addition project, step by step?
-
How are modular additions permitted, financed, and what do they do to resale value?
-
Which design and material choices maximize comfort and resale value?
-
Are DIY insulated-panel kits a realistic option for a modular addition?
-
What does a modular addition project actually feel like to live through?
-
How durable are modular extensions, and what maintenance do they need?
-
Is your home actually a good candidate for a modular extension?
-
Prefabmodularhome’s DIY kits: a faster path to your first modular addition
Why do homeowners choose modular extensions over traditional additions?
Speed is the most obvious reason. A modular addition’s structural components are built in a factory while your site is being prepped, so the two phases run in parallel rather than sequentially. That alone cuts months off a typical project. Factory production also eliminates weather delays and reduces the hidden labor overruns that routinely push stick-built additions 20–30% over budget.
Budget predictability is the second reason. Because most of the work happens in a controlled factory environment, modular additions often run 10–25% cheaper than comparable stick-built projects. You get a firm price earlier in the process, which makes financing conversations with lenders much cleaner.
On-site disruption is genuinely lower. The noisiest, messiest phase, crane day and module placement, usually takes one to two days. Compare that to months of framing, roofing, and drywall crews working inside your home on a traditional addition.
Where modular wins most clearly:
-
Adding a bedroom or in-law suite when yard space is limited
-
Building a detached ADU for rental income without a long construction timeline
-
Second-story additions where the existing footprint cannot expand outward
-
Home offices or studios where speed matters more than bespoke design
Where traditional stick-built may still make more sense:
-
Historic homes with unusual framing or strict design-review requirements
-
Extremely tight lots where crane access is impossible
-
Projects requiring highly irregular shapes or complex architectural integration
Pro Tip: Before you commit to a modular addition, check what comparable homes in your neighborhood sold for with and without the added square footage. Over-improving for your street is a real risk, and a local appraiser can tell you the ceiling before you spend a dollar.
What types of modular additions are available?
The range is wider than most homeowners expect. Here is how the common types break down by use case and site impact:
Side additions are the most straightforward. A single module or a series of modules attaches to an existing exterior wall, adding a bedroom, bathroom, or expanded living area. These require a new foundation section and utility tie-ins but generally need the least structural engineering of any option.
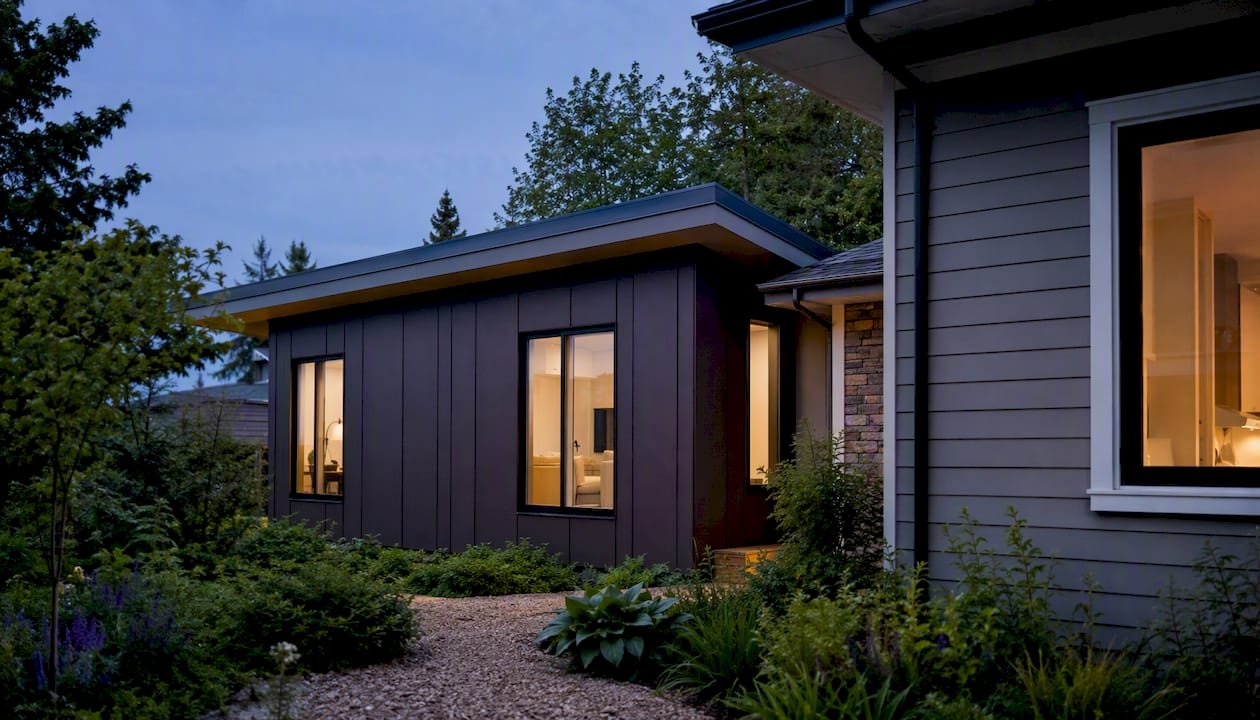
Second-story modules work when your lot has no room to expand outward. The existing roof comes off, a structural assessment confirms the walls can carry the load, and modules are craned into place. Costs for a full second story typically run $100,000–$300,000, and crane access is non-negotiable.
Detached ADUs are increasingly popular for rental income or multigenerational living. Because they sit on their own foundation and are fully self-contained, they avoid many of the structural complications of attached additions. They do require separate utility connections and, in most jurisdictions, their own Certificate of Occupancy.
Single-room modules (home office, gym, studio) are the fastest and most budget-friendly option. A prefab backyard studio can be operational in days once the foundation pad is ready, especially with a flat-pack insulated-panel kit.
Sunrooms and screened additions use lighter framing and often require less permitting than full conditioned-space additions, though they add less appraised value.
Garage conversions with modular second stories let homeowners add a full living unit above an existing garage structure, provided the garage walls and foundation can handle the load.
| Addition Type | Typical Use Case | Rough Cost Range |
|---|---|---|
| Side room addition | Bedroom, bath, family room | $15,000 |
| In-law suite / ADU | Rental income, multigenerational | $45,000 |
| Full second story | Extra bedrooms, master suite | $100,000–$300,000 |
| Backyard studio / office | Work-from-home, gym | $15,000–$50,000 |
How much does a modular home extension cost, and how long does it take?
Cost and timeline are the two questions every homeowner asks first, and the honest answer is that both depend heavily on scope and site complexity.
Per-square-foot cost ranges:
-
Basic modular addition (standard finishes, simple site): $100–$130 per sq ft
-
Mid-range (upgraded finishes, moderate site prep): $130–$170 per sq ft
-
High-end (premium finishes, complex site, crane-intensive): $170–$200+ per sq ft
The module price itself is only part of the total. Transportation and crane rental, foundation or slab work, utility tie-ins (electrical, plumbing, HVAC), permits, and final finishes each add to the bill. On a complex site, transportation and crane costs alone can run $5,000–$15,000.
Main cost drivers at a glance:
-
Module price (factory build, finishes, customization)
-
Transportation distance and crane requirements
-
Foundation type and site prep complexity
-
Utility connections (especially plumbing and HVAC)
-
Local permit fees and inspection costs
-
Interior finishes and exterior cladding to match existing home
Typical timeline:
| Phase | Duration |
|---|---|
| Design, engineering, and permitting | 4–8 weeks |
| Factory production | 6–12 weeks |
| Site prep and foundation | 2–4 weeks (overlaps with factory build) |
| Module delivery, crane, and placement | 1–3 days |
| Tie-ins, inspections, and finishes | 3–6 weeks |
| Total project | 4–6 months |
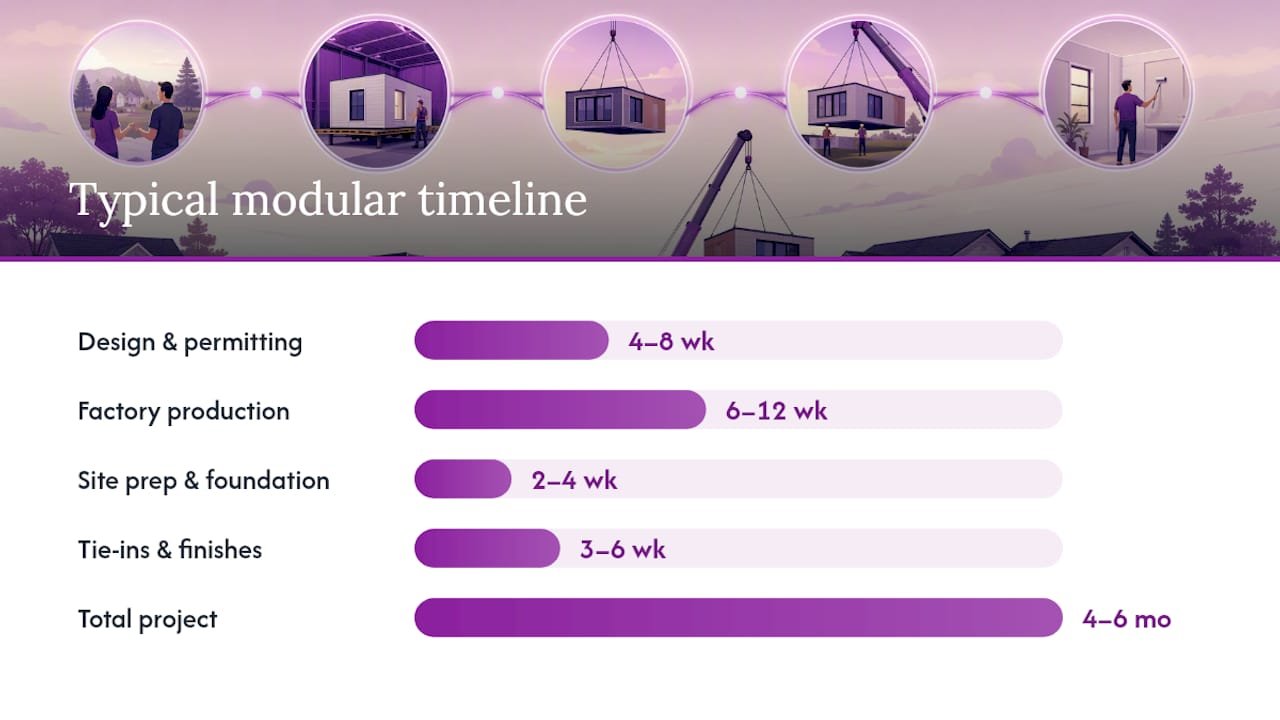
The factory build and site prep phases run simultaneously, which is where modular projects recover most of their time advantage over stick-built work. A traditional addition of similar scope would typically run 8–14 months.
What happens during a modular addition project, step by step?
Knowing the sequence prevents surprises and helps you hold your builder accountable at each stage.
-
Site assessment and structural check. An engineer or experienced modular contractor evaluates your existing foundation, wall framing, and lot access. This step determines whether your home can support the planned addition and whether crane access is feasible.
-
Design decisions and contract. You finalize the module layout, finishes, and exterior cladding. The contract should specify factory inspection rights, delivery logistics, and a clear scope of work for site tie-ins.
-
Permitting and utility planning. Your contractor (or you, if managing the project yourself) pulls building, electrical, plumbing, and transportation permits. Some jurisdictions also require a zoning or use permit for ADUs. Check your local permit requirements early, as this phase can take 4–8 weeks depending on your municipality.
-
Factory production. The module is built in a climate-controlled facility. Most reputable manufacturers allow owner inspections at key milestones. Request photos or a site visit before the module ships.
-
Site prep and foundation. While the factory builds, your crew pours the foundation, runs utility rough-ins, and prepares the connection point on your existing home. This parallel work is what compresses the overall timeline.
-
Module delivery and crane placement. Crane day is the most dramatic part of the project and usually the shortest. The module arrives on a flatbed, the crane lifts it into position, and the structural connection to your existing home is made. Most placements finish in a single day.
-
Mechanical, electrical, and plumbing tie-ins. Licensed subcontractors connect the new module to your existing systems. This phase takes 1–3 weeks depending on complexity.
-
Inspections and final finishes. Local inspectors check the structural connection, utility tie-ins, and code compliance. After passing, finish work (flooring, trim, paint, exterior cladding) completes the project.
Homeowner progress checklist:
-
Site assessment completed and structural report in hand
-
Permits applied for (track the application number)
-
Factory production milestone photos received
-
Foundation inspection passed
-
Crane day logistics confirmed (utility line clearance, neighbor notification, driveway access)
-
Utility tie-in inspections scheduled
-
Punch-list walkthrough completed before final payment
Pro Tip: Crane day requires clear driveway access and overhead utility line clearance. Call your utility company at least two weeks ahead to arrange temporary line de-energization if needed. Missing this step can delay placement by days.
Pro Tip: Stage your finish work in two rounds: complete the exterior cladding and weatherproofing first so the new space is protected, then schedule interior finishes after all inspections pass. This keeps the project moving even if an inspection requires a minor correction.
The general contractor or modular builder typically manages factory coordination, transportation, and crane logistics. The homeowner’s main job is to stay available for design decisions, permit sign-offs, and the punch-list walkthrough at the end.
How are modular additions permitted, financed, and what do they do to resale value?
This is where the modular vs. manufactured home distinction matters most, and it trips up a lot of homeowners.
The IRC distinction: Modular homes and additions are built to the International Residential Code (IRC), the same code that governs site-built construction. Manufactured homes, by contrast, are built to the HUD code, which is a federal standard that creates different financing and appraisal treatment. A modular addition on a permanent foundation is appraised and financed like a site-built addition. A manufactured home on a non-permanent foundation is not.
Common permits required for a modular addition:
-
Building permit (structural)
-
Electrical permit
-
Plumbing permit (if applicable)
-
Mechanical/HVAC permit
-
Transportation permit (for oversized load delivery)
-
Zoning or use permit (for ADUs in many jurisdictions)
Local inspectors typically check the factory inspection documentation, the structural connection to the existing home, and all utility tie-ins. Many modular units arrive with a state-issued insignia confirming factory inspection, which speeds up local approval.
Financing routes:
-
Construction-to-permanent loan: Covers the build phase, then converts to a standard mortgage at completion. Common for larger additions that require significant upfront capital.
-
Home equity loan or HELOC: Works well for smaller additions where the homeowner has sufficient equity.
-
Conventional mortgage refinance: After the addition is complete and a Certificate of Occupancy is issued, some homeowners refinance to roll the addition cost into their primary mortgage.
Modular units are increasingly financed with conventional mortgages, and lender acceptance has grown substantially as the market has matured.
Resale value: Modular additions built to code and matched to neighborhood standards generally preserve or increase home value. The factors that hurt resale are predictable: temporary or non-conforming foundations, poor exterior integration (mismatched siding, roofline conflicts), and over-improvement relative to the neighborhood price ceiling. A well-documented factory inspection and a permanent foundation are the two factors that protect value most reliably.
Do modular homes depreciate? The short answer is no, not when they are built to IRC standards and placed on permanent foundations. Depreciation concerns almost always trace back to confusion between modular and manufactured homes. A modular home appraisal follows the same comparable-sales method as a site-built home appraisal, and the resale value of prefab homes built to code tracks closely with the local market.
Common homeowner questions:
Can I get a conventional mortgage for a modular addition? Yes, once the addition is on a permanent foundation and has a Certificate of Occupancy, it is treated like any other residential improvement for lending purposes.
Will a modular addition show up differently on an appraisal? Not if it is built to IRC and properly permitted. The appraiser uses comparable sales, not construction method, to determine value.
Does adding a modular unit affect my property taxes? Yes, any permitted addition that increases assessed value will affect property taxes. The amount depends on your local assessment rate.
Which design and material choices maximize comfort and resale value?
The structural system you choose affects everything downstream: thermal performance, assembly speed, long-term maintenance, and how the addition looks next to your existing home.
Structural systems compared:
-
Timber framing: The most familiar system for local contractors. Flexible for complex shapes but slower to assemble on-site and more vulnerable to weather during construction.
-
Structural Insulated Panels (SIPs) / insulated sandwich panels: Factory-fabricated panels that combine structure and insulation in a single component. SIPs deliver high thermal performance and fast assembly, making them a strong choice for backyard studios, offices, and smaller ADUs where energy efficiency matters.
-
Steel framing: Durable and dimensionally stable, but typically higher cost and requires specialized labor for connections.
Finish decisions with the best ROI:
-
Kitchen and bathroom quality (buyers scrutinize these most)
-
Consistent exterior cladding that matches or intentionally complements the existing home
-
Roofline alignment (a mismatched roofline is the most visible sign of a poorly integrated addition)
-
Window proportions that match the existing home’s style
Making a modular addition look like it was always part of the house comes down to three things: roofline continuity, matching or coordinated siding, and interior flow between the old and new spaces. A door that opens awkwardly into a hallway, or a ceiling height that drops two inches at the connection point, signals “addition” to every buyer who walks through.
Pro Tip: If you are choosing between insulation systems, SIPs or insulated sandwich panels cut both heating and cooling loads significantly compared to standard batt insulation. That lower operating cost is a selling point you can quantify for buyers, and it shows up in energy audits that increasingly influence purchase decisions.
Are DIY insulated-panel kits a realistic option for a modular addition?
For the right project, yes. For a full second-story addition with complex tie-ins, probably not.
Insulated sandwich-panel kits arrive as flat-packed components: pre-cut panels, connectors, and hardware that assemble into a structurally complete shell. Prefabmodularhome’s insulated sandwich-panel kits are designed for homeowners who want to build a backyard office, studio, or small ADU without specialized construction skills. The assembly process is closer to flat-pack furniture than traditional framing, and a small crew can typically close in a basic structure in a few days.
What homeowners can typically handle themselves:
-
Panel assembly and structural connection (following manufacturer instructions)
-
Exterior cladding installation
-
Basic interior finishing (drywall, flooring, paint)
What almost always requires licensed subcontractors:
-
Electrical rough-in and panel connection
-
Plumbing (if the addition includes a bathroom or kitchenette)
-
Foundation work (concrete slab or piers)
-
HVAC connection or mini-split installation
When a DIY kit makes sense:
-
Budget is tight and the project is a single-room addition or detached studio
-
The footprint is straightforward (rectangular, no complex rooflines)
-
You can manage delivery logistics and have a clear path for panel delivery
-
Local permits for a detached accessory structure are straightforward
When to hire a modular builder instead:
-
Full second-story addition requiring structural engineering and crane work
-
Complex utility tie-ins to an existing home’s systems
-
Jurisdictions with strict inspection requirements for attached additions
Prefabmodularhome’s custom modular room and office kits are marketed specifically for this use case: homeowners who want a functional, energy-efficient space quickly without months of contractor scheduling. The kits use insulated sandwich panels that integrate structure and insulation, which means fewer components, faster assembly, and a tighter thermal envelope than standard stud-framed alternatives.
| Approach | Best For | Typical Timeline | Skill Level Required |
|---|---|---|---|
| DIY insulated-panel kit | Backyard studio, office, small ADU | Days to weeks (assembly) | Low to moderate |
| Modular builder (attached) | Bedroom addition, in-law suite | 4–6 months total | Managed by contractor |
| Traditional stick-built | Complex shapes, historic homes | 8–14 months | Managed by contractor |
Pro Tip: Before ordering a kit, measure your delivery path carefully. Panels are long and rigid. A narrow gate, a low-hanging branch, or a tight turn from the street can make delivery impossible. Confirm panel dimensions with the supplier and walk the delivery route yourself.
How do you choose between a modular builder and a DIY kit?
The decision comes down to four variables: project complexity, budget, timeline pressure, and your own tolerance for managing logistics.
Decision checklist:
-
Is the addition attached to the existing home? If yes, lean toward a modular builder.
-
Does the project require plumbing? If yes, you need licensed subcontractors regardless of kit or builder.
-
Is crane access available? If not, a second-story module is off the table.
-
Is your budget under $50,000? A DIY kit for a detached studio or office is likely the most cost-effective path.
-
Do you have 4–6 months for a full project? If not, a pre-built kit or container unit ships faster.
Questions to ask a modular builder:
-
Can you provide factory inspection documentation for the modules you build?
-
Who manages transportation and crane logistics, and what is included in the contract?
-
What foundation type do you recommend for my site, and who handles that work?
-
What is your warranty on the module itself versus the site work?
-
How do you coordinate with local building inspectors?
-
What is your current lead time from contract to delivery?
Red flags to watch for:
-
No factory inspection records or state insignia on completed modules
-
Vague or verbal-only transportation and crane plan
-
Warranty that covers only the module and excludes site connection work
-
Resistance to coordinating directly with your local building department
-
No references from completed projects in your state
A simple scoring method: List your must-haves (attached addition, plumbing, specific timeline), nice-to-haves (premium finishes, specific exterior style), and deal-breakers (no crane access, HOA restrictions, budget ceiling). Any builder or kit that conflicts with a must-have or triggers a deal-breaker is eliminated before you spend time on detailed quotes. For a flat-pack vs. container home comparison that maps site constraints to the right product type, that resource walks through the key site-access questions in detail.
What does a modular addition project actually feel like to live through?
Shorter and less disruptive than most homeowners expect, but not painless.
The most disruptive phases are foundation prep (noisy, generates debris, takes 1–2 weeks) and crane day (loud, requires clear site access, usually one day). Utility tie-in work, which involves cutting into existing walls and connecting mechanical systems, is the phase most likely to require you to vacate a room or temporarily lose a utility service.
Staying in the house: For most attached additions, homeowners can remain in the home throughout construction. The main exceptions are when tie-in work requires shutting off water or power for extended periods, or when the connection point is adjacent to a primary living space. For detached ADUs or backyard studios, there is essentially no disruption to the main house during construction.
Practical mitigation steps:
-
Arrange temporary utility routing before tie-in work begins
-
Schedule the loudest work (foundation demo, crane day) on weekdays when the household is out
-
Seal the connection point between old and new spaces with temporary plastic sheeting during dusty phases
-
Confirm with your contractor which days require full site access and plan around them
Documentation to request:
-
Before photos of the existing home at the connection point
-
Factory inspection photos or video at key production milestones
-
Inspection records for each permitted phase (foundation, framing, electrical, plumbing)
-
A formal punch-list walkthrough with written sign-off before final payment
Keeping a project photo gallery, from site prep through final finishes, is worth the ten minutes it takes. Buyers and appraisers respond well to documented, permitted additions, and a clear photo record removes doubt about construction quality.
Pro Tip: Set up a simple shared folder (Google Drive or Dropbox) and ask your contractor to drop photos there after each major milestone. You will have a complete project record for resale, insurance, and any future permit applications without chasing anyone down.
How durable are modular extensions, and what maintenance do they need?
Factory-built construction is not inherently more fragile than site-built work. In many respects it is more consistent, because components are cut and assembled in controlled conditions rather than on a muddy job site in February. That said, modular extensions have a few maintenance considerations worth knowing before you build.

Connection points are the most important thing to monitor. The joint between your existing home and the new module is where two structures with slightly different settling rates meet. Inspect caulking, flashing, and interior trim at this joint annually. A small gap that appears in year two is normal; one that widens or shows water infiltration needs attention immediately.
Roofline integration requires the same care as any roof penetration. Where the new roof ties into the existing structure, flashing and sealant must be maintained. Most issues show up within the first two winters.
SIP and insulated sandwich-panel walls are low-maintenance once properly sealed. The panels themselves do not rot or warp the way wood framing can, but any penetration (electrical conduit, pipe chase) must be properly sealed to prevent moisture intrusion into the foam core.
Exterior cladding maintenance follows the same schedule as your existing home: paint or stain wood siding every 5–7 years, inspect fiber cement annually for cracks, and keep vinyl siding clean to prevent algae buildup in humid climates.
Long-term durability of a modular extension is largely a function of foundation quality and weatherproofing at the connection points. A module on a properly engineered permanent foundation, with well-executed tie-ins and consistent exterior maintenance, will perform as well as any site-built addition for decades.
Is your home actually a good candidate for a modular extension?
Not every house is. Running through these criteria before you talk to a builder saves time and avoids expensive surprises.
Foundation compatibility: The existing foundation must be able to support the additional load of a new module, especially for second-story additions. A structural engineer’s assessment is non-negotiable for attached additions. For detached ADUs or backyard studios, the new structure sits on its own foundation, so the existing home’s foundation is not a constraint.
Lot constraints: Check your local zoning for setback requirements (minimum distance from property lines), lot coverage limits (maximum percentage of the lot that can be covered by structures), and ADU-specific rules. Many jurisdictions have relaxed ADU regulations in recent years, but setback requirements still eliminate some sites.
Crane access: Any module that cannot be walked onto the site in panels requires crane placement. A crane needs a clear path from the street, adequate overhead clearance (no utility lines, mature trees, or neighboring structures in the swing radius), and a surface that can support the crane’s outrigger pads. If crane access is impossible, you are limited to flat-pack panel kits that can be carried through a standard gate.
Structural considerations for attached additions:
-
Existing wall framing must be able to accept the new load path
-
Roof structure at the connection point may need reinforcement
-
Floor system must align or be adapted to match the new module’s floor height
HOA and historic district restrictions: Some homeowners associations prohibit modular construction methods or require design-review approval for any addition. Historic districts often have strict exterior material and design requirements that limit modular options. Check both before spending money on design.
A quick self-assessment:
-
Permanent foundation? Yes/No
-
Crane access from street? Yes/No
-
Setbacks allow the planned footprint? Yes/No
-
HOA or historic district restrictions? Yes/No
-
Structural engineer assessment completed? Yes/No
If you answer yes to the first three and no to the fourth, a modular addition is almost certainly feasible. The fifth item should happen before you sign any contract.
Key Takeaways
A modular home extension on a permanent foundation, built to IRC standards, is one of the fastest and most cost-predictable ways to add living space to an existing home, with total projects typically completing in 4–6 months at $100–$200 per square foot.
| Point | Details |
|---|---|
| Cost range | Modular additions typically run $100–$200 per sq ft, often 10–25% less than comparable stick-built work. |
| Timeline | Full projects span 4–6 months; on-site assembly alone takes 4–6 weeks. |
| Resale and financing | IRC-compliant modular additions on permanent foundations appreciate like site-built additions and qualify for conventional mortgages. |
| Best-fit scenarios | Side additions, detached ADUs, backyard studios, and second stories where lot space is limited. |
| Prefabmodularhome DIY kits | Insulated sandwich-panel kits from Prefabmodularhome let homeowners build backyard offices and small ADUs in days, with no specialized skills required. |
The part most homeowners get wrong about modular additions
The biggest mistake is treating “modular” and “manufactured” as interchangeable. They are not, and the difference is not a technicality. Manufactured homes are built to the HUD code and, when placed on non-permanent foundations, depreciate and face restricted financing. Modular additions are built to the IRC, appraised like site-built work, and financed with conventional mortgages. Conflating the two leads homeowners to either dismiss modular construction based on manufactured-home stigma, or to assume any prefab product carries the same legal and financial treatment.
The second mistake is underestimating integration. A modular addition that looks bolted on, mismatched roofline, different siding, and awkward interior connection will hurt resale value even if it is structurally perfect and fully permitted. The engineering is the easy part. Getting the exterior to read as one coherent house is where most projects either succeed or fail visually.
For homeowners considering a DIY kit for a backyard studio or small ADU, the realistic ceiling on self-managed work is the structural shell and basic finishes. Electrical, plumbing, and foundation work require licensed trades in virtually every jurisdiction. Knowing that boundary before you order a kit prevents the frustrating mid-project discovery that you need a subcontractor anyway.
The modular path is genuinely faster and often cheaper than traditional construction. But it rewards homeowners who do the site assessment, the permit research, and the integration planning before committing, not after.
Prefabmodularhome’s DIY kits: a faster path to your first modular addition
Skip the 12-month contractor queue. Prefabmodularhome’s modular extension kits use advanced insulated sandwich panels that combine structure and insulation in a single component, so you are not managing two separate systems. The result is a weathertight, energy-efficient shell you can assemble in days rather than months, without specialized tools or construction experience.
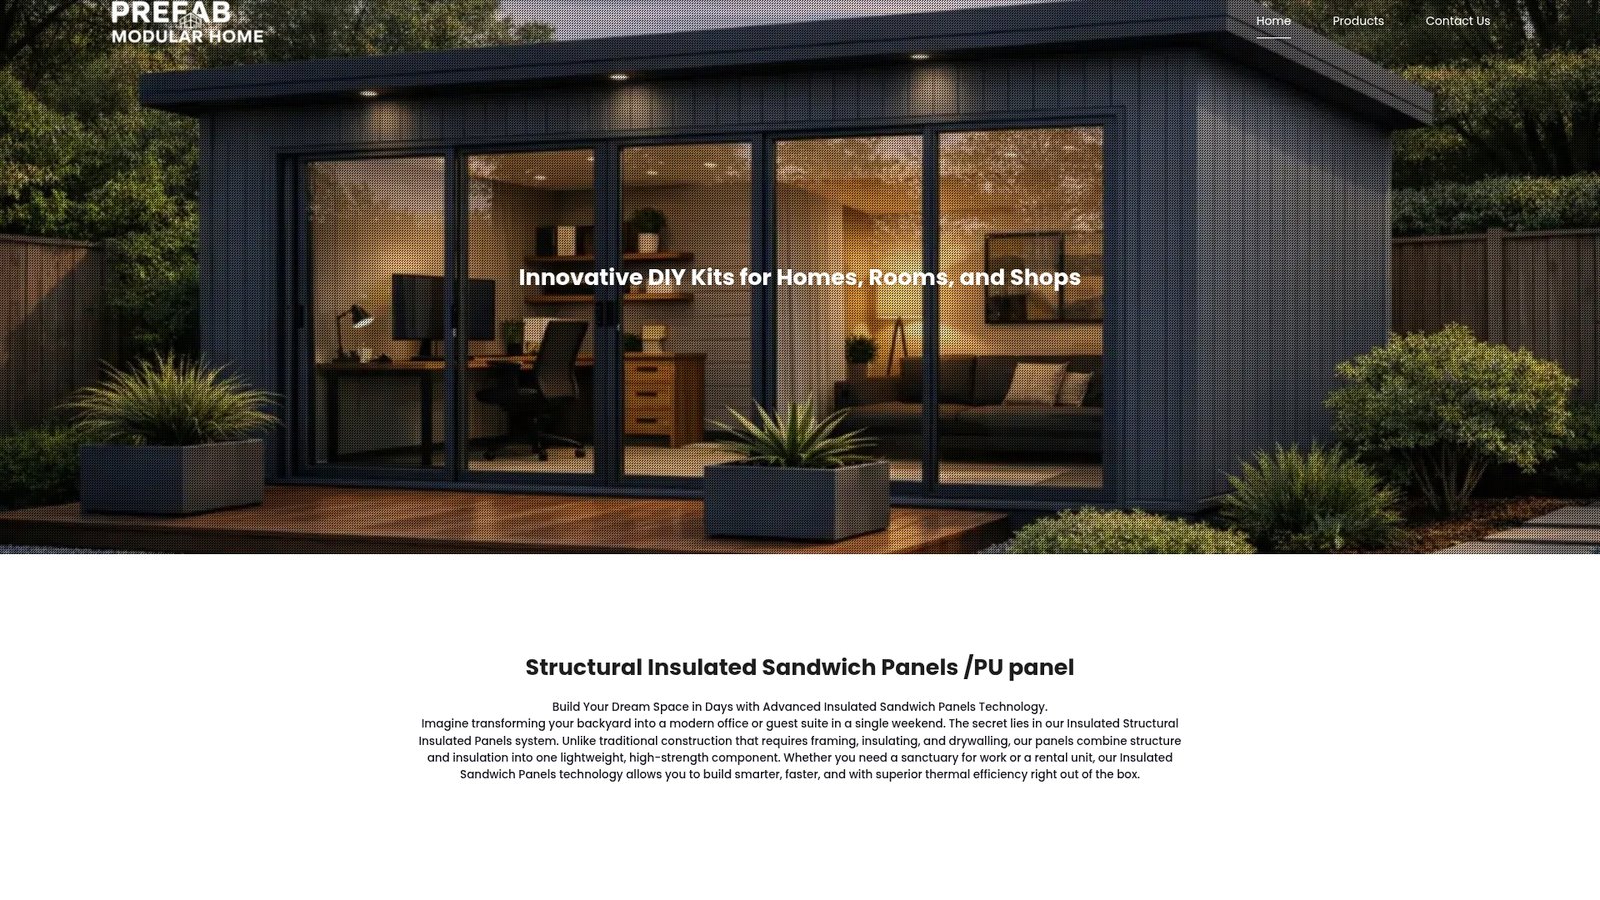
The kits cover backyard offices, garden studios, custom rooms, and small ADUs. You handle the assembly; licensed trades handle electrical, plumbing, and foundation work as needed. Prefabmodularhome provides the panels, hardware, and assembly documentation. The panels’ thermal performance means lower heating and cooling costs from day one, which is a concrete selling point when you eventually list the home.
Browse the full product catalog or go straight to the custom modular room guide to see which kit fits your project. If you are ready to get a quote or confirm panel dimensions for your site, the inquiry form is on the extensions page.
Useful sources and further reading
The sources below were used to build this guide. Each one covers a specific aspect of modular addition planning in more depth.
-
Prefab home additions provide a faster, smarter way to expand living space — Cedreo blog
-
Prefab Extension: What It Is, Cost & How It Works – Stewart Milne Homes
-
Structural Insulated Sandwich Panels – Modular Homes with Structural Insulated Sandwich Panels
-
custom-modular-room-guide – Modular Homes with Structural Insulated Sandwich Panels
Recommended
-
Modular Home Extensions That Fit Real Life – Modular Homes with Structural Insulated Sandwich Panels
-
Blog Archives – Modular Homes with Structural Insulated Sandwich Panels
-
custom-modular-room-guide – Modular Homes with Structural Insulated Sandwich Panels
-
Articles Archives – Modular Homes with Structural Insulated Sandwich Panels