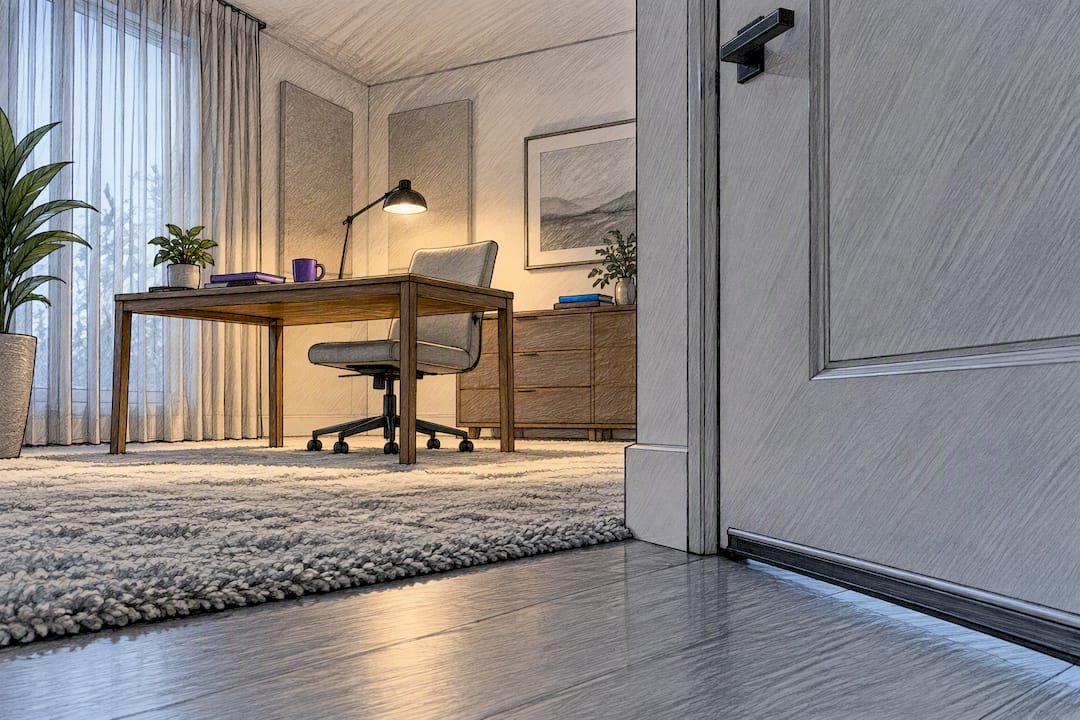
Prioritize sound blocking first, sealing gaps and adding mass, then tune the room with acoustic treatment and arrange lighting and sightlines for visual calm. Start this weekend with a door sweep, weatherstripping, a heavy rug, and a white-noise machine. If your budget allows one structural swap, make it a solid-core door and a ceiling cloud over the desk for calls.
TL;DR:
- Sealing air gaps with door sweeps, weatherstripping, and installing a solid-core door provides the most significant improvement in soundproofing for minimal cost.
- Acoustic treatment like ceiling clouds and wall panels enhances call clarity and reduces echo but is most effective after sealing the room against external noise leaks.
- Structural upgrades, such as resilient channels and double drywall, address shared wall noise, but are costly and suitable only for renovation-level projects.
- Using soft furnishings like thick rugs, heavy curtains, and bookshelves helps absorb internal reflections, creating a calmer and more visually pleasing environment.
- Prefab, insulated structures with sealed envelopes offer a quick, reliable way to achieve a controlled, quiet workspace without extensive renovations.
Table of Contents
- What Is the Fastest Path to a Quiet Home Office?
- Soundproofing vs. Acoustic Treatment: Two Different Jobs
- How Layout and Lighting Support a Calmer Workday
- Materials and Furnishings That Absorb Noise and Calm the Eye
- Renter-Friendly Fixes That Need No Permission and No Drilling
- Why an Insulated Prefab Envelope Makes Quiet Easier to Hit
- Where I’ve Seen Quiet-Office Projects Go Wrong
- A Faster Route to a Quiet Office: Build the Envelope Right the First Time
- Sources
- FAQ
What Is the Fastest Path to a Quiet Home Office?
A prioritized sequence gets you there faster than randomly buying acoustic panels. Work in three tiers: what you can do this weekend, what you upgrade in the next month, and what you save for a renovation.
This weekend (under $200): Install a door sweep and frame weatherstripping to close the air gaps that leak the most sound. Add a heavy rug with dense padding, hang lined curtains, and run a white-noise machine to mask the noise that gets through. This combination alone can measurably reduce perceived noise in most rooms, according to home-office soundproofing guidance, and a full starter kit typically runs under $200.
Short-term upgrades (weeks, moderate budget): Swap a hollow-core door for a solid-core one, add a window insert if your window faces street noise, bring in a freestanding acoustic panel, and hang a ceiling cloud above your desk. These upgrades close the gap between “quiet enough” and “actually good on calls.”
Renovation-level fixes (budget for a contractor): Resilient channel on shared walls, a double layer of drywall with a damping compound between layers, insulated joist bays, and a dedicated HVAC branch so your office isn’t sharing ductwork with a noisy part of the house.
- Door sweep and weatherstripping. Closes the single biggest air leak in most rooms; a few dollars in materials, an hour of labor.
- Rug plus dense pad. Cuts footstep noise and tames early reflections off a hard floor.
- Solid-core door swap. The upgrade with the best-documented payoff on this list.
- Ceiling cloud over the desk. Targets the reflections that make video calls sound harsh or echoey.
- Resilient channel and double drywall. Reserved for shared walls where nothing short of structural work will solve the problem.
Replacing a hollow-core door with a solid-core door can raise its Sound Transmission Class rating from roughly 25 to 35 or higher, according to soundproofing research from Setup My Desk. That’s the difference between hearing every word of a hallway conversation and barely noticing it happened.
Soundproofing vs. Acoustic Treatment: Two Different Jobs
These two terms get used interchangeably online, and that confusion wastes a lot of money. Soundproofing blocks sound from entering or leaving a room. Acoustic treatment controls how sound behaves once it’s already inside. A room can be dead silent from the hallway and still sound terrible on a video call, or vice versa, according to acoustics guidance from AVIXA.
The industry measures these with different metrics. Sound Transmission Class (STC) rates how much a wall, door, or window blocks airborne noise from passing through. Higher numbers mean better blocking. Noise Reduction Coefficient (NRC) rates how much a surface absorbs sound versus reflecting it back into the room, expressed as a decimal between 0 and 1. A hard, empty room with an NRC near zero everywhere will produce an echo you can hear on any recorded call.
Then there’s Noise Criteria (NC) and Room Criteria (RC), which measure the actual background sound level in a finished room. ASHRAE sets NC/RC 30 as the target for private offices and NC/RC 25 for executive offices, while open-plan offices are allowed a noisier NC/RC 40. A home office doing double duty as a guest room or a nursery should aim toward that private-office range rather than accepting open-plan levels of background hum.
Why blocking comes before treating
Air leakage is the highest-impact transmission path for noise in most home offices, more than the wall assembly itself. A gap under a door the width of a pencil lets through more sound than a whole extra layer of drywall stops. That’s why sealing beats surface treatment dollar for dollar: you’re closing the leak instead of trying to out-muffle it.
The data backs this up. A solid-core door swap moves STC from around 25 to 35 or higher, as noted above. A quality window insert can add a comparable jump on a leaky single-pane window, closing off street noise without touching the original frame. Both interventions cost less than most acoustic panel setups and solve a bigger share of the problem.
Pro Tip: Check your ceiling before you check your walls. If your office sits below a noisy room, treat the joist bays and add insulation above the ceiling before spending a dollar on wall panels. Structure-borne noise from footsteps overhead travels through framing, not air, and wall treatment does nothing to stop it.
Once the room is sealed, add mass and decoupling for structural upgrades: resilient channel breaks the direct path between two layers of drywall, and a viscoelastic damping compound between double drywall layers absorbs vibration instead of transmitting it. These are renovation-tier fixes, appropriate for a shared wall with a noisy neighbor or a home gym next door, not for a typical spare-room conversion.
Only after sealing and mass are handled should you add acoustic treatment. A ceiling cloud or suspended panel above the desk is often the single best upgrade for call clarity, because it intercepts the reflections that bounce straight into your microphone.
| Goal | Best-matched intervention | Typical result |
|---|---|---|
| Block hallway or household noise | Door sweep, weatherstripping, solid-core door | STC jumps from roughly 25 to 35+ |
| Block street or traffic noise | Window insert, heavy lined curtains | Noticeable drop in low-frequency rumble |
| Improve call clarity, reduce echo | Ceiling cloud, wall panels near the desk | Lower RT60, less “boxy” sound on recordings |
| Stop noise from a shared wall | Resilient channel, double drywall with damping | Best gains on structural transmission |
| Stop noise from above/below | Insulated joist bays, decoupled ceiling | Addresses structure-borne noise, not just airborne |
How Layout and Lighting Support a Calmer Workday
Sound isn’t the only thing wearing you down in a home office. Layout decisions made before you buy a single panel determine whether the room feels calm or chaotic, and lighting choices affect fatigue as much as noise does. Design-focused studios recommend locking in light, sound, and sightlines early, since all three depend on where the room sits and which way it faces, not on finishes you add later.
Desk orientation matters more than most people assume. Sitting with your back to a window creates constant backlighting on video calls and forces your eyes to adjust between a bright window and a dim screen all day. Facing a window directly causes glare on your monitor. The fix is simple: turn the desk 90 degrees to the window, so daylight falls across your workspace instead of into your eyes or behind your head.
Sightlines are the next lever. A view stretching 20 feet or more, even indoors through a doorway into another room, gives your eyes a periodic break from close-focus screen work and reduces the boxed-in feeling that makes small home offices feel exhausting by 3 p.m. If your office looks at a blank wall four feet away, add something restful to look at: a piece of art, a plant, anything with depth.
- Keep the desk off the main circulation path between the kitchen, bathroom, and bedrooms.
- Avoid placing the office adjacent to a laundry room, kitchen, or anywhere with a dishwasher, washing machine, or foot traffic.
- If two people need offices in the same house, consider back-to-back placement on either side of a shared wall rather than stacking noise sources randomly through the floor plan.
- Build a three-layer lighting plan: ambient light for the whole room, task lighting at the desk, and background lighting behind the monitor to reduce contrast between the screen and the wall behind it.
- Choose tunable, warm-dimming bulbs for evening work so the room doesn’t feel clinical after sunset.
Ergonomics ties directly into these layout choices. NIOSH guidance on remote work recommends a dedicated, properly set-up workspace and regular breaks, including the 20/20/20 rule: every 20 minutes, look at something 20 feet away for 20 seconds. That guidance pairs naturally with the sightline advice above, since a good view isn’t just pleasant, it’s the built-in break your eyes need. Set your monitor top at or slightly below eye level, add an external monitor if you’re working off a laptop all day, and make sure your chair actually supports your lower back rather than just looking like it does.
Pro Tip: If you can’t change desk orientation because of where outlets or the door sit, use a monitor arm to rotate your screen away from window glare instead of moving the whole desk. It’s a $40 fix for a problem people often assume requires furniture surgery.
Materials and Furnishings That Absorb Noise and Calm the Eye
Surfaces do double duty in a well-designed office: they either bounce sound around the room or soak it up, and they either look serene or look sterile.
Rugs are the single highest-impact acoustic furnishing you’ll buy. A thick pile rug over a dense felt or rubber pad absorbs footstep impact noise and knocks down the early reflections that make a hard-floored room sound tinny on recordings. Aim for a pad at least a half-inch thick under any rug in a hardwood or tile office; a thin pad barely changes the acoustics.
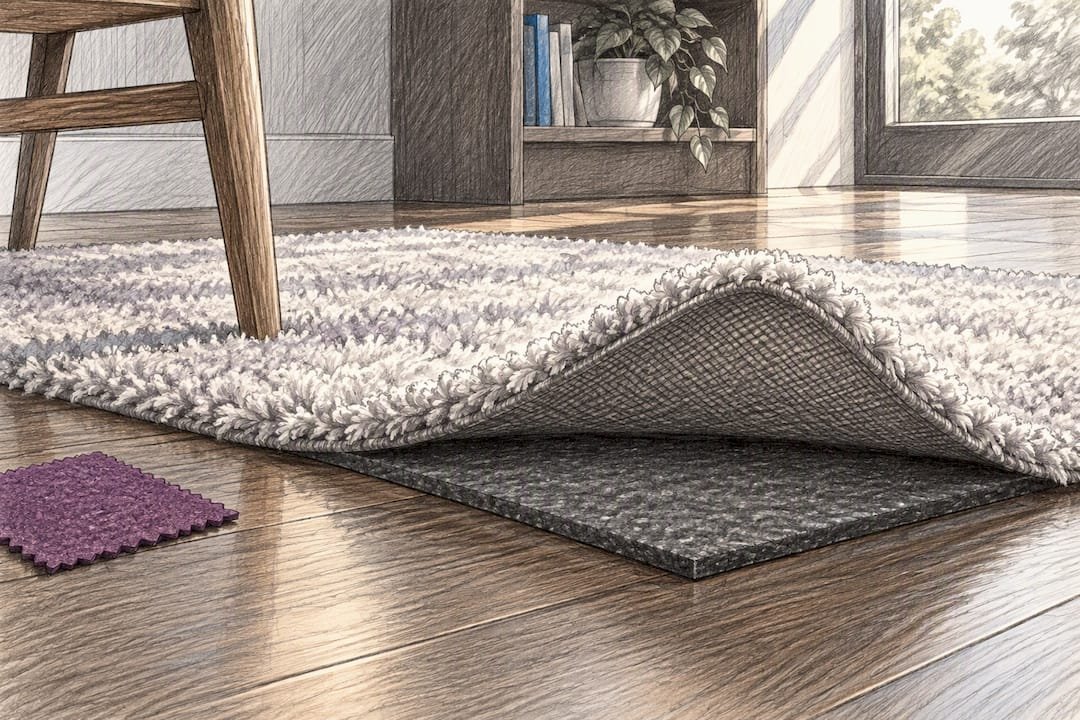
Curtains and window inserts solve different problems, so match the tool to the noise. Heavy, floor-length lined curtains with a dense weave absorb mid and high frequencies inside the room and add a bit of blocking against light and drafts, but they do little against low-frequency traffic rumble. A press-fit window insert seals the frame itself and blocks far more airborne noise, making it the better choice when the problem is a specific noisy street rather than general room liveliness.
Bookshelves are underrated acoustic tools. A wall of books with irregular spine depths scatters sound instead of reflecting it flat, which is part of why a book-lined study sounds warmer than an empty one. Upholstered furniture, a fabric-covered desk chair, even a fabric bulletin board, all contribute the same way.
- Choose a rug with a pile height of at least half an inch, paired with a matching dense pad.
- Pick curtains in a heavyweight fabric, hung floor to ceiling, wider than the window frame on both sides.
- Fill open shelving with books and irregular objects rather than leaving bare shelves.
- Favor muted, warm colors like sage green, warm gray, or soft terracotta over stark white or high-gloss finishes, since matte, textured surfaces both absorb more sound and read as calmer to the eye.
- Add one upholstered piece, a reading chair or a fabric ottoman, even in a small office, purely for the acoustic softening it provides.
None of this replaces sealing and blocking. Soft furnishings improve how the room sounds once you’re inside it; they do very little to stop a neighbor’s leaf blower from getting in. That’s the order-of-operations point worth repeating: treat the room’s internal acoustics after you’ve already blocked what’s coming from outside it.
Renter-Friendly Fixes That Need No Permission and No Drilling
You don’t need to own the walls to fix most of what makes a rented office loud. Every fix here is removable, reversible, and leaves no trace when your lease ends.
- Adhesive door sweep and gasket strips. These stick on with foam tape or magnets, no drilling required, and they close the same air gaps a permanent sweep would.
- A heavy moving blanket hung over the door. Not elegant, but genuinely effective as a temporary mass barrier while you save for a solid-core door, and it comes down in thirty seconds.
- Press-fit window inserts. These wedge into the window frame under tension, no adhesive or hardware, and pull out cleanly when you move.
- Freestanding acoustic panels on a stand. No wall mounting needed, and you can angle them exactly where reflections are worst.
- A dense rug with underlay, plus a hard plastic or felt chair mat. This combination quiets both footsteps and the rattle of caster wheels on hard flooring.
A starter kit combining a door sweep, weatherstripping, heavy curtains, a rug, and a moving blanket or mass-loaded vinyl alternative can deliver noticeable perceived quiet for under $200 in most rented rooms. Move up to a mid-level bundle, adding a window insert and a ceiling cloud, and you’re typically in the $300 to $600 range depending on window size. Near-renovation bundles involving resilient channel or double drywall aren’t renter options at all, since they require opening walls, but they’re worth knowing about if you’re weighing whether to fix a rental or build something new.
One thing worth knowing before you chase total silence: a modest amount of background sound masking often improves perceived privacy more than dead silence does. A completely silent room makes every small tick, hum, or distant voice stand out sharply. That’s part of why a white-noise machine belongs on the weekend list above, not just as a stopgap.
Why an Insulated Prefab Envelope Makes Quiet Easier to Hit
Retrofitting an existing room means fighting every weak point someone else built in years ago: gappy old windows, a hollow door, thin uninsulated walls. A prefabricated office built from structural insulated sandwich panels starts with a continuous, sealed envelope instead, which removes most of the weak links a retrofit spends its whole budget chasing.
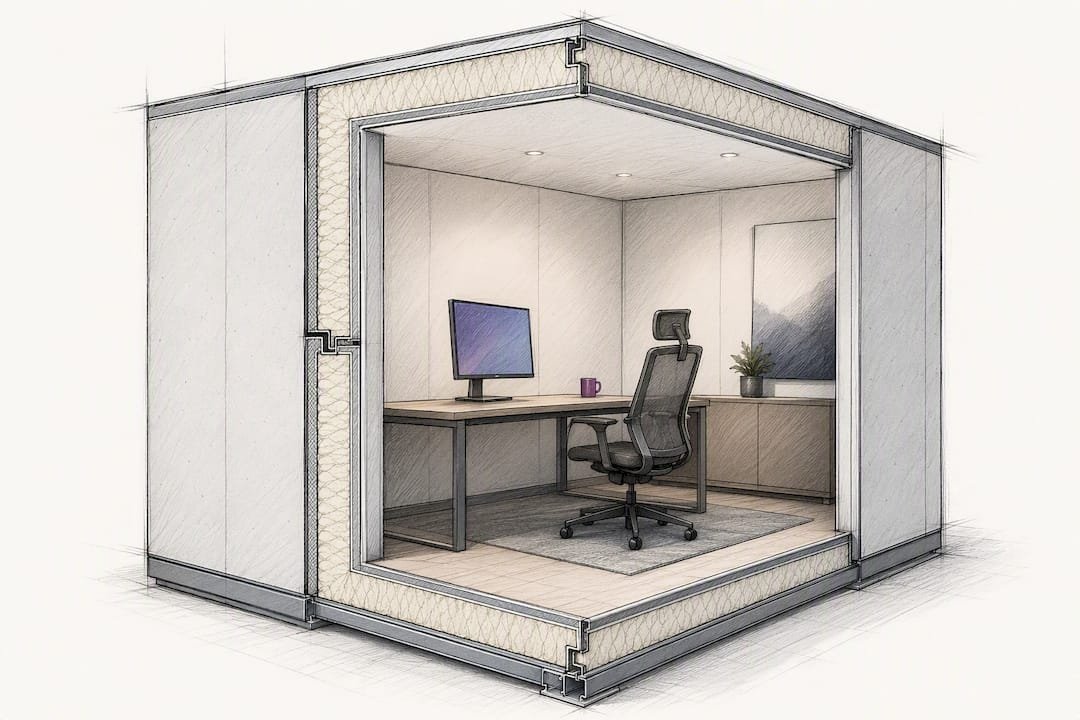
That’s the core advantage of building rather than retrofitting for anyone who wants a guaranteed acoustic baseline instead of a series of upgrades. A panel system integrates structure and insulation in one piece, so there’s no stud cavity that needs separate insulation, no drywall layer added after the fact, no gap between materials for sound to sneak through. Kits built around this principle use structural insulated sandwich panels designed for fast assembly without specialized tools or skills.
If you’re specifying a prefab office kit and want to lock in acoustic performance from day one, a few details matter more than the rest:
- Choose a solid-core door in the kit spec rather than a lightweight fill door; this is the single highest-leverage acoustic decision in any office build, prefab or retrofit.
- Ask about window inserts or double-glazed options if the unit will sit near a street or a shared property line.
- Confirm panel seams are sealed with a continuous gasket or foam bead, since seam gaps behave exactly like the door gaps discussed earlier.
- Plan a dedicated HVAC branch or a mini-split unit rather than tying into shared ductwork, which otherwise becomes a noise path between rooms.
- Add interior finishes with some absorption, a rug and curtains at minimum, once the shell is up, since a sealed panel envelope still benefits from the same reflection control any room does.
Readers weighing a modular backyard office build instead of converting a spare bedroom are often solving the noise problem and the space problem at the same time, since a standalone structure automatically removes the shared-wall and shared-hallway issues that cause most in-house acoustic complaints.
Where I’ve Seen Quiet-Office Projects Go Wrong
The single most common mistake I see is treating the acoustics before blocking the noise. Someone buys a set of foam wedge panels, mounts them on the wall, and wonders why the hallway conversation is still perfectly audible. Foam panels absorb reflections inside a room. They do almost nothing to stop sound coming through a door or wall, because absorption and blocking are solving two different physics problems, not one.
The projects with the biggest before-and-after difference are almost always the boring ones: a door sweep installed correctly, a solid-core door swapped in, a window insert pressed into a leaky frame. Nobody posts a photo of a door sweep because it’s not photogenic, but it’s usually the single change that made the room usable for calls in the first place. Panels and ceiling clouds matter, but they’re the finishing touch, not the fix.
— Kian
A Faster Route to a Quiet Office: Build the Envelope Right the First Time
Every fix in this guide, the door sweep, the window insert, the resilient channel, is a workaround for a room that wasn’t sealed and insulated to begin with. An alternative option is a kit where the envelope arrives already sealed, insulated, and ready to assemble in days, so you’re not spending months chasing air leaks after the fact.

That matters most if you’re starting from scratch rather than retrofitting a spare room, since a backyard studio, garden office, or standalone workspace gives you full control over door quality, window placement, and wall assembly from the first panel. It’s the better route for anyone who wants a guaranteed acoustic and thermal baseline without hiring a contractor for a multi-week renovation. The structural insulated sandwich panels used in every kit combine insulation and structure into one piece, cutting out the seams and cavities where sound and heat both leak through, and the flat-pack system assembles without special tools or trade skills.
If you’re weighing a renovation-level acoustic fix against building new, browse the DIY kit and container office catalog to compare options, or check the insulated wall and roof panel specs directly if you’re planning to specify performance details yourself. For a bigger renovation involving structural changes to an existing home, a design and renovation planning resource can help you scope what’s realistic before you commit either way. Request a quote through the product catalog to see current pricing for your space.
Sources
- Home Office Soundproofing Guide: Block Noise Without – Setup My Desk
- ASHRAE Handbook (Noise and Vibration Control)
- Working from Home: How to Optimize Your Work Environment and Stay Healthy | NIOSH Science Bulletin | CDC
- Transform Your Home Office: Top Soundproofing and Acoustic Treatment Tips | AVIXA Xchange
- Acoustic Insulation Home Office: 9 Measured Methods
FAQ
What Is the 3-5-7 Rule in Interior Design?
The rule suggests grouping decorative objects in odd numbers because odd-numbered groupings read as more visually balanced than even ones. It’s a styling guideline for shelves and vignettes rather than an acoustic or layout principle, so it applies to how you decorate a quiet office once the sound and lighting work is already done.
What Are the Trends for Home Office Design in 2026?
Design-focused sources point toward calmer, more restorative office spaces built around natural materials, warm-dimming lighting, and deliberate sound control rather than purely decorative upgrades. Prefab and modular backyard offices are also gaining traction among people who want a dedicated workspace without renovating an existing room.
What Is the 70/30 Rule in Interior Design?
In a home office, that ratio doubles as acoustic guidance: enough rugs, curtains, and upholstery to control reflections, without over-softening the room into something that looks cluttered.
How Do I Make My Office Less Depressing?
Start with light and sightlines: turn your desk 90 degrees to the window instead of facing a blank wall, and add a three-layer lighting plan with ambient, task, and background light so the room doesn’t rely on one harsh overhead fixture. Warm, muted colors and one upholstered piece of furniture go further than most people expect toward making a small office feel restful instead of clinical.
Should I Soundproof or Add Acoustic Panels First?
Seal and block first: door sweeps, weatherstripping, and a solid-core door swap solve more of the noise problem than acoustic panels do, since air gaps are the highest-impact noise leak in most rooms. Add acoustic treatment, like a ceiling cloud or wall panels, only after the room is sealed, to fine-tune reflections rather than fight noise that’s still leaking in.