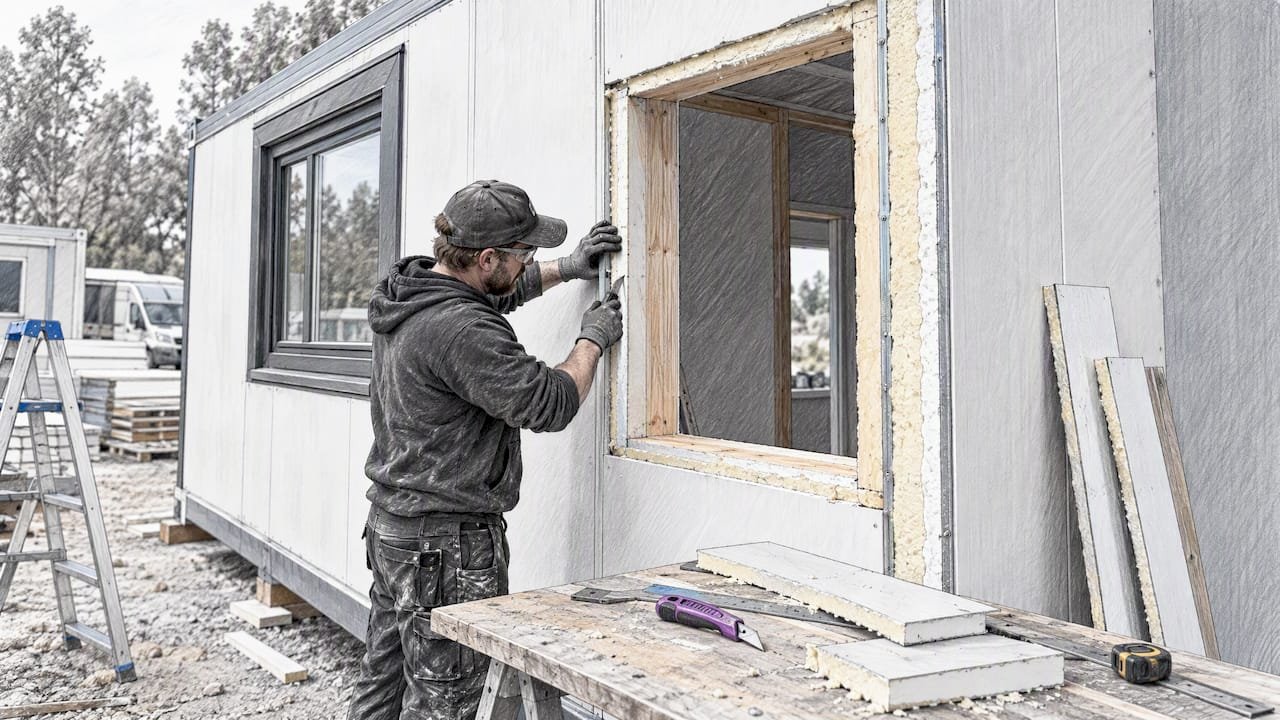
A window in a panel wall comes down to four decisions: where the opening goes, how the panels are cut around it, how the edges are trimmed, and how water is kept out of the joint. Get the order right and the job is routine. Get it wrong and you end up with gaps you hide under caulk, or an opening that weakens a wall that is supposed to carry load.
This guide covers both versions of the search. One is a structural insulated panel wall, like the ones in our kits, where the window is part of the building envelope. The other is decorative or cladding panels fitted around an existing window. The measuring and trim logic overlaps, so we treat them together and flag where they split.
TL;DR
- A single panel cannot span a window. Use separate pieces beside, above and below the opening, and plan the joints before you cut.
- In a structural panel wall, an opening that affects strength has to be detailed on the plans and reinforced at its edges. Do not cut one into a finished wall without professional input.
- Leave a gap of at least 1/4 inch where panels butt a window, then trim, flash and seal it. Caulk alone is not a finish.
- Measure from the trim or channel edge you will actually use, not the face of the window frame, and dry-fit every piece before it is fixed.
- Flash above every opening and seal the sides. Water management matters more than the look of the trim.
Table of Contents
- Two jobs behind the same search
- Plan the opening before the panels go up
- Measure the opening, then cut
- Why you cannot panel “over” a window
- Trim the edges and set the reveal
- Flash and seal: where windows actually fail
- Keep the insulation continuous
- Tools and a workflow that avoids rework
- Our perspective
- Planning a build with windows?
- FAQ
- Sources
Two jobs behind the same search
People typing “windows in panel walls” usually mean one of two things.
Structural panels. You are building a wall from insulated sandwich panels, and you want windows in it. The opening is part of the design. It is easiest to do before the wall goes up, because the framing around the hole is part of how the wall carries load.
Finish panels. You have an existing wall with a window, and you are covering it with wood slats, PVC, bathroom or decorative panels. Here the opening already exists and the challenge is a clean fit.
The approaches differ, but both reward the same habit: decide the details of the opening first, then cut.
Plan the opening before the panels go up
In a panel wall that carries load, a window is a hole in the skeleton. WoodWorks, the wood design resource, says openings in shear panels that materially affect strength must be detailed on the plans, with their edges adequately reinforced to transfer shear stresses. It adds that window and door openings are typically handled with shear-wall methods that permit openings. Translated for a homeowner: a window is normal and allowed, but it has to be designed in, not improvised.
That is why the best time to place windows in a sandwich panel wall is at the order stage. Think through:
- Position. Where do you want light, a view, cross-ventilation? Furniture, a desk or a gym mirror wall changes the answer.
- Size. Larger openings leave less solid wall beside them. Several smaller windows spaced along the wall often behave differently from one wide opening.
- Height. Sill height and head height decide how the panel pieces above and below the window are cut. Keep them consistent across the building so the pieces repeat.
- Corners. Keep openings clear of corners and panel joints where you can, so you are not stacking several details in one spot.
- Window type and rough opening size. Get the actual window unit specification before finalizing the opening. Manufacturers list the rough opening they need.
If you are planning a build with us, the DIY flat pack house kits page covers what to settle first, and our custom modular room guide shows how layouts are adapted. Tell us where the windows go when you enquire so the panels and the plan agree.
Adding a window to an existing structural wall
This is the case to slow down on. Cutting into a wall that is already standing changes how loads and shear travel through it. Before you pick up a saw, have the opening checked by a structural engineer or the builder or panel supplier responsible for the design, and check with your local building department about permits. The reinforcement around the opening is the part that makes it safe, and it is not something to work out by trial.
If the wall is made of sandwich panels and you need to make cuts for any reason, read our note on cutting SIP panels safely, which explains when DIY is reasonable and when to call someone.
Measure the opening, then cut
The cutting method is where most fit problems start. The steps below work for finish panels around an existing window and translate to cutting individual pieces in a panel wall.
Take three measurements
Record floor to sill, floor to head, and side wall to jamb. One US installation guide recommends dry-fitting each bordering panel and marking the opening with a square. It uses a miter saw for crosscuts and a guided circular saw for the jamb rip cuts, with decorative faces up on a miter saw and down on a circular saw so the blade does not tear the visible side.
For a straight window without a sill, National Plastics advises measuring from the floor to the bottom and top of the window, transferring those heights to the panel and cutting between the marks. If a large sill is in the way, hold the panel against it and trace the shape.
Measure from the trim, not the frame
If window trim is already fitted, measure from the edge of its panel channel rather than the face of the window frame. DBS Bathrooms puts the difference at typically 10 to 15 mm (roughly 3/8 to 5/8 inch), and it names forgetting that difference as a common DIY mistake. A fit that looks tight on paper ends up with a visible gap or a panel that will not seat.
Allow for movement
Panels expand and contract. For horizontal siding, CertainTeed instructs holding the panel in place, marking the opening width, adding 1/4 to 3/8 inch at both ends for expansion, and using a scrap piece as a template for the horizontal cut. It also tells installers to allow for the two sides of an opening not being level. That is good advice for any panel, not just siding.
Template awkward shapes
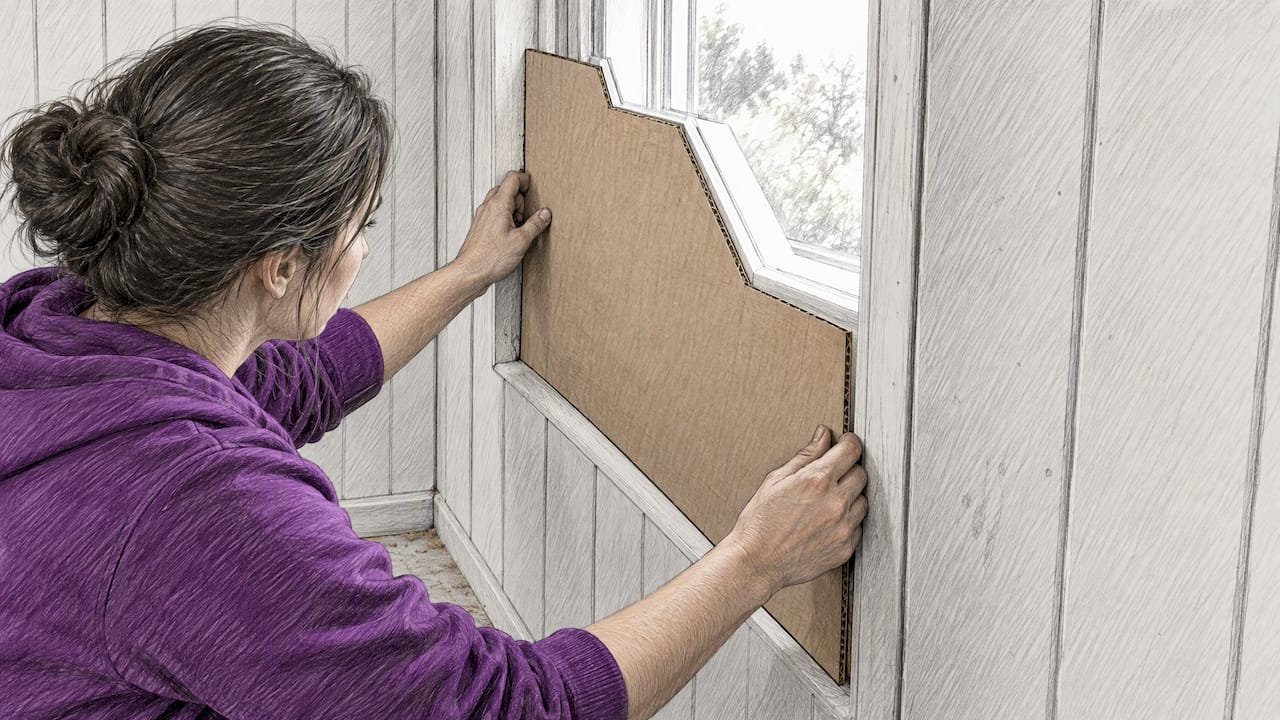
For an arched, bay or irregular outline, cut a template from cardboard or stiff paper, test it on the wall, and only then transfer the confirmed outline to the panel. The Panel Hub recommends the same approach, plus dry-fitting the cut pieces and never forcing the final piece into place. If it needs force, something is out of square. Fix the cause.
Start from a true line
Floors are rarely perfectly level. For patterned or slatted panels, Akuwoodpanel suggests starting from a true center line so vertical elements stay aligned past the window rather than drifting.
Why you cannot panel “over” a window
A continuous panel cannot run across a window opening. DBS Bathrooms notes that you need separate panels for the sections beside, above and below the window. CrownWall’s installation guide shows one way to organize this: stop the panels at the vertical portions of the window frame, separate the sections above and below with H-trim, and cap the wall sections beside the window with J-trim. The result is four panel areas around one window.
The same thinking applies to structural sandwich panels. The wall is built from a set of panels, and the window sits where panel edges and framing meet. Planning those seams so they land at the window edges, rather than through the middle of a glass area, simplifies everything that follows.
Trim the edges and set the reveal
A clean window edge is a deliberate relationship between three surfaces: the panel face, the trim face and the exposed cut edge. The Panel Hub’s guide makes the point that a neat joint should not depend on caulk to hide the gaps.
Some practical rules from manufacturer and industry instructions:
- Leave a gap. Nichiha’s installation guide requires a minimum 1/4-inch gap where its panels butt windows, doors and trim boards. At jambs, it calls for J-mold with a 1/4-inch gap to the jamb.
- Seal cut edges. The same guide says cut edges should be sealed with 100% acrylic latex exterior primer or paint. Raw cut edges absorb moisture first.
- Use trim that receives the cut edge. The Vinyl Siding Institute’s manual says cut edges around windows should be received by utility trim. Under a window, it specifies snap-lock-punch tabs at 6-inch intervals and utility trim beneath the window, shimming where needed to maintain the panel face.
- Pick the trim approach before you cut. National Plastics says an external corner trim can go on the reveal edge first, while an L-shaped external corner trim goes on after the panels. Your cut allowance differs between the two.
For interior panels, sand the cut edges, then apply adhesive in a zig-zag pattern on the back and press the panel to the wall for several minutes, as National Plastics describes.
If the trim will be painted on site, good prep avoids peeling later. This exterior trim painting prep article explains the sanding, priming and lead-safe handling to consider before you coat trim, especially on older buildings.
Flash and seal: where windows actually fail
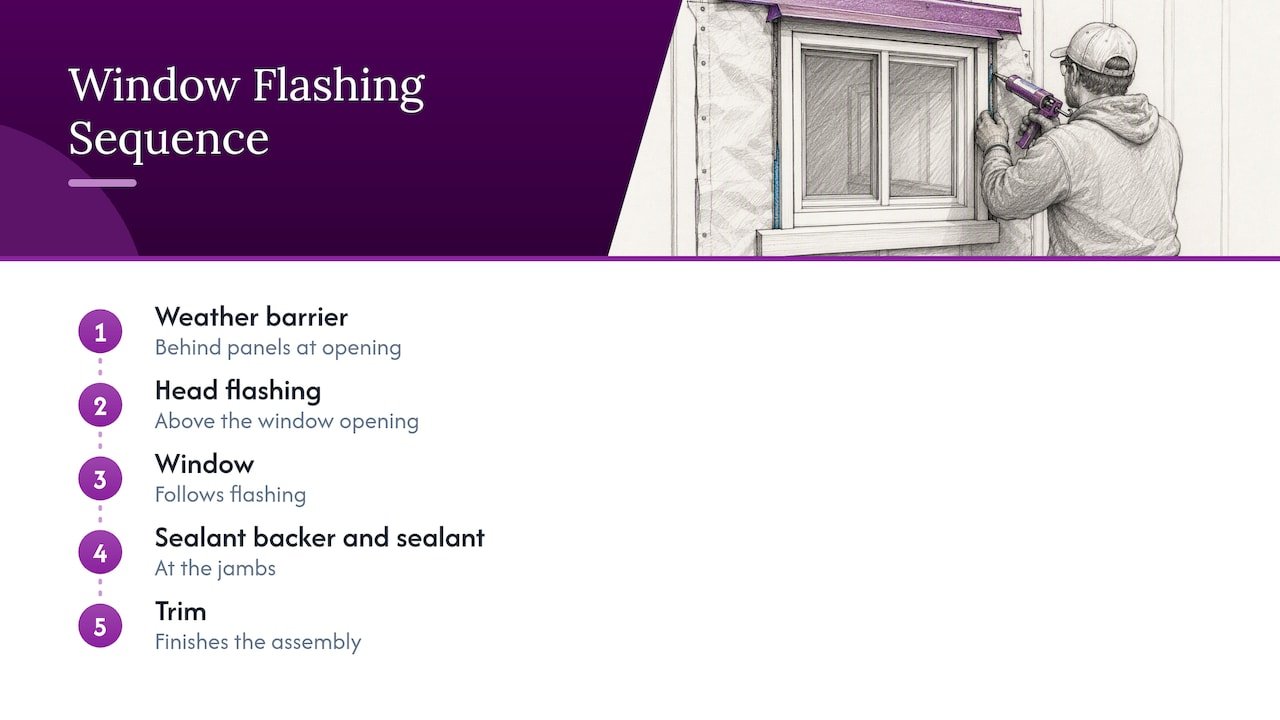
On an exterior panel wall, water gets in at the window long before it gets in anywhere else. Three layers do the work.
1. A weather-resistive barrier. Nichiha’s guide requires a weather-resistive barrier (WRB) behind its panels over stud walls and SIPs, with appropriate flashing at all openings.
2. Head flashing. Metal flashing goes above every door and window opening so water is directed away from the structure. The Goodfellow and CecoBois best practices guide recommends a 25 mm (about 1 inch) gap between the flashing and the furring strips, and says properly installed metal flashing above an opening generally does not need a sealant joint.
3. Sealant where it belongs. The same guide says to apply sealant where cladding meets moulding, such as at the window sides, to block water entry. At jambs, the Nichiha instructions call for a sealant backer and a sealant meeting ASTM C920, Class 35 minimum. At recessed windows, flashing is used where panels terminate, and J-mold under the sill is optional.
The order matters: barrier, flashing, window, sealant backer and sealant, then trim. Fixing a leak later usually means taking trim off.
Requirements differ by product and local code, so read the instructions for the exact cladding and window you buy, and follow your local building department where they are stricter.
Keep the insulation continuous
The reason to use insulated sandwich panels is a wall that is insulated and structural in one piece. A window punches through it, so the joint around the opening is where performance is won or lost. Gaps between the window frame and the panel core let air move and bring condensation risk. Fill and seal the perimeter as the window manufacturer directs, and keep the barrier and sealant continuous. For background on how the panels behave thermally, see our explainer on sandwich panel thermal performance, and on wall build-ups, 4-1/2 vs 6-1/2 inch SIP wall thickness, since wall thickness affects how the window sits in the opening.
Tools and a workflow that avoids rework
A typical kit for cutting panels around a window, per the Akuwoodpanel guide: a miter saw or fine-tooth circular saw, tape measure, pencil, a 48-inch level, a speed square, a caulk gun, painter’s tape, sandpaper and safety glasses. Materials are the panels, a high-adhesion adhesive where panels are glued, and matching finish trim.
A sequence that works:
- Decide the trim system and the gap you need.
- Take the three measurements from the real edges you will use.
- Check corners with a square and confirm the sides of the opening are not out of level.
- Make a template for anything that is not a plain rectangle.
- Cut oversized allowances only where the instructions say to, then dry-fit.
- Seal the cut edges.
- Fit flashing and barrier, then fix panels, then trim, then sealant.
Our perspective
Most problems we hear about with windows in panel walls are planning problems, not cutting problems. Someone builds the wall, then decides where the window goes, and the opening gets squeezed into panel seams that were never meant for it. Our kits are built around flat-pack panels that go up with no special skills or heavy tools, and that works best when the openings are decided before the panels are ordered.
So our advice is simple. Sketch the elevations with every window and door on them. Choose the window units first and get their rough opening sizes. Then talk to us about the layout, because the panels are customizable. Treat any opening in a wall that already stands as a design question, not a weekend cut. And spend your care on the boring parts: the gap, the flashing, the sealant. Those are what keep a wall performing for decades.
— Kian
Planning a build with windows?
If you are designing a backyard office, gym, studio or guest house, start with our DIY kit rooms, homes and container buildings. You can also look at our insulated wall and roof panels, and send us your window layout so it is considered at the start. Our guide to assembling a kit home shows how the build comes together once the plan is set.
FAQ
Can you put a window in an existing wall?
Yes, but how depends on the wall. In a structural panel wall, openings that affect strength have to be detailed and reinforced at the edges, so have an engineer or the designer confirm the plan first. Check permit requirements with your local building department too.
Can you put wood paneling over a window?
Not as one continuous piece. A panel cannot span the opening, so you use separate panels beside, above and below the window, with trim to finish the joints. If you want the window covered, a removable cover or shutter is a better choice than permanent paneling.
How much gap should I leave between panels and a window?
Follow the instructions for your panel and trim. As one example, Nichiha requires at least 1/4 inch where its panels butt windows, doors and trim, and CertainTeed advises adding 1/4 to 3/8 inch for expansion on horizontal siding cuts. Interior decorative panels have their own tolerances, so check the maker’s guide.
Do I need flashing above a window in a panel wall?
On exterior walls, yes. Manufacturer and industry guides call for flashing at openings and metal head flashing above windows and doors to direct water away. Details differ by product and local code.
Sources
- WoodWorks: Requirements for Holes or Openings in Shear Walls and Diaphragms
- Akuwoodpanel: How to Install Wall Panels Around a Window
- National Plastics: How to Install Wall Panels Around Windows
- DBS Bathrooms: How to Fit Wall Panels Around A Window
- CertainTeed: Installing Horizontal Siding
- The Panel Hub: Installing wall panels around window and door casings
- CrownWall: Window Frame Panel Installation Guide
- Nichiha: Vertical Installation Guide
- Vinyl Siding Institute: Installation Manual
- Goodfellow and CecoBois: Best Practices Guide for Installing Solid Wood Cladding
- Exterior trim painting prep